As soon as my son saw Dispicable Me, my son immediately knew he wanted to be a minion. I had made his costumes for the past several years (Coolest Homemade Luke Skywalker Pilot Costume 2 and Coolest Bumblebee Transformer Halloween Costume 24), so I started working on this new challenge. He can be pretty shy, but once he was in this costume, his personality lit up.
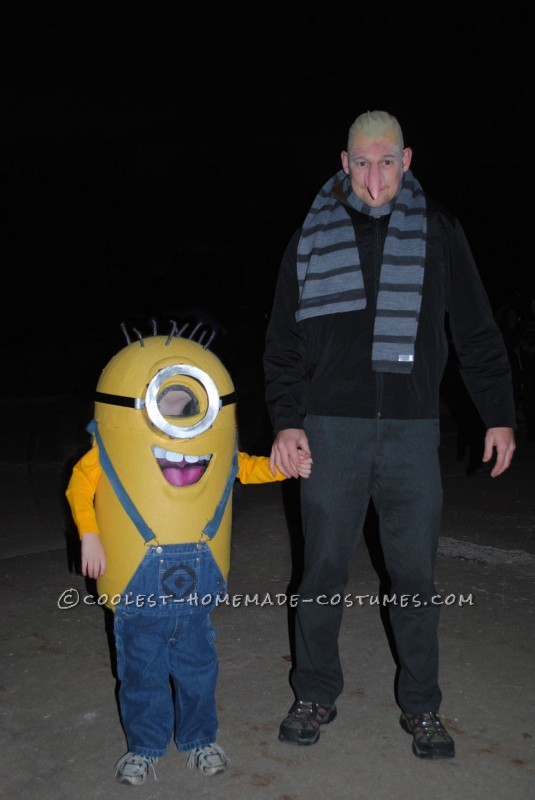
Me and My Minion
The Trash Can Structure
Since the basic shape was so simple, I knew the basic form had to be correct in order to look right. After looking around the kitchen sections in stores for a dome shape for the head, I found a great plastic trash can from Walmart for around $10. I knew this would fit his 6 yr. old body well and provide me with the structure from which I could build the costume. I cut the arm holes, mouth hole, and bottom of the trash can out using a rotary cutting tool (roto-zip), which made life very easy. Light sanding of the edges made sure the plastic wouldn’t scrape my son as he wore it around.
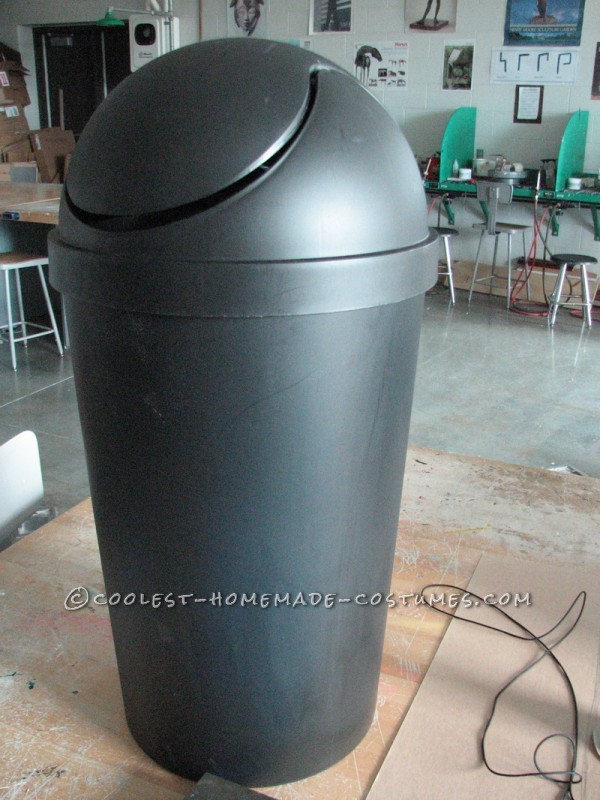
The $10 Trash Can
Refining the Form and Adding a Mouth
Next, I wrapped the trash can in foam from a camping sleeping pad. This allowed me to remove the taper from the trash can with some leveling strips, and even out some of the unwanted dimension from the lid. A hot-glue gun worked well for this. By layering the foam around the mouth, interesting depth was created to give it a more 3-D appearance.
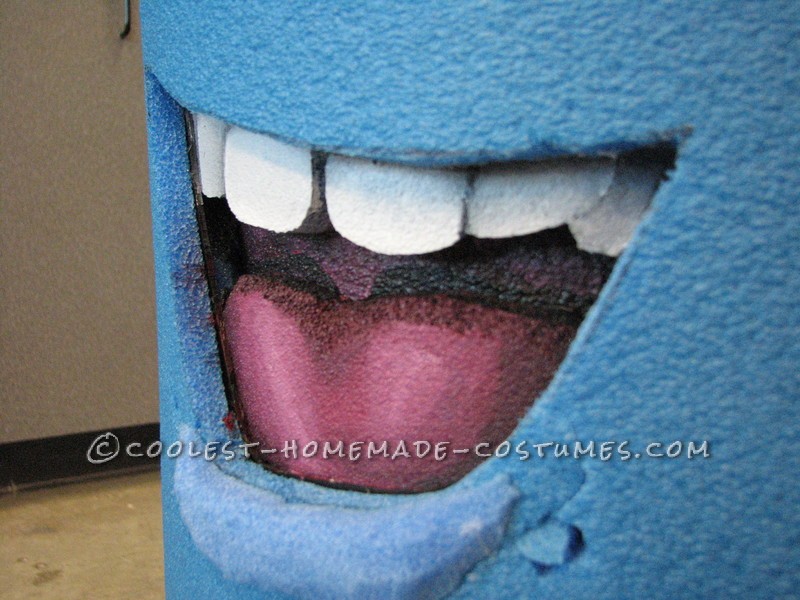
Mouth Layers to create Depth
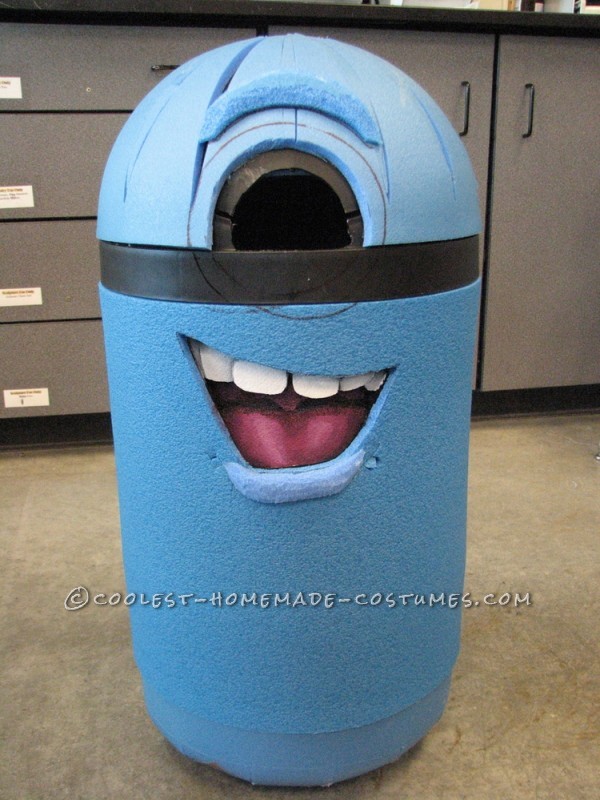
The Covered Trash Can
Sizing and Adjusting to Fit
On the inside, I used thick elastic with overall fasteners (also purchased from Walmart). This way, the costume rests on my son’s shoulders and is adjustable to make more or less slack in order to make the costume fit.
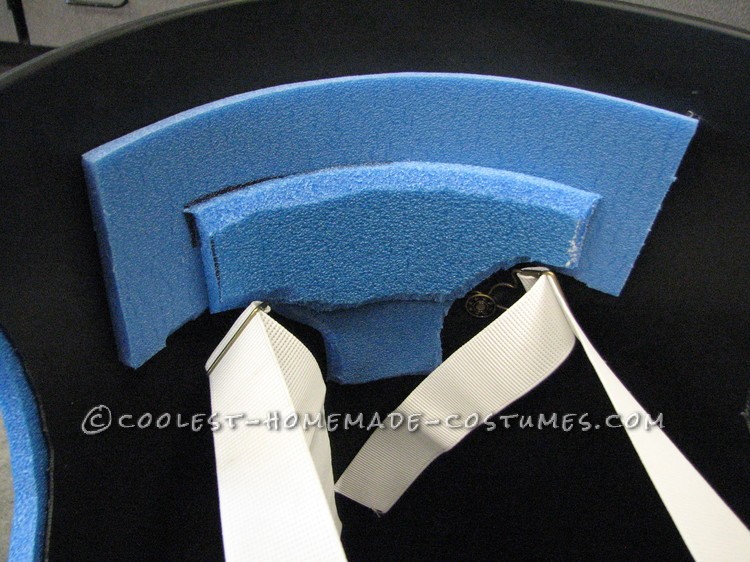
Adjustable Elastic Straps and the backside of the Mouth
Making the Mono-Goggle
The goggle was made from the camping foam first, then wrapped in aluminum flashing. I hammered aluminum circles into domes using some jewelry dapping blocks, however you could do the same with a ball peen hammer and a piece of wood with a half dome carved out with a dremel tool. The detail was created by model train tape that was wrapped around goggle. Nylon webbing formed the goggle strap. The eyebrow was made after the goggle, so I could match the shape and make it look as if it were pressing against the minion’s skin.
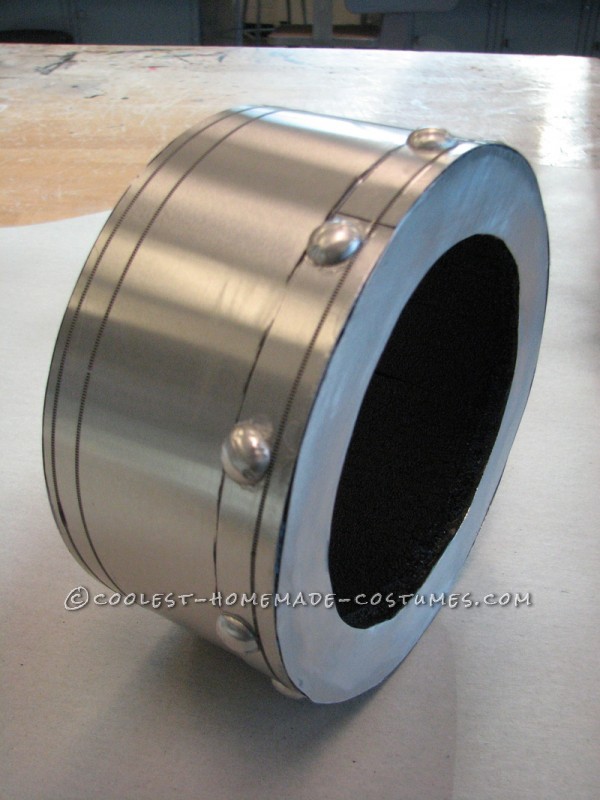
Foam, Aluminum Flashing, Tape, and Paint
Adding Skin, Hair, and Clothing
To make the minion come to life, yellow fleece was applied to the foam using spray adhesive. Shapes of fleece were cut close and “dry fit” before being glued down. Careful slits were cut in the dome so folds were not created when wrapping the fleece around the head. The lid of the trash can was done separately from the body, so it could come off for ease getting into the costume.
Acrylic paint and spray painted weaving core was used to detail out the mouth and hair. The hair was stuck into the foam by creating holes with an xacto knife. Overalls from a thrift store were painted and modified to fit around the minion form. Wire pieces act like staples through the overalls and trash can in order to keep the overalls on.
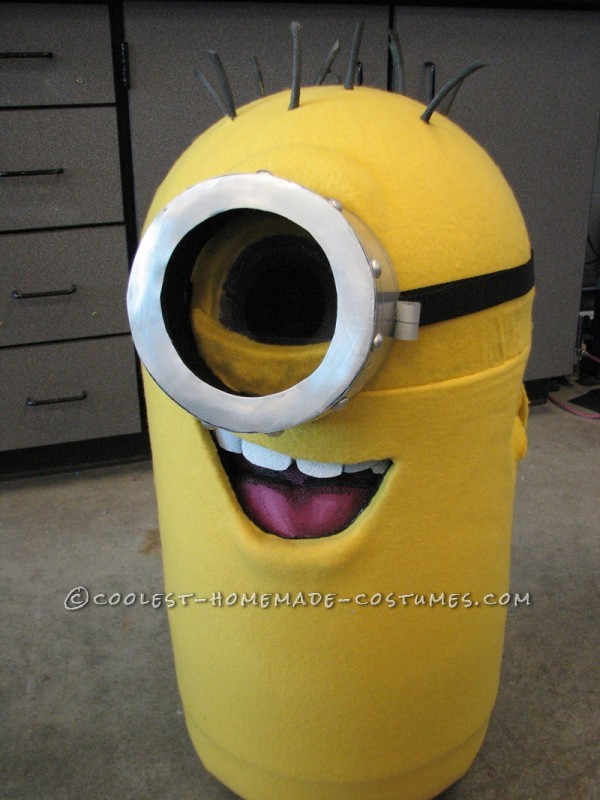
The Completed Main Form
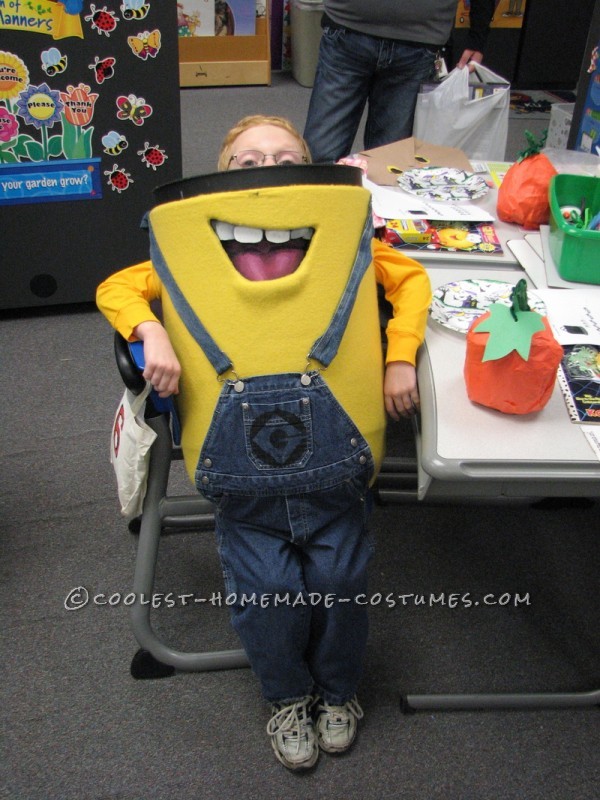
Hanging out and cooling off
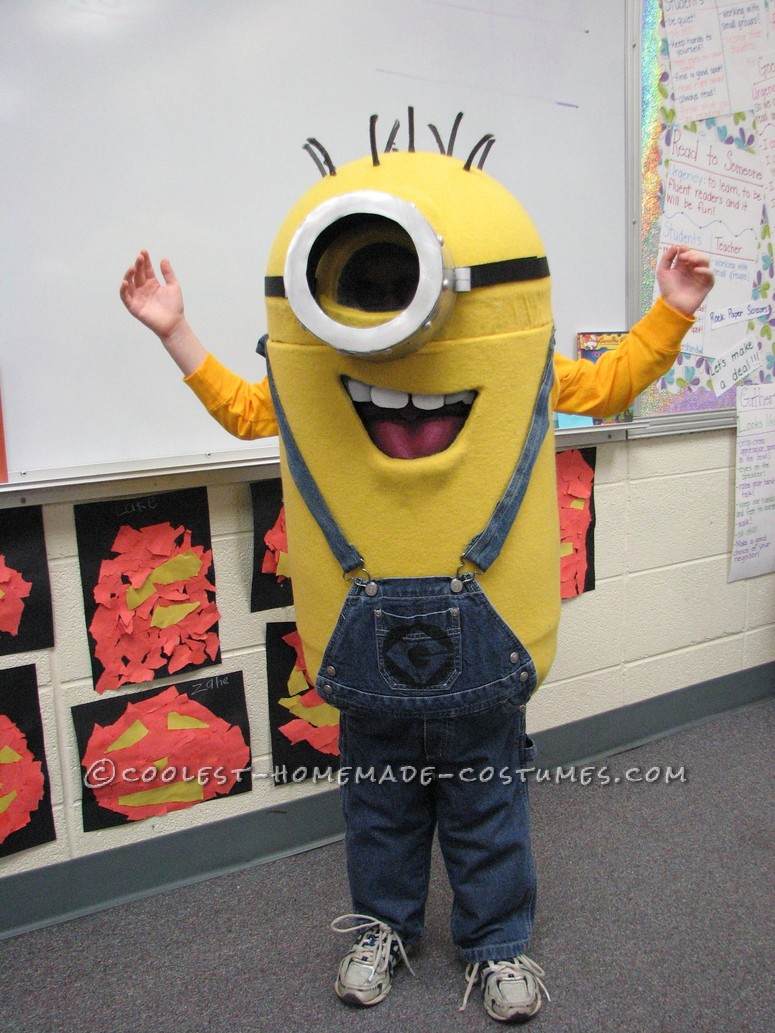
The Completed Minion
The construction and materials of the costume made it well insulated so he had no trouble staying warm while trick or treating. He needed to take the top off and vent a little when he was inside too long. His vision was limited a bit, so he needed help navigating steps and was a bit slower walking around. The costume was very sturdy and didn’t show any wear through the various activities and parties he attended. Overall, his costume was a huge hit at his school and all the students wanted photos with him in during the Halloween party.
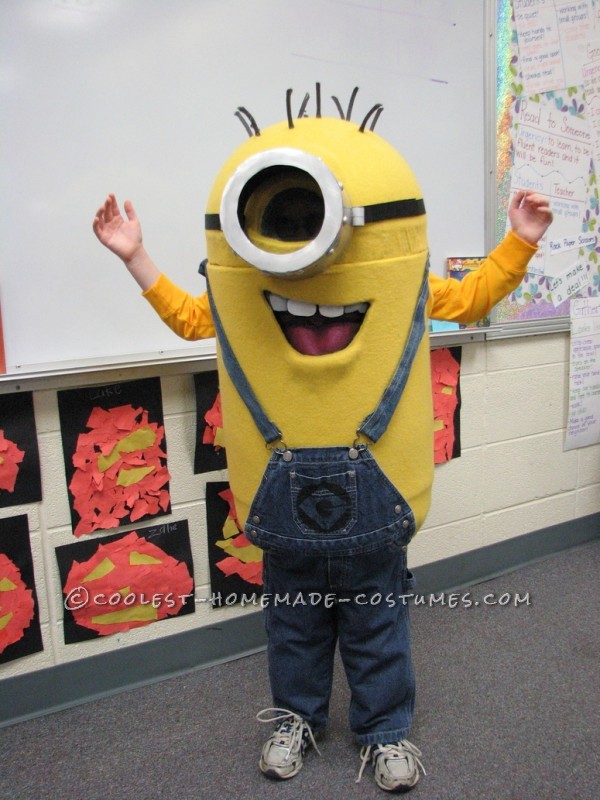
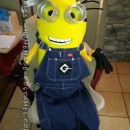
Completed Minion with Overalls (gloves and boots would complete the look…maybe a wrench)




Absolutely love it!
i want one!!!!!!!!!!!1
super cool!!!! now how can i make 4 of these for all my minion kids!
have you thought about selling this? I would buy it – it would probly go for like $200
You’re a blooming GENIOUS!
Nicely done, Brian. What size trash can did you use?
I don’t remember exactly. It’s about 2.5 feet tall and 14 inches wide at the top. I got it from Wal-Mart several years ago when I made it, so I don’t know if they still carry this or not.
Thanks, Brian! I actually did end up finding the can at WM. One quick other question. What are leveling strips? I’ve never come across those before. Thanks again.
The leveling strips are just extra strips of the camping/sleeping pad foam (maybe 3 inches wide all the way around) At the very bottom I added 2 layers and a little ways up I added one layer. This allowed the top sheet of foam to be applied without a taper that the original trash can had. I noticed you’re from Lee’s Summit – I’m just down the road in Olathe.
Hi, exactly what kind of foam did you use, cause I cant seem to find it!
The foam is a camping sleeping pad. You can find them in the sporting good section at wal-mart, they are around $15 for one.
The foam is a camping sleeping pad. You can find them in the sporting good section at wal-mart, they are around $15 for one.
The foam is a camping sleeping pad. You can find them in the sporting good section at wal-mart, they are around $15 for one.
The foam is a camping sleeping pad. You can find them in the sporting good section at wal-mart, they are around $15 for one.
The foam is a camping sleeping pad. You can find them in the sporting good section at wal-mart, they are around $15 for one.
The foam is a camping sleeping pad. You can find them in the sporting good section at wal-mart, they are around $15 for one.
Is the mouth painted directly in the garbage can?
No, the garbage can is cut away where the mouth is. There is 2 layers of foam glued to the inside of the trash can (one for the back of the mouth, and another for the tongue and teeth.) A bottom lip was added on the outside. Painting also helps create depth in the mouth area.
What size overalls did you use, I am attempting this for Halloween for my 6yr old
I’m not sure what size it was, I found them at a local Salvation Army store. I had to modify them by cutting the side slits down further so it would slide far enough on the foam covered trash can. I also had to cut extra denim from a pair of old jeans and add it to the shoulder straps to extend the length.
that is the most amazing and most creatively made minion costume i have ever seen! i admire the ingenuity. amazing craftsmanship!
Well done! Very well done!
That was impressive. Thanks for the descriptive directions!
PLEASE Sell this to me!!! My son is 6 this would be PERFECT!!! You are in Lynn I am in Middleton, I would totally buy this from you!
About how much did you spend on making this?
Honestly, I don’t remember, as it was 2 yrs. ago. I used 2 camping pads ($14ish), 1 trash can ($12ish), fleece (?), elastic and clasps (?), overalls from Salvation Army (?), yellow long sleeved t-shirt (?). I used, but already had on hand: acrylic paint, spray paint, rope, hot glue sticks, spray glue, x-acto knives, Roto-Zip to cut trash can, aluminum flashing, sticker tape. I hope this helps some.
I just made 2 of them … 37$ was the total for one! But so worth it!
How do you cut the foam to round for the head? Racking my brain….. Job very well done! I am not much of a crafter.
Domed Trash can
Look up on-line how to make a paper dome. It’s a similar process of cutting triangle pieces so the points meet at the top. The fabric covers the tiny gaps that are left.
Hi love the costume! I’m having the same trouble with covering the dome. Did you wrap the foam around the dome and then cut long triangles, meeting the points at the top? How wide was the base of the triangles, how far up from the bottom edge? About how may triangles? did you have a pattern or wing it? Did you splice smaller thin strips between the triangles? Any help would be great!
Brian, I would like to know where you found your prosthetic nose for your Gru costume. I am searching for one for my husband. Thanks!
I made it. It’s carved from a piece of 3″ thick pink (sometimes blue) foam insulation sheet. It comes in 4′ x 8′ sheets from Home Depot or Lowes. I use it for other art projects so I had scraps available. I used rasps to shape the nose and smoothed it with 280 / 400 grit sand paper. I painted it with acrylic paints and used plain old scotch tape doubled over to attach it to both sides of the bridge of my nose (since it is so light, this worked fine.)
I can see how you cut the foam mat in a triangular fashion to make it round over the dome. However, how did you make the yellow felt look smooth? I found the same trash can at Home Depot last week. I am making goggles out of large PVC pipe with candy “dots” superglued to it. They actually stuck pretty well. Then I spray painted the PVC pipe silver.
The fabric stretched quite a bit so it stayed true to the form for quite a bit of it. I had to put two cuts in the fabric from the top-center to the bottom circumference at about the 10:00 and 2:00 position (if your nose is the 6:00 position – hope that makes sense) This allowed me to cut out the section that was wanting to form a fold. You can see the seam a little, but overall it closed and blended pretty well. If you use a light fleece material, you might be able to blend it even better.
TO ALL PARENTS: (My wife wanted me to add this) Although, my son won the top prize at a costume contest that we attended, and he was the hit of his school, this is a very warm costume. When we took the top off, you could feel the heat radiating out of the costume. Great for cold Halloween evenings, not so great for long indoor events. You could cut holes in the sides and just have the fleece cover them to allow for a bit more ventilation. My son also had a harder time keeping up with friends when it came time for trick or treating. A simple, secondary costume may be more fun for your child during for this.
I don’t understand how to make the mouth. You actually cut into the trash can? Can you try to clarify please?
Yes, you cut a mouth shape out of the trash can. Add a bottom lip to the outside. On the inside of the trash can, cut a piece that shows the teeth and tongue through the opening, but make it larger than the opening so you have room to glue it to the inside. Finally, cut one more smaller piece that will glue to the back of the teeth and tongue, which will look like the back of the mouth when painted black. Cut out paper templates so you can see how they all layer together. You can see the inside of the mouth in the photo with the elastic straps.
i cant find the trash can, everything else, just not the trash can.
Brian, I agree that you are a bloomin’ genius!!!! We’ve completed everything successfully for our minion costume except how do you connect the elastic straps and overall buckles to the inside of the can so that they will stay? Thanks. Can’t wait to see what your costume for this year will be! What shall we look for????
I purchased the same hooks and “button” closures as used on overalls in packages from Wal-Mart. I had to hammer one end of the “button” through the plastic trash can in to the other end. It’s similar to rivets. Then, I threaded the elastic onto the “hook” part on both ends. You can adjust the length to fit the person wearing the costume. The elastic runs through slits in the trash can at the back. The elastic shoulder straps is just one piece of elastic that goes over one shoulder, around the back, and over the other shoulder. You can kind of see the inside-front in one of the pics above.
Hi, I’m in the process of making this. I have the can covered on foam but have a problem. When my son , who is 8, puts it on the top of the can and the can don’t meet. Like the top of the can is on his head and the can is around his body with his arms through the holes and there is a gap where the can top should fit on the can. I can’t for the life of me figure out how to get it to fit. Any suggestions?
I am having the same problem! I am using the strap but for some reason they aren’t high enough. When I tighten them it make the trash can oblong. Any suggestions?
When you try to adjust the length, it will never raise the trash can higher than where you have it attached to the sides. If you need it higher, you will need to re-set the sides (where the straps connect to the trash can), then you can lower it via the tension if needed. They should only be tight enough to hold the can in the position you want.
Sounds like you need to move the straps down so that the top of the trash can is higher. Then, there will be more room for his head in the lid. If you already cut out the arm holes, you can simply cut the holes lower and when you put the fleece over the whole can, it will cover the original arm holes.
you can also use a laundry basket
I’m working on a minion costume, and am awed by how smooth you got the felt to be. I’m making seams all over the place–not nearly as nice as yours turned out! Kudos!
I used fleece material, it has more flexibility than felt. I considered using flannel, but the fleece came in a better color and I liked the feel.
I would like to know what you used for the hair..
Rope pieces spray painted black.
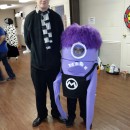
I made 2 one for each of my boys!! I even made one with 2 eyes they look pretty good! easier that I thought it would be ! I also used adult overalls and they worked great! thanks for the detailed idea!
It looks like you added a piece at the bottom to get a rounded
effect. How did you achieve this?
It’s foam. Very similar to the top. Instead of cutting long triangles to meet at the top of the dome, I cut the tips off the triangles so my son’s body could fit through the bottom. I used hot glue and duct tape to hold the pieces together in the lower dome form. You can sort of see it in the “covered trash can” photo. The fleece covers and smooths the forms created underneath.
Thanks for the awesome idea, we just finished our minion costume per your instructions with a few modifications.
I’m struggling with the mouth. I don’t think I’ll be able to make it nearly as amazing as yours. Thank you for the inspiration though.
My son is a minion this year and we used this for inspiration. I would like to share a picture of his costume, is there a place where I can send it to? We won a costume contest category for “most original” costume and my son is so happy with it.
Great job! I followed a design similar to what you outlined above and we’ve never had so many positive comments. Thanks for sharing!
How did you do the tongue?
I made 2 of these minion costumes following your tutorial. They were a ton of work but they were a huge hit. I have two that I would like to sell if anyone is interested. I am in CT.
Does anybody happen to know the size of the trash can?