So Halloween is my FAVORITE day of the year. I always start scowering the internet a year in advance for costumes ideas. I look for costumes that 1) catch my eye in some way and 2) are relatively easy to make, meaning I don’t need an engineering degree to figure out how to make my own.
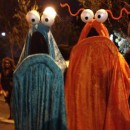
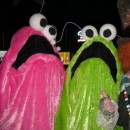
I loved the Yip Yips on Sesame Street as a kid and a few years back, I saw tons of DIY versions. I loved them because they were funny and pretty simple. I even saw a few videos online that just cracked me up and then I just knew I had to make one (yip yip yip yip yip yip…uh-huh, uh-huh).
So off I went to the fabric store to find some fur. I went to a couple of stores and just couldn’t find what I was looking for. I was getting pretty frustrated because I had an exact idea of the fabric I wanted and all those people on the internet found theirs. Why couldn’t I find mine? I was okay with the idea of a different color rather than that of the original two Sesame Street Yip Yips, but it should have the same texture/look.
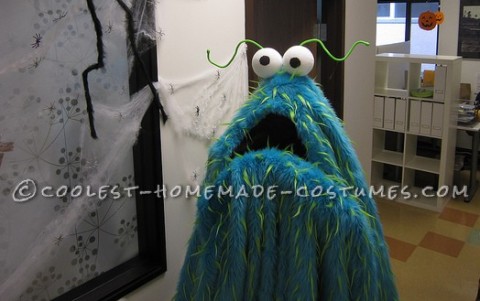
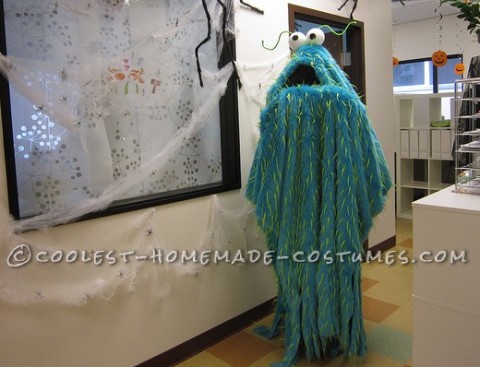
Then, just as I was about to throw in the towel, I came upon this great fabric. It wasn’t the “traditional” Yip Yip fabric, but it spoke to me somehow. It was this big role of turquoise fabric with light green spikes all over. It was FABULOUS! It came in lots of other variations: pink w/black spikes, orange w/ brown spikes, hot pink w/ orange spikes, etc. I felt the turquoise with the light green spikes looked most “realistic” for my Yip Yip/Monsters Inc. hybrid, if that makes sense (it did in my head).
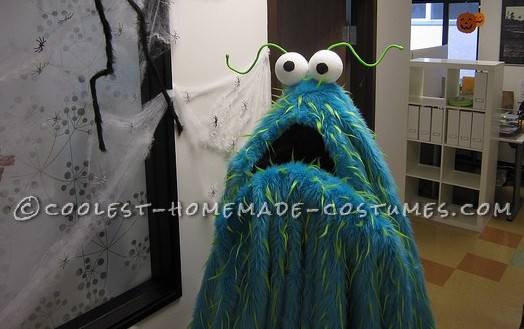
I bought five yards of it. I am 5’4″ and I did not have much leftover at the end. I trimmed maybe 12 inches off one end and the rest I used as one big piece. The other supplies I used for this costume were: 2x 3″ Styrofoam balls for the eyes (you can use bigger or smaller, whatever floats your boat), one yard of black chiffon fabric for the mouth where you see through, one foam pipe insulation for the mouth/lip definition, one green gear tie for the antenna, some black paint for the pupils, a circular sponge to paint the pupils, a hot glue gun, needle and thread, some wire, a small semi circle of Styrofoam, and a beanie cap.
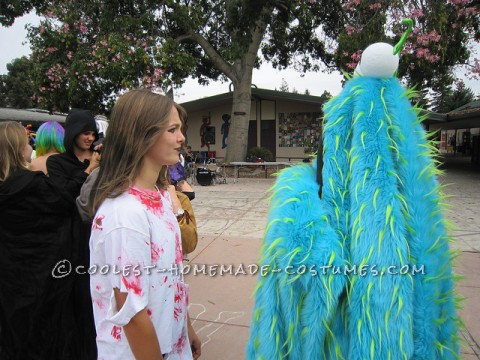
I had a friend help me with some steps since a lot of the time I had to be wearing the fabric in order to figure out where to put the other bits and pieces. First, we trimmed off the excess fabric from the bottom. Then we sewed the middle third of the sides together to give the creature some shape and to hide my body when you looked at me from the side. The top third was left open so that I could poke my arms out if necessary and the bottom third we cut into thick fringe since that is what a Yip Yip looks like on the bottom, don’t you know? ;)
Then we marked where the top of the head would be for eye placement and then put the mouth about 10 inches down from that. Again, you can make the mouth as big or small as you want. Mine was about 12 inches wide and 18 inches long. So we cut out a hole with these measurements and then we took the black chiffon fabric, layered it on top of itself about five times. That was just enough times so that I could see enough through it, but no one could see my face from the outside looking in. We then sewed it to the inside of the edges of the mouth hole.
We then took the foam pipe insulation and cut it to size to fit around the inside of the mouth hole there where the two fabrics met. We hot glued it into place wrapping the fur part half way around the tube in order to give some lip/mouth definition from the outside. This was also what I held on to in order to make the mouth open and close when I was yip yipping.
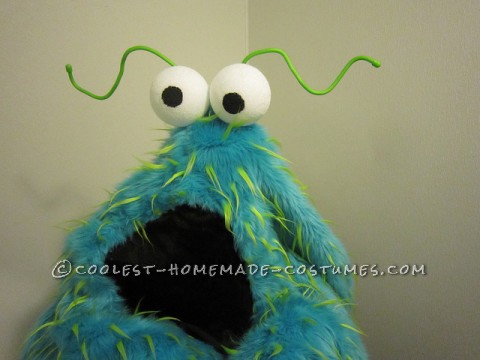
We then glued the eyes to the top of the head. I felt they looked too flat next to the mouth, so I decided to wear a beanie underneath which we sewed to the inside of the top of the head and I shoved a semi circle Styrofoam piece between my head and the inside of the beanie to give some height to the head. Much better!
All the videos online had just used hot glue for the antenna and eyes, which I initially tried too, but then I realized they just weren’t sticking. If I moved too much, they would fall off. I work at a school and I was going to be in this costume for a few hours covering a lot of ground. It had take a licking and keep on sticking so we had to reinforce the eyes and the antenna. I took a thin piece of wire and connected the balls in the middle so they would stick together. Then we took the green gear tie (you can get that at Home Depot or Eddie Bauer), bent it into the shape we wanted for antenna, placed it behind the eyes and sewed it into place. We then took another little piece of wire and hooked the eyes to the antenna for extra support and hold.
We then dabbed a sponge (circle shape) into some black paint and dabbed it on the Styrofoam balls to make the pupils.
Voila! My Yip Yip/Monster Inc. hybrid was done and I was very happy with him. He wasn’t what I initially pictured in my head when I first got inspired, but he actually ended up turning out even better than I had imagined.
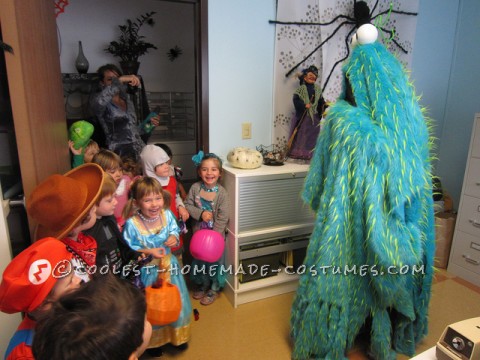
As I mentioned, I work at a school. All the kindergarten and preschool kids come to my office to trick or treat and I decorate for them and set up all the candy stations. It is as much fun for me as it is for them. Well they LOVED my costume. They squealed with delight when they saw me. They thought I was a real life fuzzy wuzzy creature. The great thing about the fabric was that the spikes moved when you moved as if it were real fur on an animal, so that gave it another realistic element. The older kids were also curious, trying to figure out who was in that thing and where was the voice coming from. Suffice it to say, this big kid had a BLAST!
All I can say is this costume was easy to make and fun to wear!
Your comment has been sent successfully.