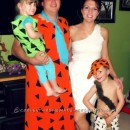
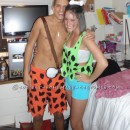
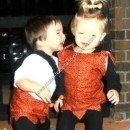
Halloween has always been an exciting time for me, but once starting a family and having kids of our own, that just upped the anty of fun to be had. Every year we like to figure out a family costume theme and I love to spend the time creating it. Once we figured out that this year’s theme was going to be The Flintsones, I started brainstorming like crazy on a way that I could make our costumes look amazing while staying on a strict budget.
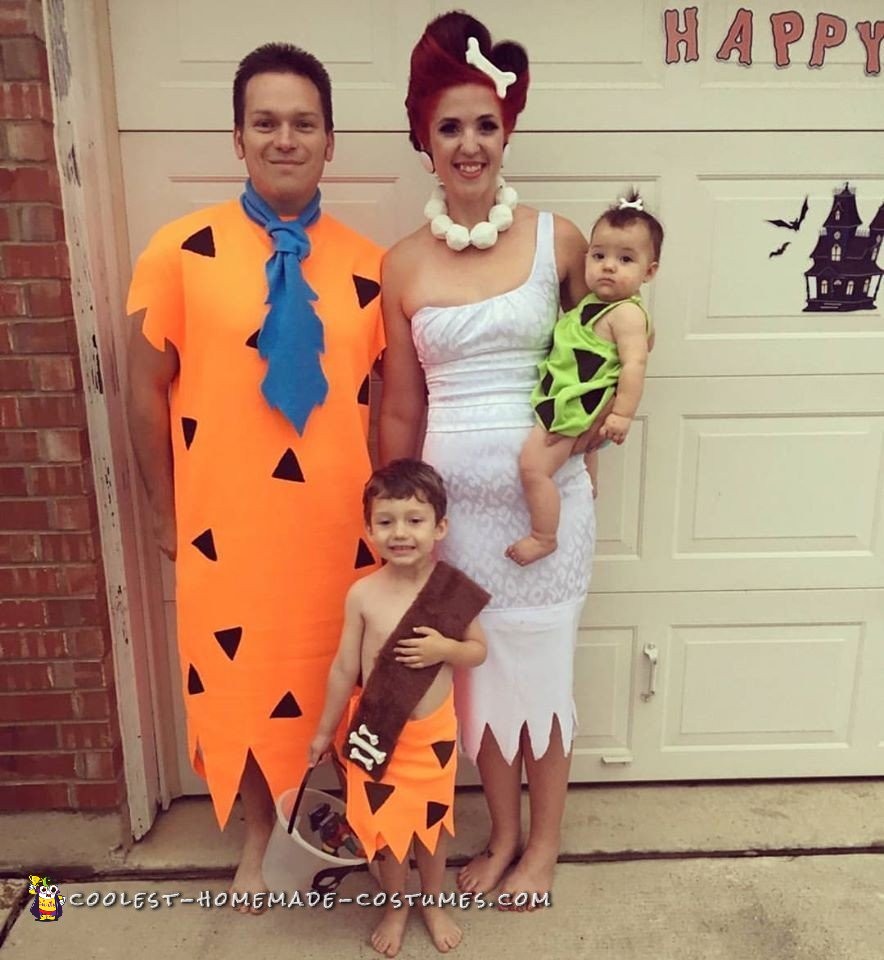
I gave myself a couple weeks so I would have plenty of time to search and find the right materials for the right prices. I began with my dress for Wilma. I thought she might be a little harder to get my hands on because summer was over and a white dress isn’t really easy to find in the fall, let alone a one shoulder one. I went to a couple of resale stores to try and see if I could at least find some material so I could piece it together if I needed to, but I was lucky enough to find the perfect item. I found a form fitting white cheetah print dress that went to about mid thigh. I knew that I could easily tuck in one of the shoulders to make it look like Wilma’s silhouette. I wanted Wilma to still have her iconic triangle cuts on the bottom of the dress, but I did not need the dress to be any shorter than it already was so I went looking for some possible ideas. I ended up finding a white long maxi skirt with the same sheen as the dress and decided that I could sew it on to the end of the dress which would create the length I needed while still being able to allow me to cut out the triangles. I was out the door with these two items for less than ten dollars and a lot of relief.
Looking for Pebble’s outfit went in about the same fashion. I knew that she had a sleeveless lime green tunic with a turqouise bloomer/ short shorts underneath. I went and took a trip to a children’s resale shop and found exactly that in the summer clearance pile: the lime green tunic I found was really an oversized romper with a pink flower sewn on the front, and I found the turqouise children’s shorts no problem. Her costume cost less than $5 out the door. I went home, cut the romper right above the crotch area which immediately turned it into an aline tunic- perfect. I used a seam ripper to detach the flower, and we were good to go. I took a piece of thin cardboard from a cereal box and cut out a rounded triangle to use as a stencil for Pebble’s top. I had to go buy some black acrylic paint at Michael’s, but even with it being .69, I used a 40% off coupon and got it even cheaper (every little bit can help). I then stenciled on the black triangles onto the front and back of her tunic and let it dry.
Fred and Bam Bam’s outfit was a little easier to acquire because I had already decided that I was going to go to the fabric store and just make it myself. I went and bought I believe 1 1/2 yards of a bright orange fleece for their main costumes, as well as a 1/8 of a yard of bright blue fleece for Fred’s tie, and 1/16 of a yard of an animal print for Bam Bam’s sash. All of these fabrics were already on sale for 50% off and was just under $12 out the door.
To make Fred’s oversized shirt dress, I layed the fabric down so the seam was at the top and the fabric was doubled up on itself and looked like a tall rectangle. I found a shirt that was 3-4x too big and layed it over the fabric so I could use it as a guide. I followed it around the shoulders, over the collar, and under the armpits. I also followed it around down the sides, but just cut it straight down the fabric so it became a dress and not a shirt. I then hand sewed up the side seams to right under the armpits and then had him try it on so I could pin exactly where I needed to sew the shoulder and head opening to be. I had him slowly take it off so he wouldn’t get hurt by the pins, sewed the shoulder seams, head opening, and then I cut triangle jagged shapes into the sleeves (keep the front and back sleeves together when cutting, that way they stay uniform). I turned it inside out and then cut out more triangle jagged shapes into the bottom of his tunic. The great thing about using fleece is that the fabric wont fray when you cut it, saving you a lot of time finishing up the garments! I used the same stencil from Pebble’s tunic to paint on black triangles to the front and back of his costume. While that was drying, I got to work on his iconic oversized blue tie. I found a tie that my husband already had in his closet and used it as a guide to the length I should cut the fabric. I layed the tie on top of the fabric and just made it a little bit longer on the top and bottom as well as wider all over. The bottom was very oversized, that way I could go back and cut the jagged shapes out of it as well. Once the tie was done, we tied it on him just like any other tie and it worked perfectly.
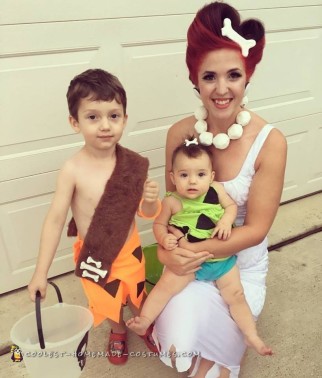
For Bam Bam, I used the leftover fabric from Fred’s costume (I cut a foot off of the bottom of Fred’s tunic before I sewed the side seams). This gave me the perfect amount of fabric to just wrap around my son. I used the same stencil and painted the black triangles onto his fabric and cut out jagged triangles from the bottom. I waited until Halloween day, because 3 year olds have no patience, and I just used the fabric as a wrap skirt and safety pinned it to him. I also took the animal skin fabric and pinned it on the back, wrapped it over the shoulder, and pinned it to the front and trimmed any excess material.
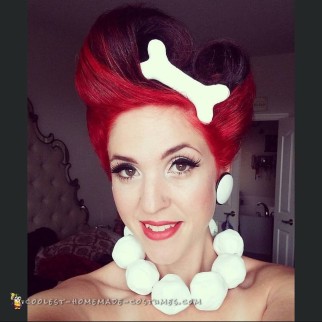
It took me a while to figure out what I should do to make Wilma’s necklace and all of the bone accessories, but I decided to use Air Dry Clay from the craft store. I believe it was $9.99, but I once again used a 40% off coupon. I also bought small 1 1/2 inch styrofoam balls from the floral section (use a coupon on those as well in a seperate transaction to save more money). When I got home, I took a piece of the clay and wrapped it around the ball, I kind of wrapped it in two pieces like a baseball. After wrapping a ball, take a skewer or chopstick and stick it all the way through the ball so you will be able to thread it through a piece of string or chain later on. Once all of the balls have been wrapped and have holes in them, wait about an hour or two until they start to harden and take something with a flat straight edge and push into it to start and make them look more like rocks. For the bones, I just formed them into the shapes of bones and found that making the front and backs flat were more ideal. That way I was able to hot glue them to clips for Wilma and Pebbles as well as hot glue them to the animal skin fabric for Bam-Bam.
I decided for Wilma’s hair and makeup, I was going to look at the 1950’s for inspiration. I hot rolled my hair all over, and while cooling, I went to work on my makeup, focusing on neutral tones. Keeping a light color on the eyelid, the lightest color on the inside corners of your eyes and eyebrow bones, as well as the darkest color in your crease making your eyes really pop. I used a black eyeliner to create a thick cat-eye as well as applying very dramatic eyelashes. Finish is off with some red lipstick and you are good to go.
When it was time to take my hot rollers out, I seperated my hair into two sections: the front and back, making a part from one ear to the other. I focused on the front section first by teasing all of it all over, making sure to really get it good in the root area. Make your hair look huge, like you got electrocuted. I seperated it into two sections at that point and just followed where my natural part was. I started on the smaller half and made a victory roll on each side (youtube would probably better be able to describe how to do it, plus visuals are amazing in learning them. They really are easier than they look, but you may want to try it a couple times and not just wait until Halloween day to do it for the first time). Once both victory rolls were made, I just took small pieces of hair in the back and rolled them up as if I was rolling them into hot rollers and just pinned them up all over next to each other. The final thing to do was to add my bone, and Wilma was good to go.
Getting everyone dressed didn’t take very long at all, but we made a huge impact everywhere we went that night trick or treating. All of the neighbors commented on how much they loved it, and one neighbor said they could recognize us from all the way down the street. We heard a lot of “Yabba dabba doos” through out the neighborhood and just received a lot of warm sentiments from everyone we encountered. The costumes were extremely comfortable ( I didn’t want to take mine off at the end of the night) and cost less to make than those expensive costumes you would buy at the big box stores that feel like they are going to fall apart while trying them on. I really think theses costumes were my favorite ones we have done so far and will be hard to top next year, although I am up to the challenge.
Costume Cost Breakdown-
Wilma: $9
Pebbles: $4
Fred & Bam-Bam: $11
Accessories: $14 (clay for bones and necklace, paint, eyelashes)
Total: $38
Less than $40 to make an amazing costumes for a family of four!!!! How can you beat that?!
