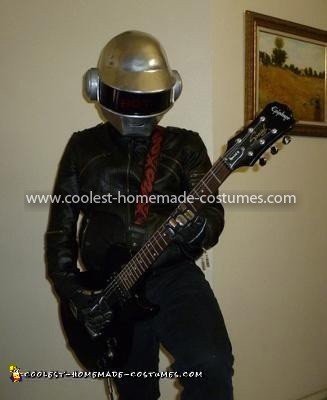
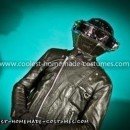
I have been a fan of Daft Punk for quite awhile and loved how awesome it would be to have their helmets. Once I found out that each helmet would be worth $65,000 a piece not to mention acquiring the license to wear them – I set out to make my own for the very first time.
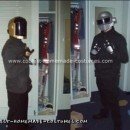
There are 2 helmets, the chrome one belongs to Thomas Bangalter and the gold one belongs to Guy-Manuel de Homem-Christo. Or just simply Thomas and Guy-Man. Thomas’s helmet was easier so I decided to do his first.
I actually started to work on this costume last year 2010 and been working on and off to prepare for Halloween of 2011. Overall I have spent hundreds in materials!! (not sure how much exactly).
Here’s a list of materials I bought and used:
– Cardstock paper
– double-sided tape
– Superglue
– Craft glue
– Glue gun + glue sticks
– Chrome vinyl
– Various types of spray paints (probably 8-10 cans)
– Foam
– Plexiglas sheet
– PETG sheet
– Styrene sheet
– Black Liner Gloves
– Faux leather jacket
– Balaclava
– Studs + industrial glue
– Automotive Bondo filler
– scissors
– x-acto knife
– Fiberglass resin
– Fiberglass cloth
– Dual Respirator
– Latex gloves
– Paint brushes
– Two 5 volt computer fans
– mini toggle switch
– 9v battery connector
– telephone wire
– heat sinks
– electrical tape
– painters tape
– duct tape
– 2 mini equalizers
– led belt buckle
– Four CR2032 batteries
– velcro
– fasteners
– VHT Nite Shades Spray Tint
– Various types of sand paper + sanding block
– Adidas superstar 2 black shoes
– 3 bottles of glazing and spot putty
– Plastic spreaders
– Dremel Tool + accessories
– Steel ruler
– Tack cloth
– Novus 1 clean & shine
– Novus 2 scratch remover
Most importantly!!
– Blood, Sweat,and Tears
– A lot of time + patience
Steps I took to make this Daft Punk Thomas Costume. This is starting back in 2010:
1) I printed out a 3d model from a program called Pepakura designer. The file I got it was from a user named dung0beetle.
2) I cut out all the printouts and folded and use craft glue to put it together.
3) I applied fiberglass resin on the outside first, let it dry and then applied it on the inside. Then I applied fiberglass cloth along with more resin to strengthen it from inside so it can maintain its structure.
4) Then I cut out the visor from the helmet and used it as a template to create the actual visor. I then cut the visor shape from Plexiglas and spray tinted with VHT nite shades.
5) Then I applied Bondo to smooth out the edges on the outside of the helmet and roughly sanded it quickly as Halloween already came and didn’t have time to work out all the kinks I wanted too.
6) I primed the helmet applied some spot putty and finally painted the helmet with Rustoleum’s Bright metallic finish (which I highly do not recommend as it smears way to easily). It was a very rough looking helmet.
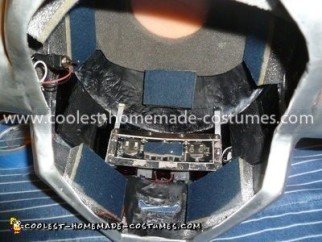
7) Then I duct taped the visor from the inside and also duct tape the equalizers and the led belt buckle. I also had 2 large holes on each side where the ears are just so in case I can add speakers or whatever I needed to add.
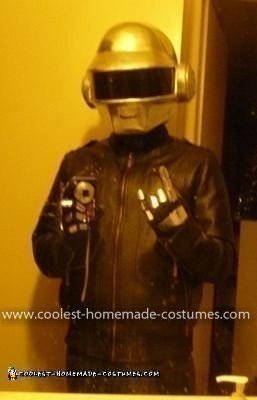
8) I used black liner gloves for metallic gloves. I then used cardboard from a cereal box to cut out the shapes and then applied chrome vinyl over the shapes. Then I hot glued it on the back of the gloves.
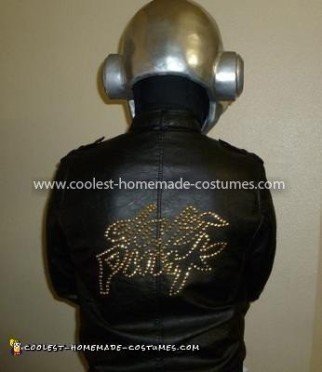
9) For the jacket I didn’t add the studs yet.
Improvements this year of 2011
Daft Punk Thomas costume v2.0
For the jacket:
– Added the studs to the back of my jacket, used E-6000 to adhere the studs to the back.
For the helmet:
– Primed. Sanded. Filled with spot putty numerous of times till I was satisfied with the smoothness of the helmet.
– Used a better spray paint called “Krylon Premium Foil Sterling Silver”
– Superglue in the visor and on the visor added velcro if I wanted to take off the equalizers or not.
– Add extra holes in the nose area for better ventilation also for a more accurate helmet design.
– Added two 5 volt computer fans (w/ toggle switch) in the nose area to keep me cool and keeps the visor from fogging up.
– Add a lot more foam for a snug fit and also to reduce the helmet from twisting and turning around a lot.
– Also added 2 pieces of styrene to hold the led light buckle in place. Also added fasteners on the styrene and led buckle for the option of leaving it on or off.
– Also redid the visor by using PETG plastic instead of Plexiglas and using less tint to promote better visibility. And using hot glue instead of duck tape to mount it (initially it was with double-sided tape but didn’t work too well).
For the gloves:
– Redid the gloves. I used a new pair of gloves this time. For the plates I used the blueprints from a professional prop maker named “Volpin” so it would be more accurate.
– Put fiberglass resin over the pieces so it be stronger and lasted longer.
– Added superglue along with the chrome vinyl so it won’t peel off as easily as it did last year.
– Instead of using hot glue to adhere the pieces to the gloves I used industrial glue. (as the heat from the glue damages the chrome vinyl)
– Also bought the Adidas superstar 2 shoes because it almost identical to the one’s Daft punk wears.
So this was my costume of 2010 and 2011. I hope to make the other helmet soon and hopefully the build will be better than this one. Thanks for reading! :D
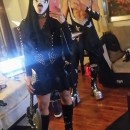
Here is a vid of my Daft Punk Thomas Costume:


Wow! Amazing costume. The work that was put into making this costume is unbelievable. This is PASSION beyond description. This is by far the best homemade costume I ever had the pleasure of seeing.
This costume is sick!!!
You did a great job on this costume. It is very realistic and awesome! Way to go !!:)
You did a great job. I hope you will win something…
I love Daft Punk and I love your costume! I love the helmet, the lights, down to the jacket w/ studs, and metallic looking gloves. Great job!!
I love your costume. I do not know how money and how much time you spent to do this project?. I don’t think I can do it. Great job!
It sure looks awesome! I like it a lot and would like have it too.
I don’t know how much money and how time you spent on this project but you did a great job.
Very good technology. Good music and very cool costume.
Great job!
Awesome!! Couldn’t have done it better myself.
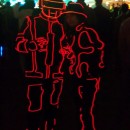
try a TRON style Thomas Bangalter!