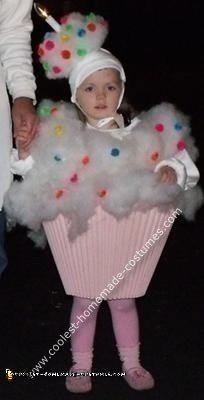
My mother always put a lot of time and creativity into making our costumes and I wanted to continue this tradition. I asked my 3yr. old what she wanted to be this year and she decided on a cupcake! This Homemade Cup Cake Halloween Costume was inexpensive and fairly easy to make and she walked the entire night with no problems!
This is what we used: (*= bought at a craft store)
*White, knit baby hat we already owned
*White foam disc used for flower arrangements
*Inexpensive battery-operated window candle
*Bag of poly-fil (we bought a 32oz huge bag, used about 1/5)
*Bag of colorful pom-poms
*A white sweatshirt about 1-2 sized too big
*An old lampshade (accordion style)
*Wide ribbon
*Glue gun
The hat – First I removed the “brass” part or bottom of the candle (that part is not necessary for operation), placed the batteries inside and shoved it into the middle of the foam disc. I then removed it, put hot glue in the hole and placed the candle back in. I hot glued the poly-fil all around the disc, then added the “sprinkles” or pom-poms. I added the light bulb last, but make sure and check to see that it works before gluing it in. I hot glued the disc to the beanie-style hat, placing it slightly towards the front, not on the exact top/middle of the hat and then glued 2 pieces of ribbon on the inside of the hat so that it could be tied under the chin. This hat sounds heavy, but is surprisingly not. (As most of the beanie hats are folded and sewn to stay folded up, I cut the stitched part so that the hat would fold down and fit my 3yr. old)
The top/shirt – I hot glued poly-fil all over the front and back, but did not do the sleeves. Then attached the pom-poms.
The bottom – We looked and looked for an accordion-style lampshade. We finally found 2 (just in case) for $8 total at a second hand store. We removed the metal part that attached to the lamp and spray painted it pink. I hot glued some poly-fil around the top of the lampshade to match up with the sweatshirt, too. To have the bottom stay in place, I first hot glued the end of two pieces of ribbon on the inside bottom part to about half-way up and taped over to be safe. We then had our daughter try it on to mark where the other ends will be glued. We criss-crossed the ribbon, marked it so that the lampshade was above her knees and then hot glued the other ends on, kind of like suspenders.
The outfit – I had matching leggings, socks, shoes that I put on her first and added a white shirt for under the outfit. We then had her step into the bottom and actually taped the ribbon at the shoulders to keep them from slipping. We then put the big puffy sweatshirt on, added the hat and that was it! I did all of this in about 3 hours. I used a lot of hot glue, but did not have to sew a thing.
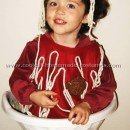


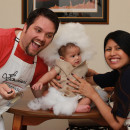
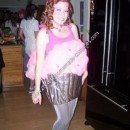
It is so nice to see parents are still making costumes! They are so much more personal than store bought ones and create lasting memories. Thanks for providing such clear and easy-to-understand directions for making this costume. The cupcake costume appears to have been the perfect choice for this too sweet little girl. God Bless!