I’m an artist and graphic designer, currently graduated with a BFA in fine arts. I love to do anything creative, but since graduation I havn’t had many creative outlets. So I decided I would take the time to once again create a costume that was extremely original and hadn’t been attempted before.
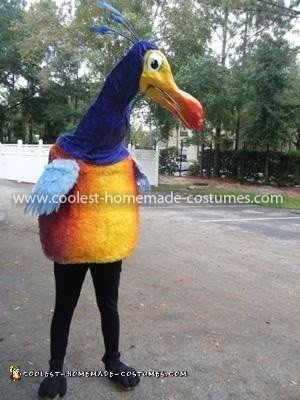
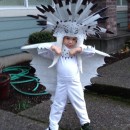
Last year, one of my 2nd character choices for a homemade costume was the bird KEVIN from the movie UP! I dug back into my original ideas and decided that I wanted to make Kevin, but that I didn’t want it to be as generic as other bird costumes. This costume IS one of a kind – the head moves, the beak actually opens and shuts, and the wings even flap – ALL with my head nicely concealed in his neck so that you never really pay attention to the fact that a person is in it. The only thing I wish I had done was get a soundtrack of his bird noises going and it would have been completely legit!
Patience and time are necessary, I spent at least 60+ hours and still barely finished it in time for Halloween 2011. I also had awesome roomies and a great playlist to help me through it all.
To start the body I cut all of my fun noodles in half so that they would be easier to manipulate and form into shapes instead of being so resistant to change. Using duct tape for support I started with circles and half ovals in order to get the general shape of Kevin’s body without making it too detailed just yet. I also made sure to make an area of noodles that fit kind of like suspenders so that there would be somewhere for my body to support the structure. After taping each section, I took a dark pink sharpie marker and drew lines where all the noodles connected so that I could hot glue everything in place.
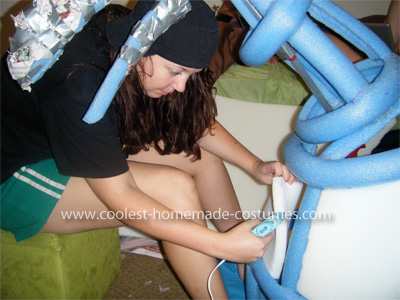
Most IMPORTANT step of the entire costume is HOT GLUE. The thicker the glue the more time you must hold the noodle in place and wait for it to dry but it holds so well. Cut and place pieces of noodle where extra support is needed, because remember this is the BASIS of the entire costume, it needs to be strong or it wont make it in the end. Now onto creating the neck, which had a few problems along the way.
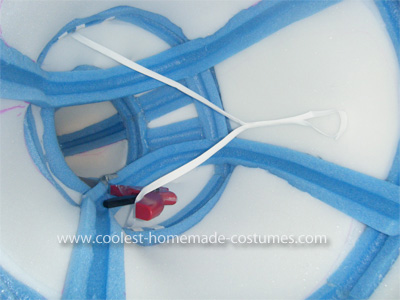
I started the neck by using two long pieces of noodles. I made the rings around each long piece to give a basis for a neck. Then I actually cut and glued several pieces in the back for that support I needed and to give it a slight curve. Kevins fully moving head was made with a gopher grabber from Walmart. I decided it was just long enough to reach the head and I could use the trigger to attach onto is beak to also make it move. I cut a hole in the side of the neck and secured the Gopher grabber so that it could move but not fall apart.
The HARDEST part of the costume- the head. I started with the shape of Kevin’s head and then moved onward. I hot glued the back of his head onto the Gopher grabber. Using different pivot points I created from foam I could get the beak to open slightly when the trigger was moved. I hot glued them into place with LOTS of hot glue to ensure strength when paper mache is added.
Taking the seam fabric (similar to a shoe lace) I attached it to the other side of the grabber and then hot glued it to the end of the bottom noodle which made his beak. I made sure to make the seam fabric short enough so that just the smallest amount of movement when the trigger is pulled would close the beak slightly . I had to reinforce the bottom beak so that it was kind of on a hinge so that it would move but not fall off.
I used several layers of duct tape around the back of the bottom beak and made sure not to tape down the seam fabric that would pull up and down to move it. Now I attached some newspaper with duct tape to get the overall shape of Kevins beak. Its time to go BACK to the body to add the final foam structure.
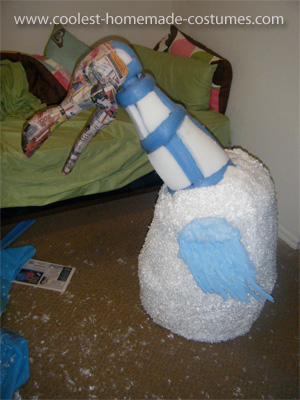
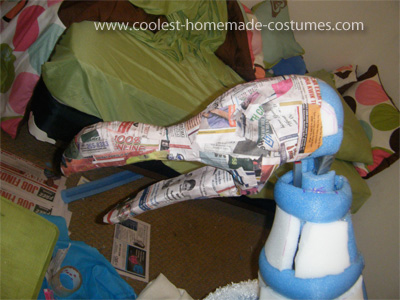
Next, I had to use a roll of foam I also found at Walmart in the fabric section to give some shape to this costume. I laid the body structure over the foam and used a pink sharpie to draw lines where the foam should be cut. Once each piece was cut I AGAIN used tons of hot glue to get the foam to stay in place. I HIGHLY suggest spending the money on a full sized hot glue gun as this was so hard with a mini one. It took twice as long and hurt my hands because I had to pull the gun trigger so many times in order to get anything out of it. Once finished it is back to the head for some paper mache and final touches to really make this look like the bird from up!
Even though I started a slightly formed beak with some newspaper and duct tape there is a lot more to be done. I took several more stacks of newspaper and taped them down to add eyes and even some of his face. Then I used tape and taped over all of the bumpy parts to attempt to smooth it out more. Afterwards it was time for paper mache and in a big mixing bowl I created a solution of half glue and half water.
I cut the newspapers into strips and dipped them into the solution and then would run them in between my fingers to get of any excess solution. I then placed them on the newspaper beak and head until all was covered and let it dry over night. Be very careful when doing the paper mache around the beak where it is hinged because it STILL needs to stay hinged and not get stuck. I left this area a little more unfinished just because I knew it would still open and close and I really did not have time to figure out any other way at the moment. Now it is time to create wings that actually flap.
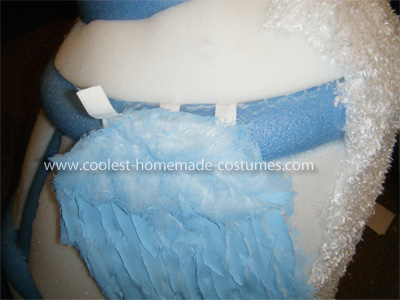
For the wings, I went back to Walmart and got kids angel wings that I had seen earlier that week. I cut the wings in half and spray painted them a sky blue like Kevin’s wings in the movie. Since his wings are small this was the perfect solution. I used stretchy material you can find in the seam of some pants to attach the wings through the foam and firmly onto the other side with hot glue. I then used the same seam fabric to get the wings to flap.
Using the seam fabric I glued two long pieces together and then glued the other end to the underside of each wing THROUGH the foam structure. I left enough room around the fabric so that it could move in and out when pulled on, therefore making the wings move with it. I created a little loop hole on the end so that it would be easy for me to pull the string and allow the wings to flap together. I had to use my free left hand as the other is the one that moves the Gopher grabber making the head function. The final and the BEST steps are ahead- finishing touches with fur and spray paint!
For the final steps, I bought faux fur from a fabric shop and cut them into very wide long strips, probably about 8 strips total. I also hot glued this on making sure to overlap each piece so that none of the inside structure could be seen. Once everything was into place it was time for painting.
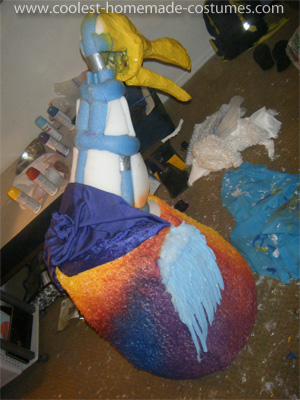
I took the whole costume outside and used many cans of spraypaint including yellow, orange, red, blue, and purple to create the same colors that Kevin has in the movie. I looked at pictures as I was spraying to try and get the most accurate pattern of colors and shapes of feathers. Make SURE to cover his sky blue wings with some type of grocery bags as spraying close to them will ruin the color of the sky blue with other colors.
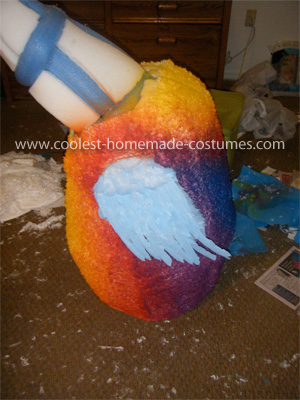
After the body was done drying, I spraypainted his head with the yellow, orange and red as seen in the film. I let that dry for about and hour and used acrylic white, black, and green paint to create the crazy eyes of Kevin. Be careful though, because I didnt let my spray paint DRY long enough before painting with acrylic and the colors kind of mixed so I had to put several coats.
At last – the FINAL step to making crazy Kevin from UP! Using the blue fuzzy fabric I also bought at a fabric store I covered the neck up to the head. Be very careful with this step, especially as you get up closer to the head because the fabric needs to STAY LOOSE in order for the head to move properly. I kept the fabric loose around the neck and then attached it to the head rather loosely also for the same reason. I then used the blue mesh fabric and cut an area in the front for my face and glued it down. After all I cant function in a costume if I cant SEE anything!
I got very lucky I found a fabric that was almost the exact color of his neck so that my head isn’t as obvious as it would have been. I finished that up by gluing the blue fuzzy fabric around the mesh edges for a more finished look.
I bought some stretchy black leggings to wear and as for my feet I literally took some black stretchy fabric and cut 3 pieces to create the toes of his feet. I then rolled them into round shapes and hot glued them so that I could stuff them with polyester fiberfill. I hotglued them right onto the shoes and then took extra fabric and wrapped it around my ankles. I also secured this with glue at the sides of the shoes and used safety pins to get the fabric to stay up on my leggings creating one solid leg form and tricking the eyes.
Here’s my 2010 Slinky Dog Costume…

Wow… What a phenomenal costume a true artist
That is so cool and creative. Kaleena, I think you are my hero.
Kevin the Bird
I was very impressed by the work and creativity that went into making this costume. I enjoyed watching the video at the end to see the costume being worn. I think this was very well done.