I saw a previous winner’s soccer ball costume and I knew I wanted Halloween costumes to make in paper Mache for my daughter. I went through a mental list of round objects that would look cute on a three year old and I came up with an apple. The biggest challenge was finding the punch balloon. The 3′ wide balloon was $12.99 and I realized it was too big. After measuring my daughter I realized a 16″ balloon would be perfect. The dollar store had a package of two punch balloons for $1.00 so I had one plus a spare.
I picked up a roll of postal paper (like brown craft paper) for $1 to use as a “primer” of sorts. It covered the newsprint so it did not peek through my final layer. For the final red layer I bought a roll of bright red wrapping paper from a dollar store. I had all the newspaper I needed and the paper Mache recipe (from Recipezaar.com) called for water, sugar and flour. I had those too! I picked up a package of latex gloves and a roll of masking tape from the dollar store and I was all set.
I used masking tape and a piece of cardboard to create a round base to rest the balloon on. I then applied 7-9 layers of paper Mache over about three weeks. Between each layer I put down a grid of masking tape resembling latitude and longitude lines on a globe. That really helped me fill in any gaps in the new layers. Each layer needed a long time to dry so I set up fans on either side. The punch string was a bonus for this process. I hung the string over a hook on my dining room chandelier to stabilize the balloon while the fans buffeted it.
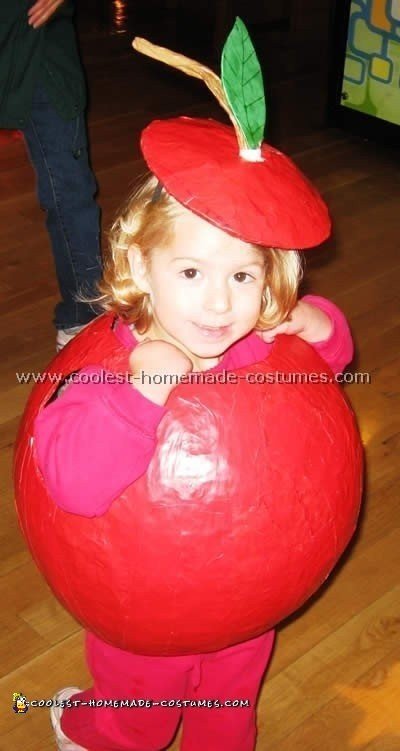
Once I had all the newsprint and the brown paper dried I cut out holes for the head legs and arms. This was difficult because I had to use small objects like a pencil cup for the arms. It took two tries to get a leg opening that she could comfortably squeeze through. This cutting will puncture the balloon so just pull out the pieces and discard. Save the cut-out of the head area to make a hat. Once I had the holes the right size I covered the ball and each opening with the red wrapping paper. For this layer I learned it is best to cut the paper with scissors (normally you want to tear paper Mache by hand to make it lay flat). Tearing the wrapping paper made the white backing show which ruined the effect. I ended up doing an extra layer but you don’t have to now that you know the right way to do it.
Cover the hat with the red paper too. Leave an opening in the middle for a stem and a leaf. For the stem I cut an empty paper towel roll in half, soaked it in paper Mache, glue and squeezed it into a narrow stem shape. This took a long time to dry so you might want to do this well in advance of the day you need it. We ended up baking ours in desperation! We sprayed both the hat and the apple with high gloss spray lacquer to make them shiny. For the leaf I cut out a piece of cardboard in a leaf shape. I then covered both sides with green construction paper. I used a green marker to draw lines on both sides of the leaf.
As for how to attach the leaf and stem that is difficult. We tried using paper Mache glue, contact cement and finally duct tape. The duct tape showed which isn’t attractive but we were out of options. Work with it to find out what works for you. I suspect a strip of Velcro would have done the trick. The hat will slide off unless you glue on something rubbery. We used leftover rubber shelf liner. For the chin strap we glued on a thin elastic strip. Finally we dressed our daughter in a red shirt and red sweatpants. The only glitch we had was realizing our daughter could not see her feet to go down steps. Either avoid staircases or take extra time to guide your little one safely. Time to make: three weeks of spare time.
Thanks for all the great Halloween costumes to make on this site!
Total Spent: $4
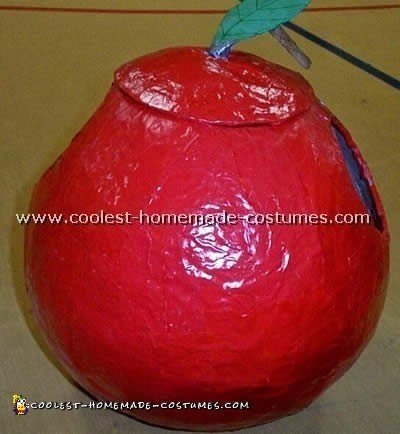
Halloween costumes to make by Barbara R., Panama City Beach, FL
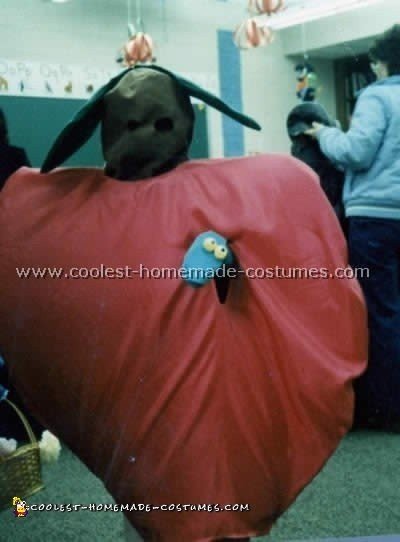
We often created homemade costumes for Halloween as a chance to think beyond the usual and expected as well as for the so much touted “quality time”! This particular if peculiar idea for Halloween costumes to make came from my daughter’s mild unruliness during an excursion where she, her younger brother and I searched a local store for inspiration and trends. She crankily complained sighing heavily commenting that she was bored and could not make up her mind. After a few more irritating remarks I exasperatedly stated that no matter what she would settle upon; she would always be my rotten apple! It seemed our eyes widened simultaneously.
The materials used were one sheet of 1/2 ” foam cut as if for a street placard ad that fit over her head and shoulders approximately 3” below knee with a vertical slit on the left upper quadrant just large enough to accommodate a green worm fashioned from a green sock with bulging craft eyes, skimpy yarn strand hair and a mobile facial expression provided by my daughter’s left hand. A soft dark brown felt stem topped with foam-fluffed green leaves complete with cut-out eye and mouth holes formed the headpiece and shiny red fabric tacked and glued to the lightweight foam foundation completed the ensemble.
This was easy to make as it was inexpensive and fun. It took very little time to assemble and earned her a Susan B. Anthony silver dollar for most original costume.
Good luck with your own Halloween costumes to make!
Total Spent: $20





Your comment has been sent successfully.