Armor (what you need):
Tracing Paper
Poster board
2 packs of 4 1/2” thick Fitness floor mats or EVA foam
2yrds. of 1/2” thick sheet foam
2mm thick Black Foamies Sheet Foam 11” X 17”
1” Nylon
2” Elastic bands
Elastic cord
3/4” Velcro
Suspenders
Plastic-coated Wire
Leather hole punch
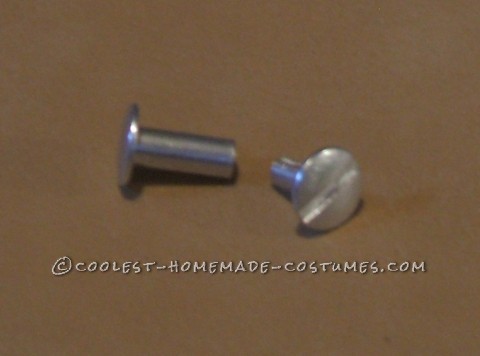
Roughly 65 Steel or aluminum screw posts (Aluminum is cheaper)
6 Parachute buckles
6 Strap adjusters
Glow sticks
Scrap piece of plywood
Styrofoam ball
Heat gun
Hot glue gun
X-Acto knife
Utility blade
Spray paint
Acrylic paints
M-3 Predator Gun (what you need):
Nerf Vortex Vigilon
Dremel motor tool
Two pieces of PVC pipe
1/2″ Thick Sheet Foam
2mm Sheet Foam
Spray paint
Acrylic paint
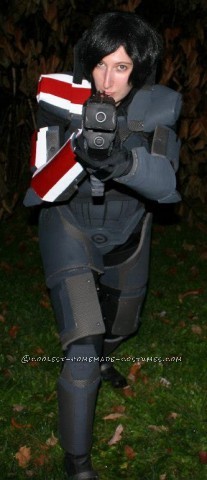
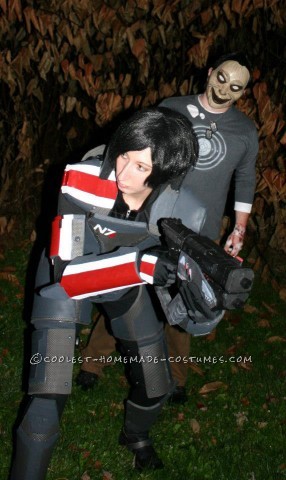
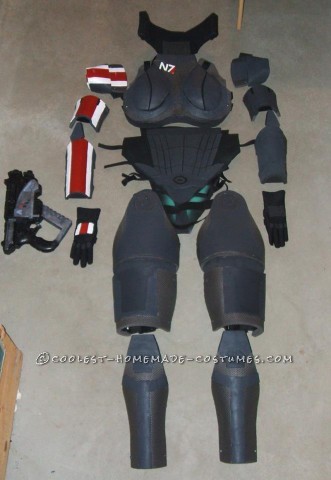
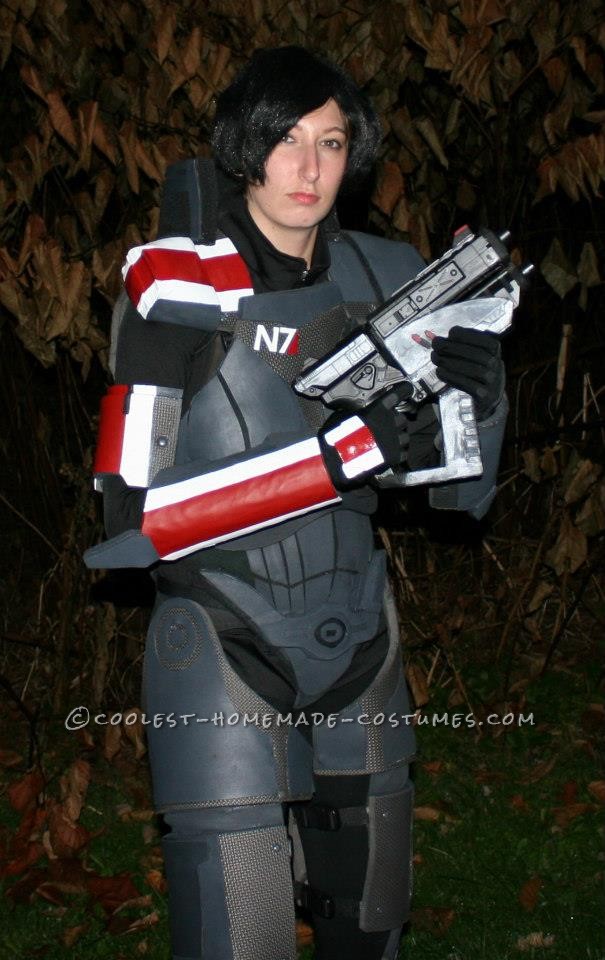
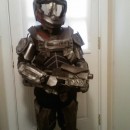
This is my homemade Female Commander Shepard costume created by my boyfriend Alex and myself from the Mass Effect game series. We decided to challenge ourselves this year and it was our first attempt at ever creating something this involved. We were very pleased with how it turned out.
In creating the armor, we taped tracing paper onto my body and traced the pattern onto that. I then adjusted the design on poster board, which was then cut out and given to my boyfriend to cut out the pieces on the foam mats with a utility blade.
Chest:
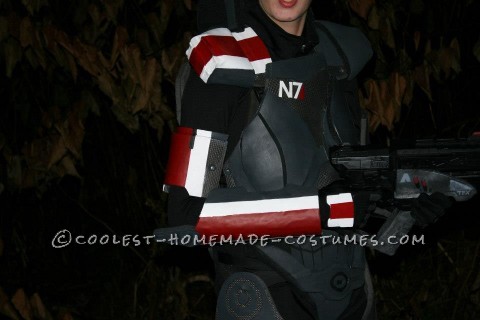
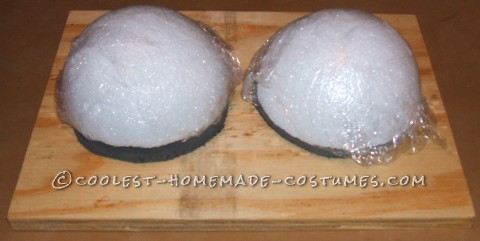
To form the chest we made a mold template with a scrap piece of plywood (we got for free at a lumber store) and a styrofoam ball, which was cut in half and glued onto extra pieces of the foam mats to give a bit more height. Those pieces were also glued onto the plywood. We then heated the foam with a heat gun and lay it onto our molding template while pressing down onto it to get the shape. We found out using cereal bowls worked well to really press down onto the foam over the Styrofoam balls. I also glued on some of the 1/2” thick sheet foam to add more dimension, and the 2mm sheet foam for the details.
Other details on the chest piece nylon to 6 screw post fasteners on the chest piece and 6 on the upper back (that’s 12 total fasteners). There are also 6 strap adjusters, to tighten the chest and back piece onto me. To poke holes through the foam we used a leather hole punch so that the fasteners can fit.
Upper Back:
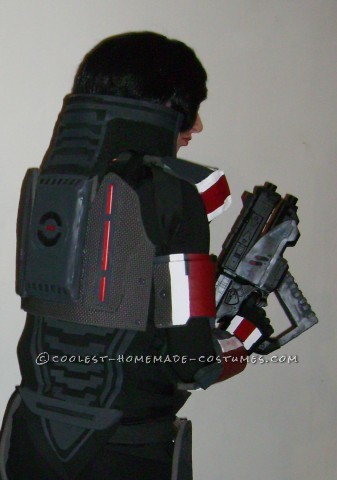
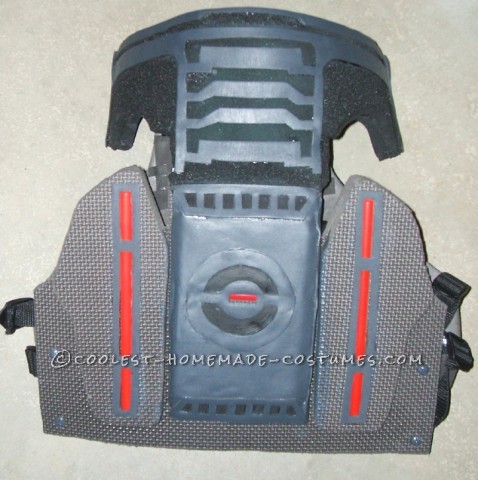
The upper back piece is just one basic shape cut out of the foam mat, with extra pieces layered on top of it. The detail work is done with the 2mm sheet foam. We cut out pockets into the foam mat so that the glow sticks used for the lights can be put in and taken out with ease. The only one that is in permanently is the one in the center.
Neck:
To make the neck piece we cut out two “T” shaped patterns on the 1/2” sheet foam. We added in 3 strips of plastic-coated wire on the inner top part of one piece, then layered the other “T’ shaped piece over that. This made it so that we could easily form the piece around the neck. The very bottom of the “T” is left unglued so we could attach it to the top of the back piece. It is then glued down on the top and inside of the back piece. The detail work on the neck piece is also done out of the 2mm sheet foam and glued on.
Abdomen and Lower Back:
The abdomen and lower back piece is created out of one piece of the 1/2” thick sheet foam. It is basically done in an hourglass shape, but we have the foam thinner in the crotch area so that it just folds from the front to the back of my body. We attached the front and back by gluing on straps of 3/4” Velcro so that they connect at the sides, and also used suspenders to make sure the piece would not slide down with a lot of movement. All of the detail work is done with the 2mm sheet foam and glued down. To make the belt, I cut out some extra 1/2” thick sheet foam and covered it with the 2mm sheet foam.
(Note: All pieces below follow the same process and are just mirrored for the other arm or leg)
Shoulders:
The shoulders are done with one piece of foam mat with a piece of the 1/2” thick sheet foam on the outer area. That is then covered with the 2mm sheet foam and all detail work painted on with acrylic paints. Each shoulder piece has a piece of 2” Elastic band attached with 2 screw post fasteners. To make sure the shoulder pieces would not slide down my arms, we tied on a piece of elastic cord from each screw post on the front and back.
Biceps:
The bicep pieces are also done with one basic piece of the foam matting. Like the shoulder pieces, a piece of the 2” Elastic band is attached with 2 screw post fasteners. This makes the pieces very easy to slide on and off. The detail work is also done with more of the 2mm sheet foam and painted with acrylics.
Forearms:
The forearm pieces are done similarly to the bicep pieces. However instead of using only one strip of the 2” Elastic band, we used 3 strips. Each forearm piece uses 6 screw post fasteners. Again this makes the pieces very easy to slide on and off. The detail work follows the same as the other pieces.
Gloves:
The gloves are a pair I bought from Wal-mart. I used the 2mm sheet foam to make the detail pieces which are then glued on and painted.
Hip and Thighs:
To create the hip pieces we cut the shape out of the foam matting, with 2mm sheet foam to do the detail work. Each piece uses 3 screw post fasteners. The first fastener is located at the top of the rounded piece and attached to the other piece with a strip of the 2” Elastic band sewn together. The bottom part of the pieces each has 2 of the screw post fasteners attached to a piece of 1” Nylon and connect to a parachute buckle. The thigh piece is also cut out of the foam mat with the 2mm sheet foam for detailing. Each thigh piece uses 4 screw post fasteners attached to strips of nylon. They also connect to the parachute buckles (2 buckles on each thigh). There is a strip of the 2mm sheet foam in-between the hip and thigh pieces to make sure they would not fall down my leg. Having the 2” Elastic band around the hip makes it easy to slide on these pieces and then secure them with the parachute buckles.
Calf (Lower Leg):
To create the lower leg portion of the armor, we again cut the pattern out of the foam matting. To make it easier to put on and take off, we kept it more open in the back instead of wrapping all the way around the leg. The detail work is the same as the steps above with the 2mm sheet foam glued onto the foam mat. The leg pieces also use 6 screw post fasteners on each leg with 3 strips of the 2” Elastic band. (Same as the forearm pieces)
Boots:
There wasn’t much to do here since my sister had a pair that I thought would work well. Plus they zip up on the side. I didn’t want it too look plain, so my boyfriend added a little strip of the foam matting with the 2” Elastic band attached to 2 screw post fasteners for each boot.
M-3 Predator:
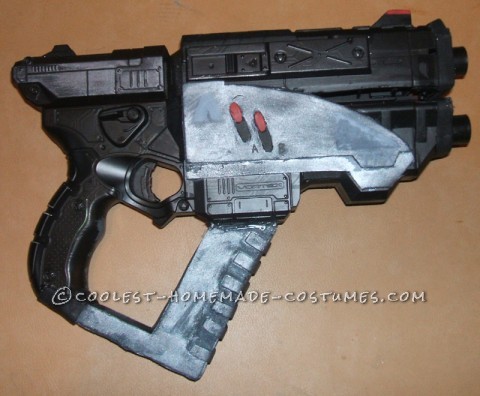
To create this gun from Mass Effect 3, we modified Nerf Vortex Vigilon gun. My boyfriend took it all apart and removed pieces inside we didn’t need, then used a Dremel motor tool to carve out a strip in-between the two barrels. We then used a base coat of black spray paint and I glued on the detail work with some of the 2mm sheet foam to make it look more like the gun in the game. The hand guard on the gun I made using pieces of 1/2” thick sheet foam, then covered with 2mm sheet foam and painted with acrylics. The barrels of the gun are pieces of PVC pipe that I glued onto the front of the gun.
And that’s all there is to it. I would’ve done more if I had been smart and documented the process, but alas I forgot. However, I hope what I did explain helps if you’re an amateur like me attempting to make your own FemShep costume!


Your comment has been sent successfully.