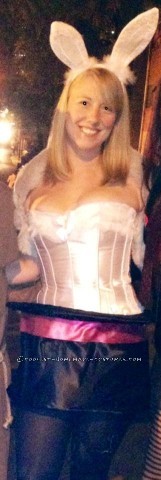
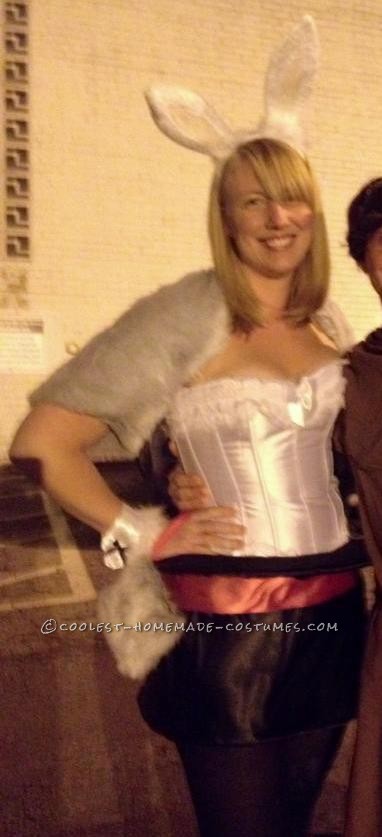
Bring the magic to your Halloween party as a rabbit in a hat!! Dress like a bunny from the hips up and make a top hat as a skirt – abracadabra! You’re a star!
Making the Top Hat frame. The frame was pretty easy – made from very thin PVC pipe from Home Depot using the connectors that are made for that type of pipe and have 3 prongs. I measured a circle from the pipe for the top and cut it into fourths. I connected the four pieces using the three prong PVC pipe connector. To make the bottom circle, I measured the pipe and cut it in HALF only. I connected the pieces to form the circle. Next cut two pieces of pipe based on the height you want the hat to be. Use the connectors to connect the two circles together.
**Note: when I refer to the top circle of the hat, that is the side that will have the brim on it. **
Covering the Top Hat. Now this was the hardest part of the costume — so hard that I had to scrap the first attempt and buy more fabric! Buy a couple yards of fabric of the widest fabric you can find. Place the top of the frame on the bottom left corner of the fabric. Glue a few inches at a time, letting the frame ROLL NATURALLY. This will be in an arc and does NOT follow the bottom edge of the fabric. Pull the fabric tight as you roll it to avoid wrinkles. Continue until you have glued the entire frame. Make sure the whole pipe is covered and trim the excess fabric.
Now you need to address the other two connectors. They need to be facing out, parallel to the bottom of the hat. This is how you will attach the brim. Cut two small holes and rotate the connectors into place.
Now hang the frame from the top (the already glued side) on a hanger so you can glue the fabric to the bottom of the frame, pulling tight. Once you’ve finished gluing, again make sure the whole pipe is covered and trim the excess fabric.
Making the Brim. Make another circle your desired size. Cut in half and connect with the connectors facing in. Cut two more small pieces of PVC pipe and attach the brim to the hat using the connectors you have rotated in the previous step. For extra stability, wrap wires from the top circle to the brim.
To cover the brim, cut a large circle the will cover the brim top and bottom. Glue the circle to the top side of the brim. Fold the fabric under and glue – trim the excess fabric. Make a hole in the center of the brim fabric and cut slits so you can fold the fabric under and top circle.
Finishing touches for the hat. Glue fishing line to make loops that go over your shoulders on each side to keep the hat up. Add ribbon and you’re done!
To become a bunny from the hips up, I bought a corset online. I love homemade costumes, but a corset is beyond my skill level! I made bunny ears from wire and hot glued the fake fur and shimmery fabric around the frame. I attached the ears to a headband with more wire and covered the headband in fur. The cuffs are made out of the shimmery fabric, hot glue and Velcro. I forgot to make a tail but I would have used a white loofa if I had remembered.
As a last minute edition, I made the shrug out of fur (they were out of white fur so I had to use gray) because it was SO cold!! To make the shrug, fold a piece of fabric in half, sew about 6 inches on each end to make arm holes. I also made a small purse by sewing two pieces of fur together and sewing Velcro across the open end.
TA DA! You are now a rabbit in a hat!



Your comment has been sent successfully.