My four year old Abby had been saying for months that she wanted to be Ariel from The Little Mermaid for Halloween. But then in September she saw How to Train Your Dragon and fell in love with Astrid. Her answer to “what are you going to be for Halloween?” automatically changed to “I want to be Astrid!” I kept asking her for weeks, sure that her answer would change back to Ariel, but when the first week of October arrived and she was still sticking with Astrid I knew I’d better get going if I was going to pull this all together in time for Halloween!
Everything was homemade other than a pair of her jeans and the green striped shirt. Then we just added all the pieces I’d made, and we had our Astrid! I love the way this turned out…the biggest complaint my husband had was that our daughter loved her costume so much she couldn’t stop smiling. He thought she should look fierce and have a scowl on her face, but our “Astrid” was nothing but grins :)
After seeing her costume at our church “trunk or treat” one of her friend’s parents went out to buy a viking costume to wear when they took their daughter our trick or treating on Halloween. The next time I saw her she asked “where did you get that? I went to the costume store to find a viking costume for myself, and none of them looked half as good as your daughter’s!” I may be biased, but I have to agree…my little Abby looked amazing in her Astrid costume!
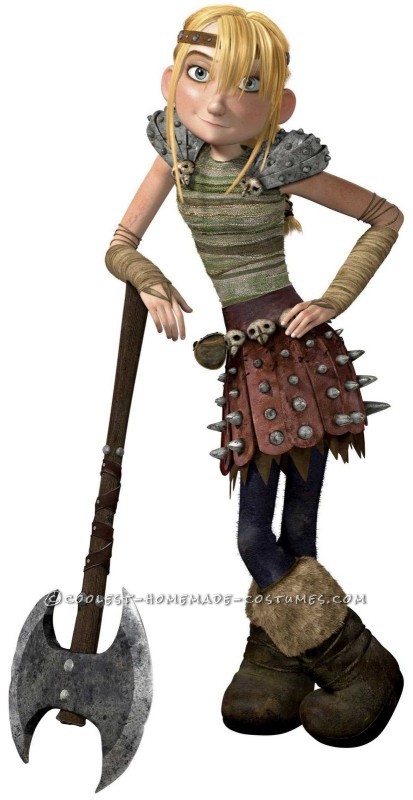
Astrid from the Movie
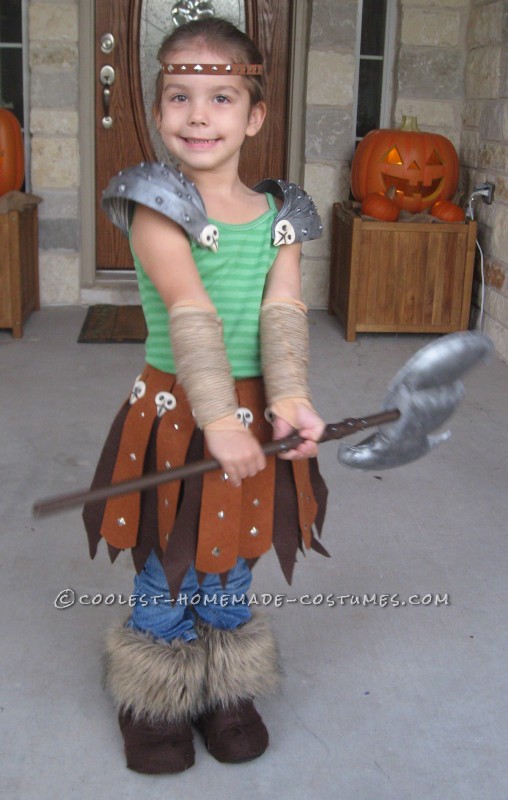
Abby as Astrid
The Skirt
Last year I discovered felt when I made my son’s pirate costume, so that’s where my mind automatically went…felt and hot glue make costume creation SO easy! I cut strips of tan felt and poked square brads from the craft store through to give the outer layer a look similar to Astrid’s skirt, while keeping it safe enough for a four year old to wear. I looped the top of each strip, securing it with hot glue, and then pulled a piece of twine through to create the skirt. But, when I went to string the strips together I realized that the skirt had a flat look to it, so I went back and slightly tapered each strip to allow the skirt to flare out the way it should.
If you look at the photo of Astrid from the movie, her skirt actually has two layers, a lighter brown with a darker brown underneath. So I cut out wider strips of dark brown felt, cut it to have a jagged edge, and used hot glue to secure them to the backs of the tan felt. This really did give the skirt more depth, made it look more full, and kept you from seeing the splits between the tan strips as she moved around. The skirt was the first piece I made for this costume, and just putting it on by itself would bring the biggest smile to my daughter’s face. She’d yell “I’m Astrid” and run off to pretend she was slaying dragons!
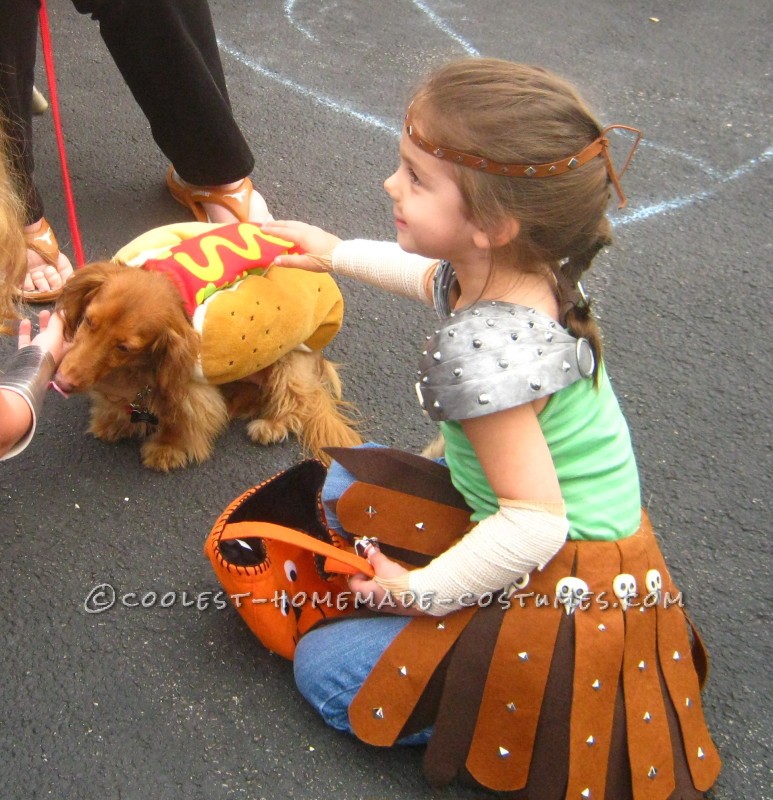
Trunk or Treating
The Skulls
Astrid’s skirt has skulls between each strip, and there are skulls on the front of her shoulder armor as well. I searched everywhere I could to find skull buttons, skull brads…skull anything that would work. It’s Halloween, so I figured finding little skulls would be a piece of cake, but it was impossible! Plus, I realized that the skulls were more like bird skulls, not human skulls. I found a post by someone online who had made the skulls out of Crayola Model Magic, but they didn’t give anymore details, so I went out in search of the model clay to try to make my own!
First, I’ve got to say that model magic is SO cool! It’s super-light, you can mold it like play-doh, but to stick pieces of it together you don’t have smoosh it, you just touch them to each other and the automatically stick. I shaped each skull, molding them around a brad in the back side (to push through the felt skirt). Once I had the shape, I used a dinner knife to make the cross slits down the “beak” and then a mechanical pencil eraser to make the divots for the eyes. Once they had dried, I used watered down brown paint to give the white model magic a “dirty skull” look, and then black paint, a paper clip, and my finger to work the dark details into the eye sockets and beak slits.
Once I pushed the brads through the felt I used a little fabric glue to hold them down. The bird skulls really gave the costume a finished look…most people thought we had bought the costume when she wore it out, because it was so detailed.
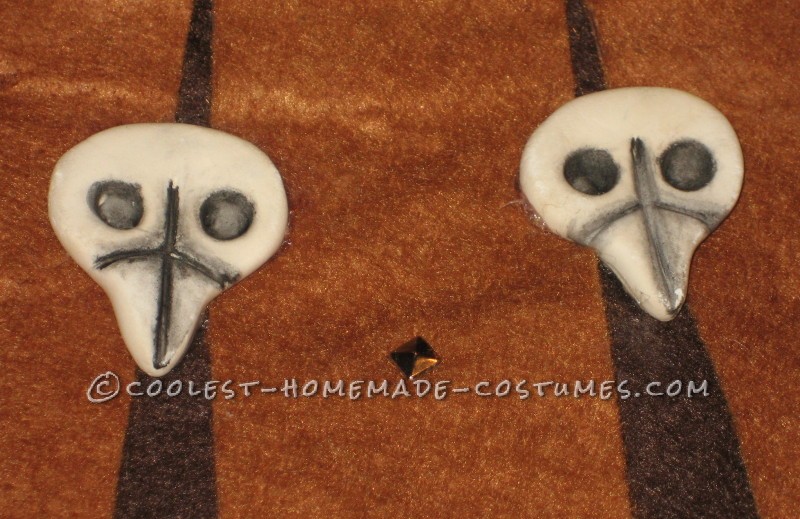
Skull Close Up
The Boots & Hair
The boots were simple…back to the trusty old felt and hot glue! I also picked up some fake fur strips at the craft store to give them the “fuzzy boot” look. I wrapped her snow boots in felt, securing the bottom with elastic strips and hot glue. At the top I folded over the felt, then hot glued the fur strips to the folded piece of felt. So many people kept asking us where I found the boots…and I’d pull them down to show her pink snow boots hiding underneath!
For her hair piece, I bought a strip of suede at the craft store, and went back to the same square brads that we used on the skirt for the headband. My daughter is really sensitive about things poking her (what four year old isn’t?), so I knew that I couldn’t simply stick the brads through the suede. Instead, I snapped the backs off the brads, then pulled out the glue gun to stick them to the suede. I sounded like a great idea, until I burned my finger on the first tiny brad that the glue heated up! But I ran and grabbed my tweezers and my finger burning problems were solved.
For the criss cross in her braid, I simply french braided her hair. Then I tied a thin suede strip to the bottom, and worked my way up the braid, wrapping it around in a criss cross pattern. Then I tied it off at the top…super simple and it added so much more detail!
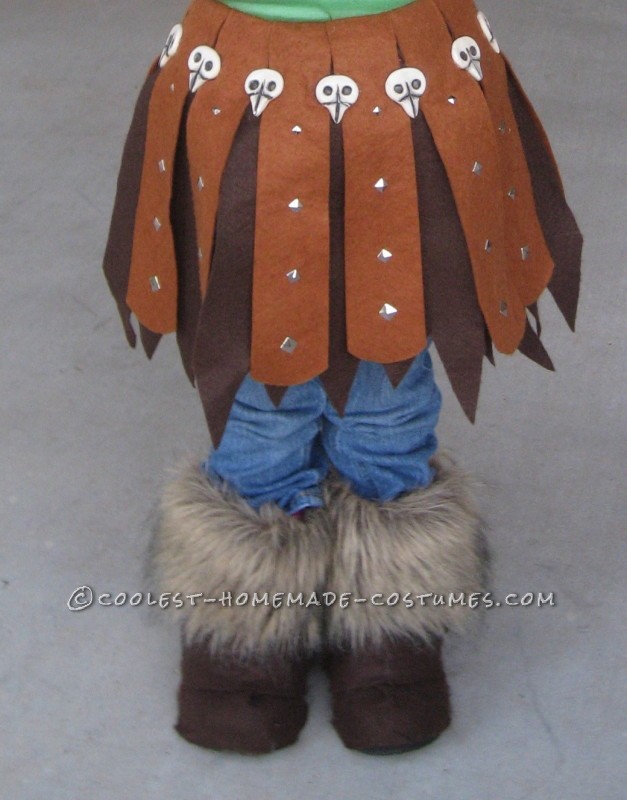
Fuzzy Boots
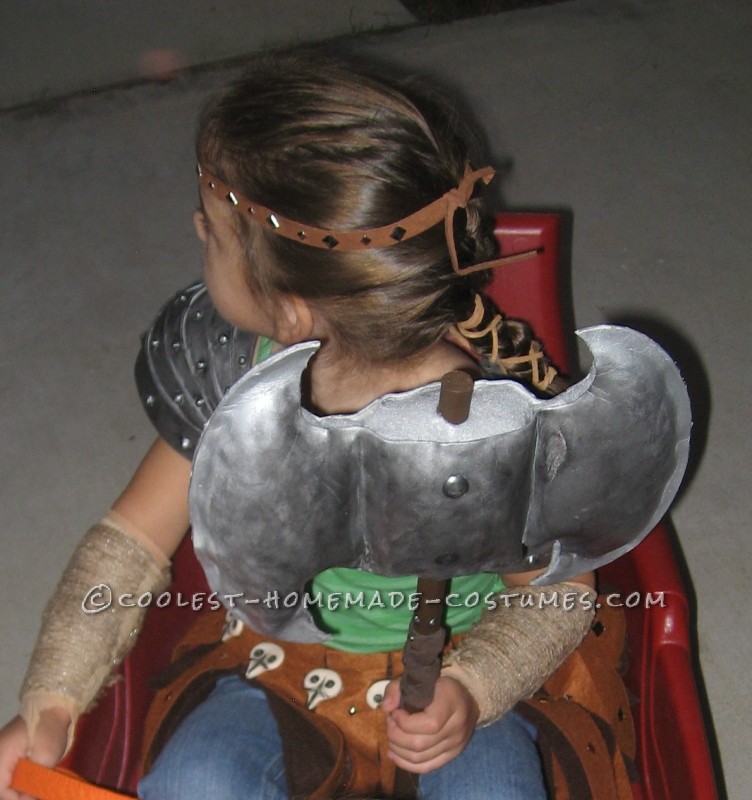
Hair Pieces
The Shoulder Armor
I had no clue where to start to make the shoulder armor, so I searched online and found a post by someone who made themselves an Astrid costume for Comic-Con, where she gave instructions on how she made her shoulder armor. She used craft foam, which I’d never used before, so it was back to the craft store to see if I could find it!
I cut the craft foam into strips, then held them one by one over the stove to heat them until they were a little floppy. Then I placed them against the inside of a small bowl until they cooled, and they kept their shape! After heat forming each strip, I hot glued them all together to form the armor plate. A couple of layers of 3D fabric paint made the “spikes.” Then I covered it all in modge podge to seal the foam, and used silver rub ‘n buff to give it the right color. But it looked too shiny for our battle hardened Astrid, so I brushed black acrylic paint on over small areas, and quickly rubbed most of it off with a paper towel to give the armor and “old and used” look. One more layer of modge podge kept the paint from rubbing off, and I was almost done!
To attach the armor to her shirt, I sewed a few loops of string to the back side of the armor. Then I used safety pins to attach them to the shirt, making sure they stuck up off of her shoulders a bit so that she could raise her arms. Then I hot glued a skull to each front, and a disk of cardstock with a 3D fabric rim that I had painted to match the armor on the back, and that step was done.
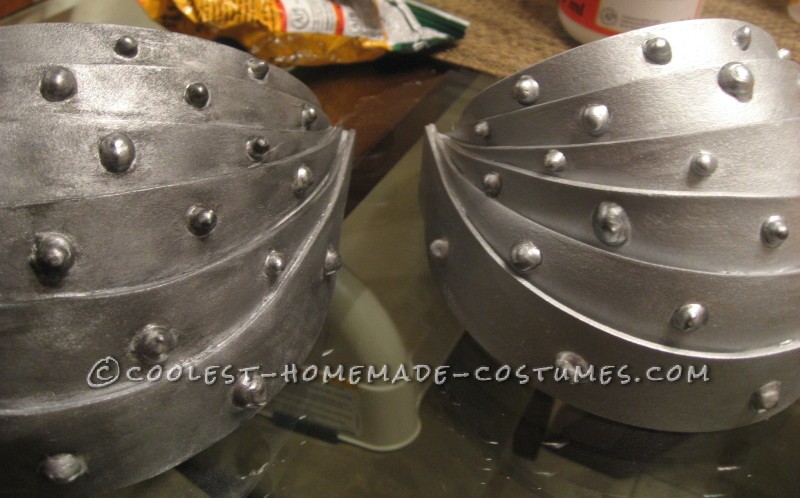
Aging the Armor
The Battle Axe
I wasn’t going to hand my four year old a hard battle axe, so I had to find a way to make a kid friendly one. I’d used felt to make a pirate sword before, and figured that I would do that again. But after working with the craft foam to make the shoulder armor, I thought that I had a new way to make the battle blade.
The handle was just a dowel rod painted brown, wrapped with dark brown suede, and decorated with a few dots of 3D fabric paint for the “bolts.” I cut out the blade from craft foam, then heat formed the crease between where the blade wraps around the handle and where it becomes more flat. I also heat formed the curve of the blade edge using a pie plate. I cut out felt pieces and hot glued them together, and stuffed them for the blade center, and to help it hold it’s shape. This is also how I attached the blade to the handle, I simply hot glued the felt to the stick and didn’t have to worry about the blade slipping off. Then I hot glued the edges of the craft foam blade together as well, filling with stuffing as I went.
To finish it off I used the same technique to paint it that I used on the shoulder armor, but left the blade edges shiny by keeping the black acrylic paint layer away from the edge. The raised “bolts” in the center of the blade are just more 3D fabric paint that I applied before painting the blade. I was pretty happy with how this turned out…even the nine year old boy down the block came over and fell in love with it! He asked me if I could make him one too :)
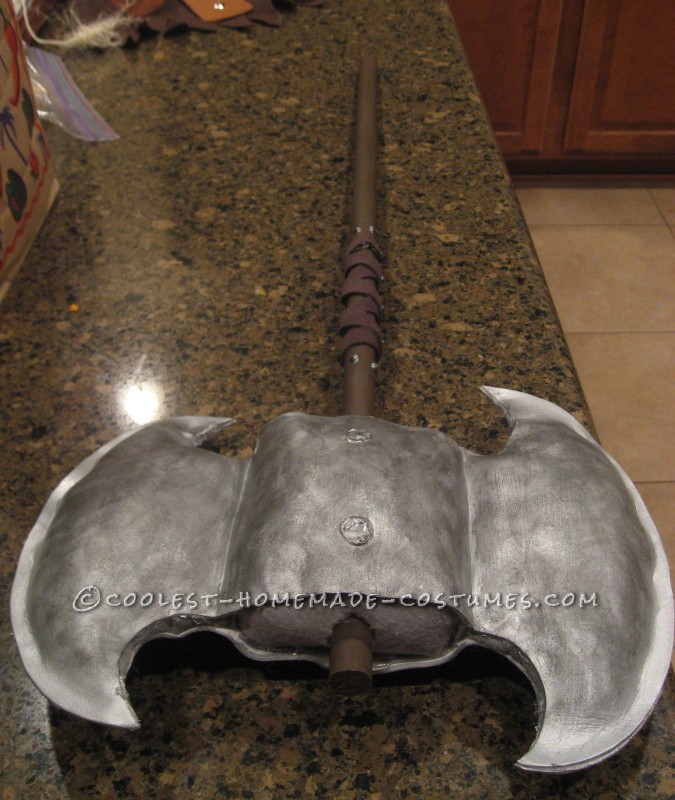
The Battle Axe
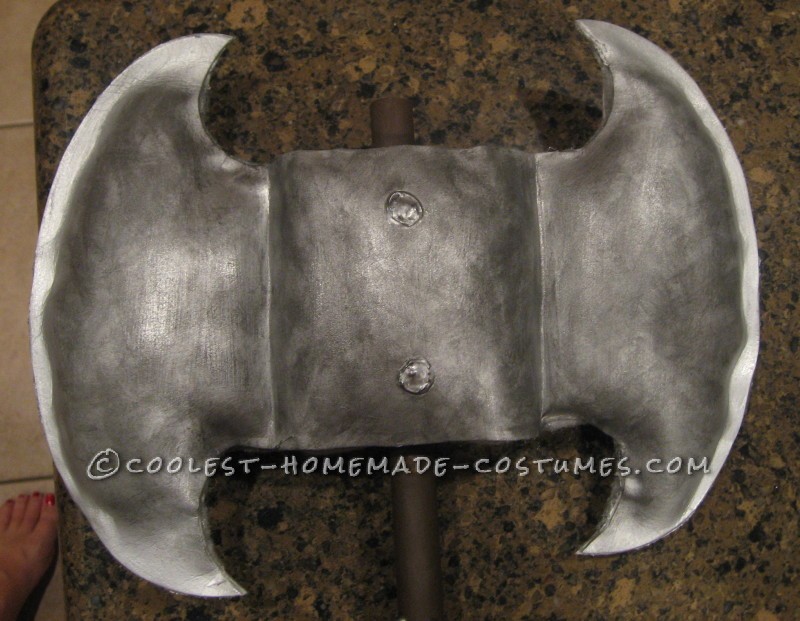
The Axe Blade
The Forearm Wraps
My first thought for the forearm wraps was burlap, but it’s so scratchy, that I knew I’d have to figure out some way to protect my daughter’s arm from whatever material ended up on the outside. Plus, I needed something that could hook around her fingers.
So I pulled out a pair of old tights from when she was one, slid them onto her arms, and cut them off just above her elbow. Then I cut the foot section, making a slit for her thumb, and a hole for her fingers to come through. They were pink, so I used a combination of tea and coffee to dye them to match her skin. I tried sewing the burlap on top, but she still complained that it was scratchy, so I had to find another layer before I was done.
We had some old self adhesive ace bandage lying around, so I wrapped this on top of the tights. It worked great! Dying with coffee didn’t give it the color I needed, so I ended up using the watered down brown paint from the skulls to get the bandage to the right color. After that, I put it all on her, then used the hot glue gun to attach the burlap to the bandage and I was finally done!
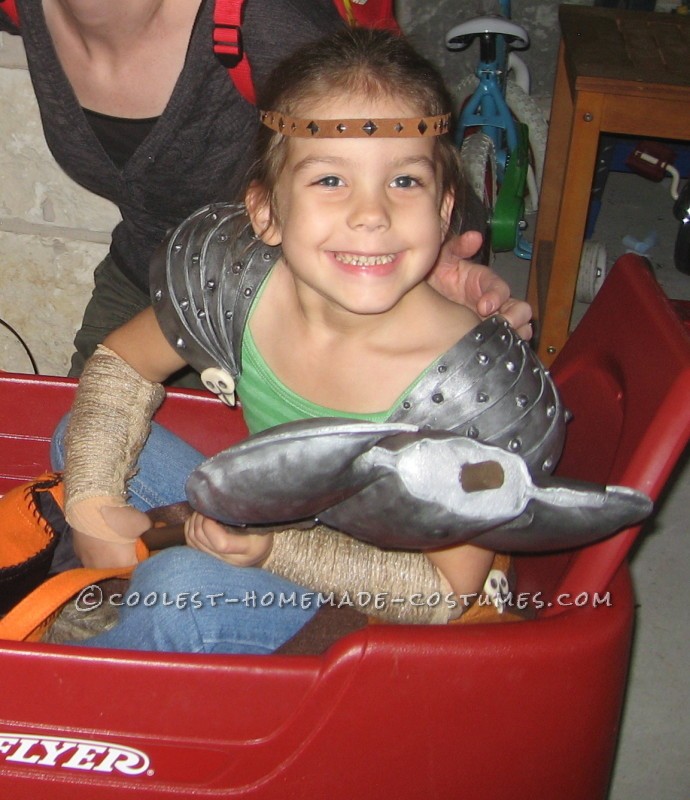
Burlap Arm Wraps


I am amazed; this costume is brilliant! I love the fact that it is entirely DIY and that you have used so many different techniques
I am amazed; this costume is brilliant! I love the fact that it is entirely DIY and that you have used so many different techniques
hi, can i buy from you?
hi, can i buy from you?
Please help! I’ve been to a few craft stores and no one know of a “craft foam” that gets pliable when heated up. Can you please tell me the name of the product and where to get it? Thanks.
Please help! I’ve been to a few craft stores and no one know of a “craft foam” that gets pliable when heated up. Can you please tell me the name of the product and where to get it? Thanks.
Thanks so much for your post. Your instructions were great. My husband and I had a fun 2 evenings making this costume for our 5 year old daughter. It turned out so well. She absolutely loved it. I am now a complete convert to felt, glue guns and craft foam and inspired to try another project.
Thanks Jodie! I keep hoping that with the new movie out she might want to re-use it with a red shirt this year :) But of course she’s stuck on Rapunzel, so I probably won’t get to take it easy!
This is so amazing! My daughter has been begging all year to be Astrid, and now that I’ve found this post I’ve basically solved all my questions. I can’t wait to get started!!
This is so amazing! My daughter has been begging all year to be Astrid, and now that I’ve found this post I’ve basically solved all my questions. I can’t wait to get started!!
This is awesome!!!! And very helpful! :-)
This is awesome!!!! And very helpful! :-)
I’m actually trying to make this costume for myself since my 4 yr old son wants to be Hiccup! I love how you put this whole thing together! I’m just trying to figure out how you made the skirt. I’m a little confused by your directions in the post and just can’t envision it. Can you elaborate what you did with the under layer, in regards to attaching it together with the outer pieces of fabric, the twine, and square brads. I’m actually not quite sure what brads even are! Lol!
I cut the lighter color of felt out, and then folded it over just enough at the top to hot glue the fold and create a loop for the twine to go through. Then I threaded the twine through all of the lighter colored pieces. When you tie it around yourself, you’ll notice that there are lots of gaps, this is where the darker felt comes in. You just cut out pieces that are large enough to fill in the gaps and hot glue them to the underside of the lighter pieces, which will give it a layered and more full look. The brads are easy…go to Hobby Lobby and they have tons of them (ask one of the store workers, they’ll help you). You just push them through the outer layer, and spread the back ends out so that they stay in place. Hope this helps a bit!
What length did you cut the foam for the shoulder pieces?
What length did you cut the foam for the shoulder pieces?
I’m making this without my granddaughter close, what are the measurements for the shoulder armor?? She is 4 yrs. also….