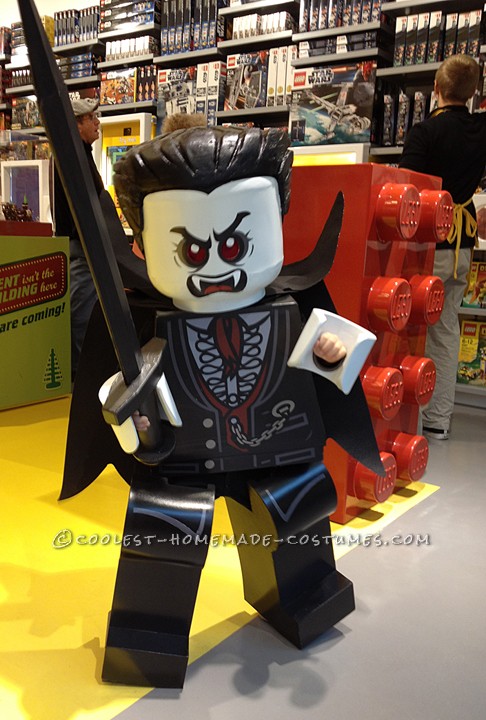
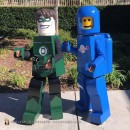
When asked, “What do you want to be for Halloween this year” My 5 year old son replied, “Lego Lord Vampyre”
Who is Lord Vampyre you ask? Well, only the leader of the monster realm from one of Lego’s latest series. This is the second year in a row my son has dressed as a Lego mini figure for Halloween despite knowing the complications with such a costume. So, I decided that this year’s costume would be an improvement on last year’s design while welcoming new challenges.
First, I wanted to reduce my materials cost while increasing effectiveness, so I researched materials. I decided to use a low density PVC foam board called SIntra found at a plastic supplier warehouse. Having never used it before, I asked many questions about it’s capabilities. Traditionally this material is used for mounting photos, or creating signage and displays, but I may be the first to make a mini figure out of it. I chose it for it’s surface properties (plastic) it’s easy to cut, is lightweight, water proof and fairly inexpensive. A 4 foot x 8 foot sheet cost $40.00. However, transporting in our Subaru hatch proved to be challenging, especially during an extremely windy day. I wrestled with the sheet (cut in half) in the parking lot for a good 20 minutes trying to get it into the car. I almost reconsidered.
On to step 1.
Planning dimensions and creating templates
A great Lego Mini figure costume needs to, not only look good, but function well, especially if worn by a small child. I start by taking numerous measurements of my son needed to create each stage of the costume. Not only do you need measurements of body parts, but also the negative space that occurs during movement. This space is crucial to a working costume. Once measurements are taken, I worked with a illustration of a Lego mini figure and scaled the figure up to my son’s height using Adobe Illustrator. If you do not have access to this type or similar software, you can use a ruler and scale it using our old freind multiplication. I wanted this year’s costume to be as accurate as possible, but small adjustments to scale must be made as a humans proportions differ from that of a Lego Mini figure. Once I established my sizing, I started to create two dimensional panels of the Lego leg to be cut. The only tools needed to cut this material were 2 types of x-acto knives. 1 heavy knife for straight cuts, and a scalpel blade for circular cuts.
Once the panels were cut it was on to step 2.
First leg panel cut and the paper template used
Gluing the legs together
To attach each panel I used an industrial strength adhesive called E-6000. This glue is extremely strong but does take at least 24 hours to fully cure. Clamping is an option, or you can simply hold the pieces tightly together until they set 10-15 minutes, or until you’ve completely lost your mind from boredom.
Keeping it together
Cleaning up the glue
Once the glue has cured, you can cut away any dry glue from around your seams by using your x-acto knife.
Cleaning up
Once all of your pieces have been glued and any excess glue has been cut off you can sand the joints using different types of sand paper. Sintra sands well and you can even soften corners or edges. I find a sanding block works best as it applies even pressure across the surface. But there is one last part I forgot. Curving the PVC foam board. Sintra reacts well to softening when heat is applied. I simply waved the heat gun over each piece (time varied on size) and once it was soft, used a paint can or other cylindrical object to achieve my desired curve.
Semi Finished Leg
The Torso
Creating the torso involves cutting a neck hole and 2 arm holes for your child. Determine your child’s head size and make the neck hole accordingly, with a little extra room.
Building the torso undergoes the same process as the legs. Create a template based on dimensions, cut out each panel, glue, clean and sand. The last step, which also applies to the legs, involves concealing the joints. I wanted to achieve a seamless molded look so I filled each joint using automotive bondo. Once it dried, I sanded the areas using fine wet/dry sand paper.
Torso constructed and sanded
The Hands and Head and finishing
One of the toughest challenges this year was creating the hands. Last year I used styrofoam to carve the hands and the results were pretty good. The shape and design was correct, but the surface was a little rough for my liking. Seeing that I had an abundance of sintra, I decided to create the hands using said material. Again, I started with a paper template and cut the top and bottom profile of the hands using my scalpel blade x-acto knife. Next, I had to curve the sides using the heat gun. This is where things get tricky. With various angles and details, it was challenging to shape the sintra in my favor while following the contours of the hand. Once the shape was complete I glued the pieces together using E-6000. Some of the curved joints were not perfect and created tension while gluing which meant I spent a long time holding it together manually until the glue grabbed hold. Once dry, I sanded, cleaned and applied bondo like the previous steps.
The Head
Using Sintra I created the cylinder for the head by heating and curving it the same manor as previously stated. Once that was complete, I glued 2 – 1″ pieces of Styrofoam together using PL Premium before attaching it to the head cylinder. After allowing it to dry, I carved the Styrofoam with my x-acto knife into the desired beveled shape. Finally sanding was done to smooth the Styrofoam. Depending on what character you are creating, you can use styrofoam for the hair, or simply repeat the above step to finish a standard Lego mini figure head. Lord Vampyre has a full hea of hair which I carved out of stacked / glued styrofoam purchased at Home Depot.
Once everything was constructed and Halloween was fast approaching, it was time to spray paint all of the body parts and complete the graphics. Due to the persistent rain and the arrival of hurricane Sandy here in Toronto, I was unable to get outside to spray paint for several days. Finally I pestered my neighbor for the use of her shed. Spray painting indoors is never a good idea.
The graphics were drawn in Adbove illustrator and printed on adhesive vinyl. I did this to save time. If you do not have access to this type of software you can hand paint the graphics using stencils or freehand. Unfortunately my vinyl was not water proof despite claims that it was. Given the rain we had, my son’s costume ended up with a nice distressed antique look. Fortunately, I had several prints and was able to re-apply new graphics.
Miscellaneous
Elastic straps and Velcro were used to fasten the Lego legs to my son’s legs. I used foam padding inside the torso to keep it tight as well as inside the head. The sword was constructed using sintra a styrofoam rod for the handle as well as a styrofoam ball (cut in half) for the end of the handle.
I hope you like it!
Creating the Hands
Finished with Bondo



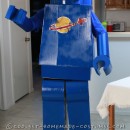
looks awesome and exteremly time consuming…really like the idea and effort you put into this! I would liketo try this any way you can e-mail me the the graphics so I can print them out?
looks awesome and exteremly time consuming…really like the idea and effort you put into this! I would liketo try this any way you can e-mail me the the graphics so I can print them out?
Hi, just wondering HOW IN THE WORLD you done the hair…
I’m trying to make this for halloween but has nooooo idea where to start
Hi, just wondering HOW IN THE WORLD you done the hair…
I’m trying to make this for halloween but has nooooo idea where to start
Just when I think I’m something special with the costumes I make, I find this… AMAZING work, sir!
Just when I think I’m something special with the costumes I make, I find this… AMAZING work, sir!