Let me preface this by saying I had NO pattern, and NO idea what I was doing. It was a process full of trial and error (a LOT of error). I managed to break 3 sewing machine needles, a bobbin case, I hot glued my finger tips too many times to count, but in the end, it was COMPLETELY worth every bit!
I’ll explain Sulley first, he was much easier to complete.
First, I went to the fabric store and got a hot glue gun, LOTS of hot glue, 2 cans of “Spa Blue,” spray paint, a can of purple spray paint, and 4 yards of white fuzzy fabric (called “Grizzly Bear”). I had some left over, but at the time, I had no idea how much I would need, and I figured more would be better than less. Then I went to Wal-Mart and got a pair of sweat pants and a hoodie (not the zip up kind). I got grey, because they didn’t have the size we needed in white, but I would strongly recommend getting white if possible. That way when you’re painting, if somehow the hoodie or sweats show, you’ll be able to paint them and it won’t be obvious.
When I got home, I laid the fabric on the floor (and put our two puppies away—the fabric was driving them crazy, they kept trying to attack it!) and laid the sweat pants on top. I cut out around the pants, giving myself a wide area around the pants (like an inch or two). I did the same thing with the top, except I did the torso, arms, & hood parts all separately so there were 8 pieces total (2 for the hood, 2 for the torso, 2 for each sleeve) to glue on.
I then hot glued (my finger tips and) the fabric to the hoodie and sweats. I was lucky enough to have a seam coincide with where the pockets were, so I made sure to leave that unglued so he would have somewhere to stash his keys/phone/wallet. I also made sure to stuff the space between the grizzly fur and the hoodie with poly fill, since Sulley has a bit of a belly. I took 2 pieces of fabric about 8” wide, and the length of one of my boyfriend’s legs and hot glued the edges together and stuffed it with poly fill, then glued the end of the tail to the pants, right over the middle of the butt.
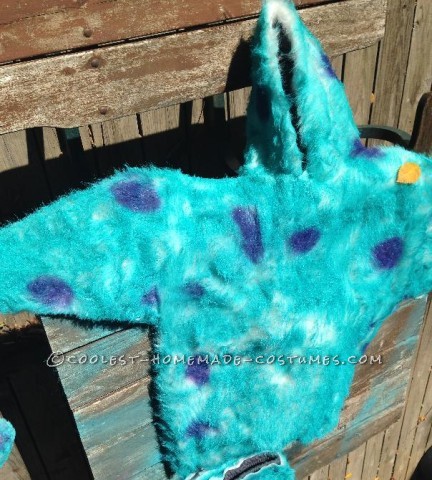
After everything was hot glued, I took the white furry outfit outside, and sprayed really light layers of spray paint. I’d let a layer of paint dry for about 20 minutes, then brush it out (with an old brush—don’t plan on using it on your own hair after you’ve brushed the grizzly fur) really lightly so the fabric wouldn’t stick. I’d do about 2-3 layers of paint, depending on the darkness of the color. I had a pair of “bird” slippers from a costume last year, so I covered the claws and painted them blue, too. Then I painted the dots sporadically around, and BOOM! Sulley!
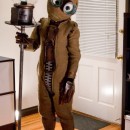
Now, for BOO. Unfortunately for me, there weren’t any tutorials for adult-sized Boo costumes that I could find. Fortunately for you, I’m going to explain how to do it so you can make it and hopefully avoid some of the errors I made.
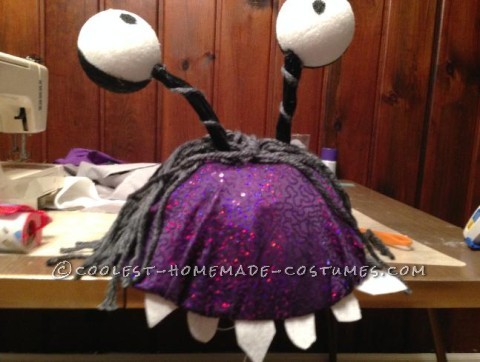
I really thought about getting a purple sparkly sleeping bag and cutting the bottom out. Turns out, there aren’t many purple sparkly sleeping bags out there. So instead, I got 3 yards of purple sparkly shimmery fabric (from the dance/costume area of the fabric store) and some regular ol’ purple lining fabric for the body. Then I got some silvery spotted fabric for the arms (1 yard), a package (of ten) black pipe cleaners, and two Styrofoam balls. I had black acrylic paint, so I didn’t need to get any of that. I got a sheet of white felt fabric for the teeth.
Once I got home, after I had my mom show me how to actually use the sewing machine (which involved a few frustrated tears and breaking the first sewing machine needle), I cut out the purple fabric. I decided I wanted the fabric to go from my shoulder tops to a little below my knees, and I used the width the fabric came in. I added about 6 inches to the length, since I figured it would shorten up once I filled it up and sewed it up. I cut two rectangles from the sparkly and from the lining fabric. I sewed the short edges of one of the sparkly pieces to the short edges of the lining pieces. Then I sewed together ONE of the long sides, and sewed lines across the width (keeping the other long side open). Once I had several lines going across the width of the pieces, I stuffed each little section with poly fill and sewed up the long sides. Unfortunately, I did that with both pieces before I sewed the pieces together. Rookie mistake, eh? It was REALLY tricky to sew the long edges of each stuffed piece together, I had to climb on the table and wrangle the pieces together, some spots I had to hand-sew because I’d stuffed them too full.
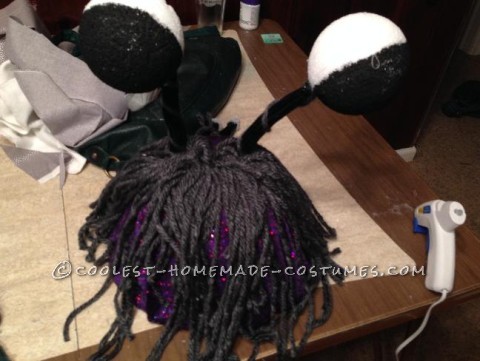
After I had the body of the costume done, I paper mache-d the inside of a punch bowl to use the next day to make the “head” part. Then I took an old hoodie, cut the sleeves off, and used them as a pattern to make the sleeves of my costume from the silvery spotted fabric. I left the sleeves pretty long and put some extra fabric on the end and made it a pointy shape so they’d look like tentacles. With the tube-looking torso part inside out, I hand stitched the sleeves in, and hot glued over the threads for added reinforcement, since I’m no expert seamstress. I pulled the tube torso part back right side out, then all I had left to do was the “head,” part. Once the paper mache was dry enough (about a full day), I covered it in fabric, and hot glued the fabric on the inside of the head. Then I cut the pipe cleaners in half and dug a bit of a hole in the Styrofoam balls and stuck the tip of the pipe cleaners in there and hot glued them in place. I painted the back half of the eyes and the dot in the middle so they’d look like the lamp that Sulley used to make Boo’s costume. I made a little slit in the fabric and paper mache on top of the head where I wanted the eyes to be popping out from, and covered it in hot glue on the inside of the head to keep it in place. Then I covered the inside of the head part with the regular purple lining part, and used a rectangle piece (attaching the short ends to the head and the inside of the top of the body) of the same lining fabric to attach the head to the body. I cut out little teeth from the white felt, and attached them (hand sewing some, hot glueing others) to the top of the body of the costume and the bottom of the head. The costume was pretty heavy, so I had to make little straps attached to the inside of the body to keep the costume held up from falling down.
We got SO many compliments, we went to dinner in our costumes with another couple, and we had people in the parking lot and in the entire restaurant asking to take our pictures. These are the best costumes I’ve ever made! They were quite a bit of work, but well-worth it!

Your comment has been sent successfully.