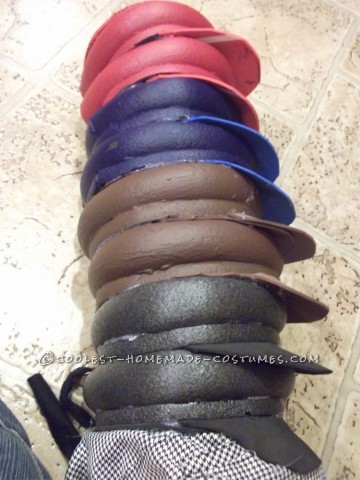
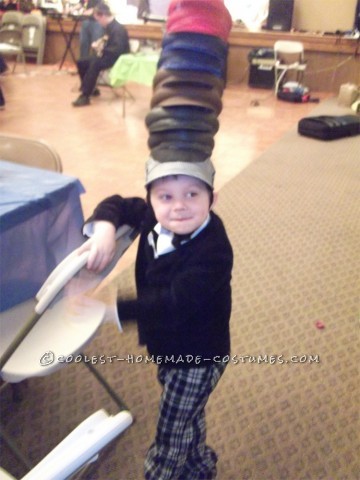
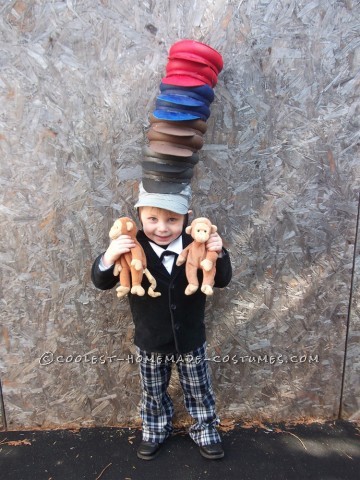
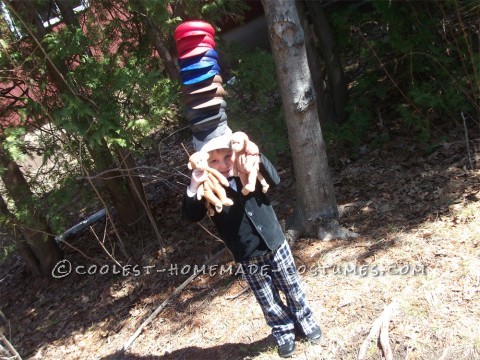
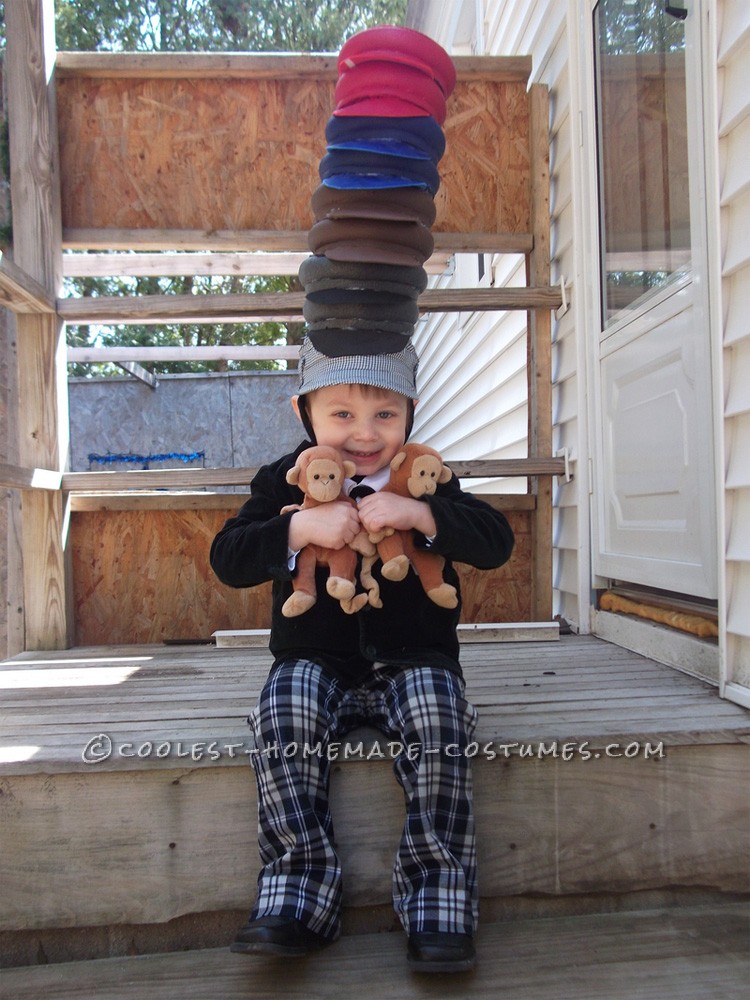
This original costume idea based on the Children’s Book: Caps for Sale was inspired by one of my son’s favorite storybooks by Esphyr Slobodkina”. I referred back to the book often when making this costume, for various details. I was able to borrow most of the clothing for the costume because the actual clothing is somewhat ordinary. Please keep in mind that this was made for a three-year-old so the measurements given reflect that. Making the stack of caps is rather time-consuming, but as you can see from the pictures, well worth it.
Time spent: Roughly 6 hours
Cost: About $25.00 for checked cap and supplies, low temp glue gun.
You will need:
- low temp glue sticks
- red, blue, black and brown foam sheets
- red, blue, and brown acrylic paint (same shade as the foam sheets)
- foam paintbrush
- copper pipe insulation (7ft long cylindrical gray foam found at home improvement stores)
- black/white checked cap
- 2 black fabric strips, about 18″ each, for tying/securing hat under chin
- red ( approximately 6″ ) circular piece of stiff fabric, such as felt (I used a red suede yarmulke/kippah)
- black felt [for the mustache], optional
Clothing:
white button down shirt, black ribbon bow tie (4-5″long, folded and secured at neck in shape of upside-down V-see book), black suit jacket, checked pants (I found these at a thrift shop in the girls department!) black shoes or saddle shoes, mustache secured w/ tape (optional), monkeys, for added cute appeal.
Step One:
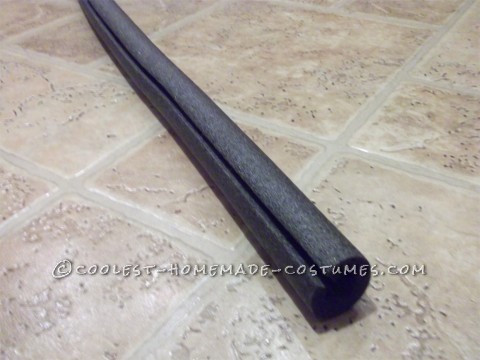
Carefully, cut the foam insulation tube in half lengthwise (the long way). For each cap, you will need one 20″ piece of foam. When creating this for a larger child or an adult, a longer length may be needed. Bend the 20″ piece into a circle and glue the edges together, holding it in place a few seconds until glue dries. This piece will become the top outer part of each cap when assembled. Repeat this step until you’ve made the desired amount of caps ( I made two of each color for a total of eight, not including the checked cap on the bottom).
Step Two:
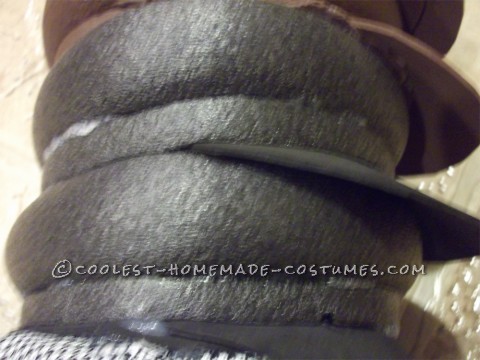
Cut a 20 x 1/2 inch piece of foam from the remainder of the foam tubing, to be used for the band of the cap (between the top and the brim). Bend this piece into a circle as well, glue and hold in place until dry. Glue the smaller 1/2″ band under the larger circle to create the look of the cap.
It is possible that the top part of the cap and the band pieces may not fit together exactly, and if that happens, you can fill in any spaces with more glue. The center of the stack of caps will be hollow and very lightweight.
Step Three:
Once you have attached the two sections of each cap together, you are ready to start painting. Cover any surfaces you are using as acrylic paint is permanent if it gets on furniture or clothes. Paint two caps brown, two blue, and two red. The color of the foam is already gray so you don’t need to paint the two gray caps. Add a second coat of paint if you feel it is necessary.
Step Four:
Once these are completely dry, you are ready to add the brims. Place a painted “cap” on top of the corresponding color foam sheet and, with a pencil, draw a brim onto the sheet. Cut out this shape and glue it in place under the edge of the band of the cap. Once it dries in place you may bend it slightly to more closely resemble an actual brim (it will be somewhat flat).
Step Five:
Fit the checked cap on the head of whomever will be wearing the costume. Take the two 18″ strips of black fabric and glue them to the inside of the checked cap (right in front of the ears is ideal), one on each side.
These strips will tie together to keep the stack of caps secure on the costume-wearer’s head. The checked cap should tie snug and be secured under the chin for best results.
Step Six:
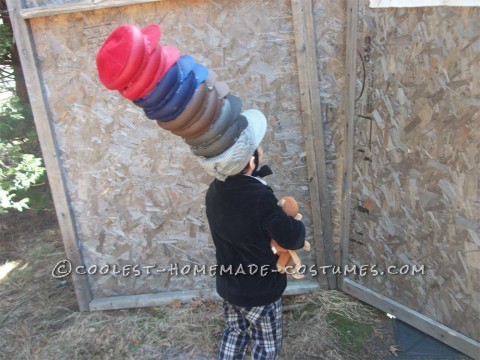
You are now ready to stack the caps! Stack and glue each colorful cap on top of each other, being careful to make sure they are perfectly aligned and straight. The order is gray on the bottom, then brown, then blue, then red on the very top.
Do not attach the circular red fabric to the top cap yet, as you may need to reach through the stack to secure them to the checked cap.
Step Seven:
Decide where the stack of caps should be glued to the checked cap. I do not recommend attaching the stack of caps to the checked cap while it is on someone’s head! The glue is hot! Mark the area on the checked cap while it is on the head and attach the stack afterward. Make sure you use enough glue to keep that stack from budging.
If you feel the absolute need to attach the stack while the hat is on your child’s head, just make sure to place a piece of fabric inside the hat temporarily to protect the head from the heat of the glue gun. MAKE SURE IT IS A LOW-TEMP GLUE GUN.
Step Eight:
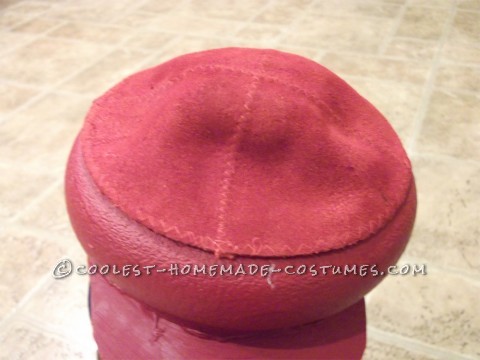
Center the red circular piece of fabric over the hole in the top of the red cap. Glue it securely to the foam.
Step Nine:
Sit back and enjoy the WOW factor! And take lots of pictures!






Your comment has been sent successfully.