I am a mother of three children and have always made Halloween costumes for them. I have experimented with many different materials but last year my costume making abilities changed dramatically when I started using plumbing pipe insulation to form my costumes. My sister has been using this for some time and I absolutely love this method. It is unbeatable for being extremely lightweight, sturdy and capable of forming any shape.
This year I wanted to make costumes that tied in with the décor of our house. Every year we go all out as Halloween is really loved by our entire family and this year amongst the many displays we decided to make a display of crypto zoological creatures such as Giant Spiders, Bigfoot and the famous South American blood sucking Chupacabra.
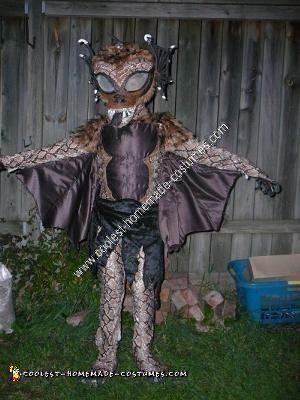
I researched this creature and found that reports of it varied from dog-like to reptilian alien like beings. Here is my homemade Chupacabra (Goat Sucker) Halloween costume.
I wanted the body suit to show a muscular frame and decided I would make a complete muscle suit for under the costume. I measured my son and using black stretchy fabric formed a tight fitting simple body suit. I then cut individual muscles and sewed them on stuffing them with polyester fiber fill with the exception of the chest, abs and back which would be added on later in a different fabric. This took about 4 hours to complete due to needing to be hand sewn.
I made abdominal muscles using a brown reptile looking fabric. I sewed a pillow like form in the shape of the outer abs and then quilted to define the individual muscles. The brown fabric was used because this would be seen on the overall costume. I then sewed this onto the black muscle suit.
To form ribs I used 1 inch strips of plumbing pipe insulation and hot glued them on. Be sure to use low temperature glue to avoid burns and melting of insulation.
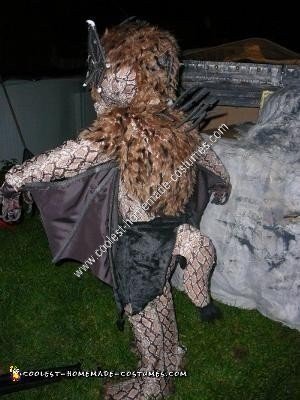
Using the same pattern I had made for the muscle suit I made another suit from stretchy brown and beige reptile looking fabric. This fabric had shiny translucent sequins which really added to the reptile effect. I cut out the center of the abdomen so that when I attached it to the under muscle suit the abs would come through. I then hand sewed the outer suit to the under muscle suit and used hot glue around the ribs to avoid seeing stitches. I wanted to form a hunch back look and did this by making a triangular pillow shape that fit my son from shoulder to shoulder and pointed at the bottom in his lower back. I covered this with reptile fabric and attached it to the muscle suit on one side only. I then cut down the back of the inner muscle suit and added velcro to the other side of the hump. The hump now velcroed closed over the inner muscle suit to create a seamless look.
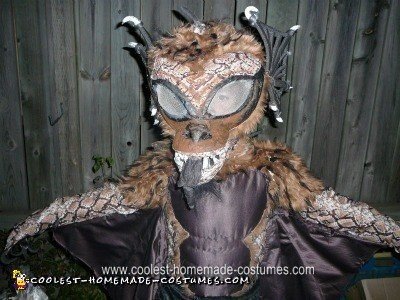
Detail was then added to the suit by using 1cm x 1cm of two different furs, one black and one brown. I glued this onto the shoulders, neck area, around the abs and back using mostly the brown fur and used black as lowlights. Using the same brown fabric as the abs, I cut out two triangular shapes and sewed them onto each side of the costume to form wings. I added thin strips of insulation to form ridges on the wings and cut the bottom edge into a bat shape. As a final touch to the body I made 8 inch long spikes from the plumbing insulation and glued them onto the hump in between the fur.
I made feet by taking a pair of my son’s old shoes and gluing strips of plumbing insulation around the shoes until they resembled a pair of ankle boots. I added strips in the shape of toes and then hot glued the brown and beige reptile fabric over the whole thing. I added toe nails cut from the insulation and added fur around the toes. I placed three toes at the front and one at the back.
I traced around my husband’s hands to make a pattern for the costume hands. I did this to ensure a good fit. I have traced around the kids hands before and the end result was too tight. I sewed the brown material as the palms and the brown and white fabric for the top together forming a glove. I again added claws using the insulation and hot glue.
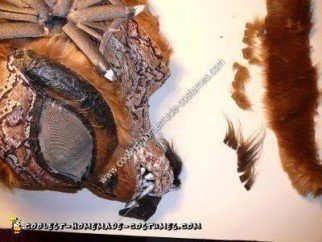
To make the head I made a custom fitted cap for my son with the pipe insulation. I then began adding strips to form a fitted head shape. Once this was accomplished and fit my son well I was able to start shaping the Chupacabra head. I used cut strips about an inch wide and hot glued until the shape took form. I formed ears and teeth with the insulation and glued them on. The entire head was then covered with individual pieces of reptile scales cut from the brown and white fabric. I did this to create texture and depth. I added a tongue with the insulation and using door screen I formed the eyes. This worked really well for the overall look and enabled my son to see easily. I completed the head with fur.
I made a tail using the same materials and attached it with velcro for easy removal. To finish the costume I made a loin cloth from a short charcoal fur.
This homemade Chupacabra (Goat Sucker) Halloween costume took approx a week worth of evenings and cost under $10.00 to make. I really love how lightweight the headpiece is and thank my sister for sharing her awesome techniques.


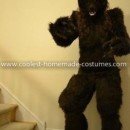

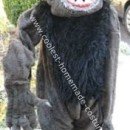

I absolutely love this costume! It is very original and creative. Your attention to detail is amazing and your crafting skills are fantastic. Awesome job!
Can I buy this from you? My son is dying to be a chupecabra (he is a big 5 year old) and I am just not crafty like this!!