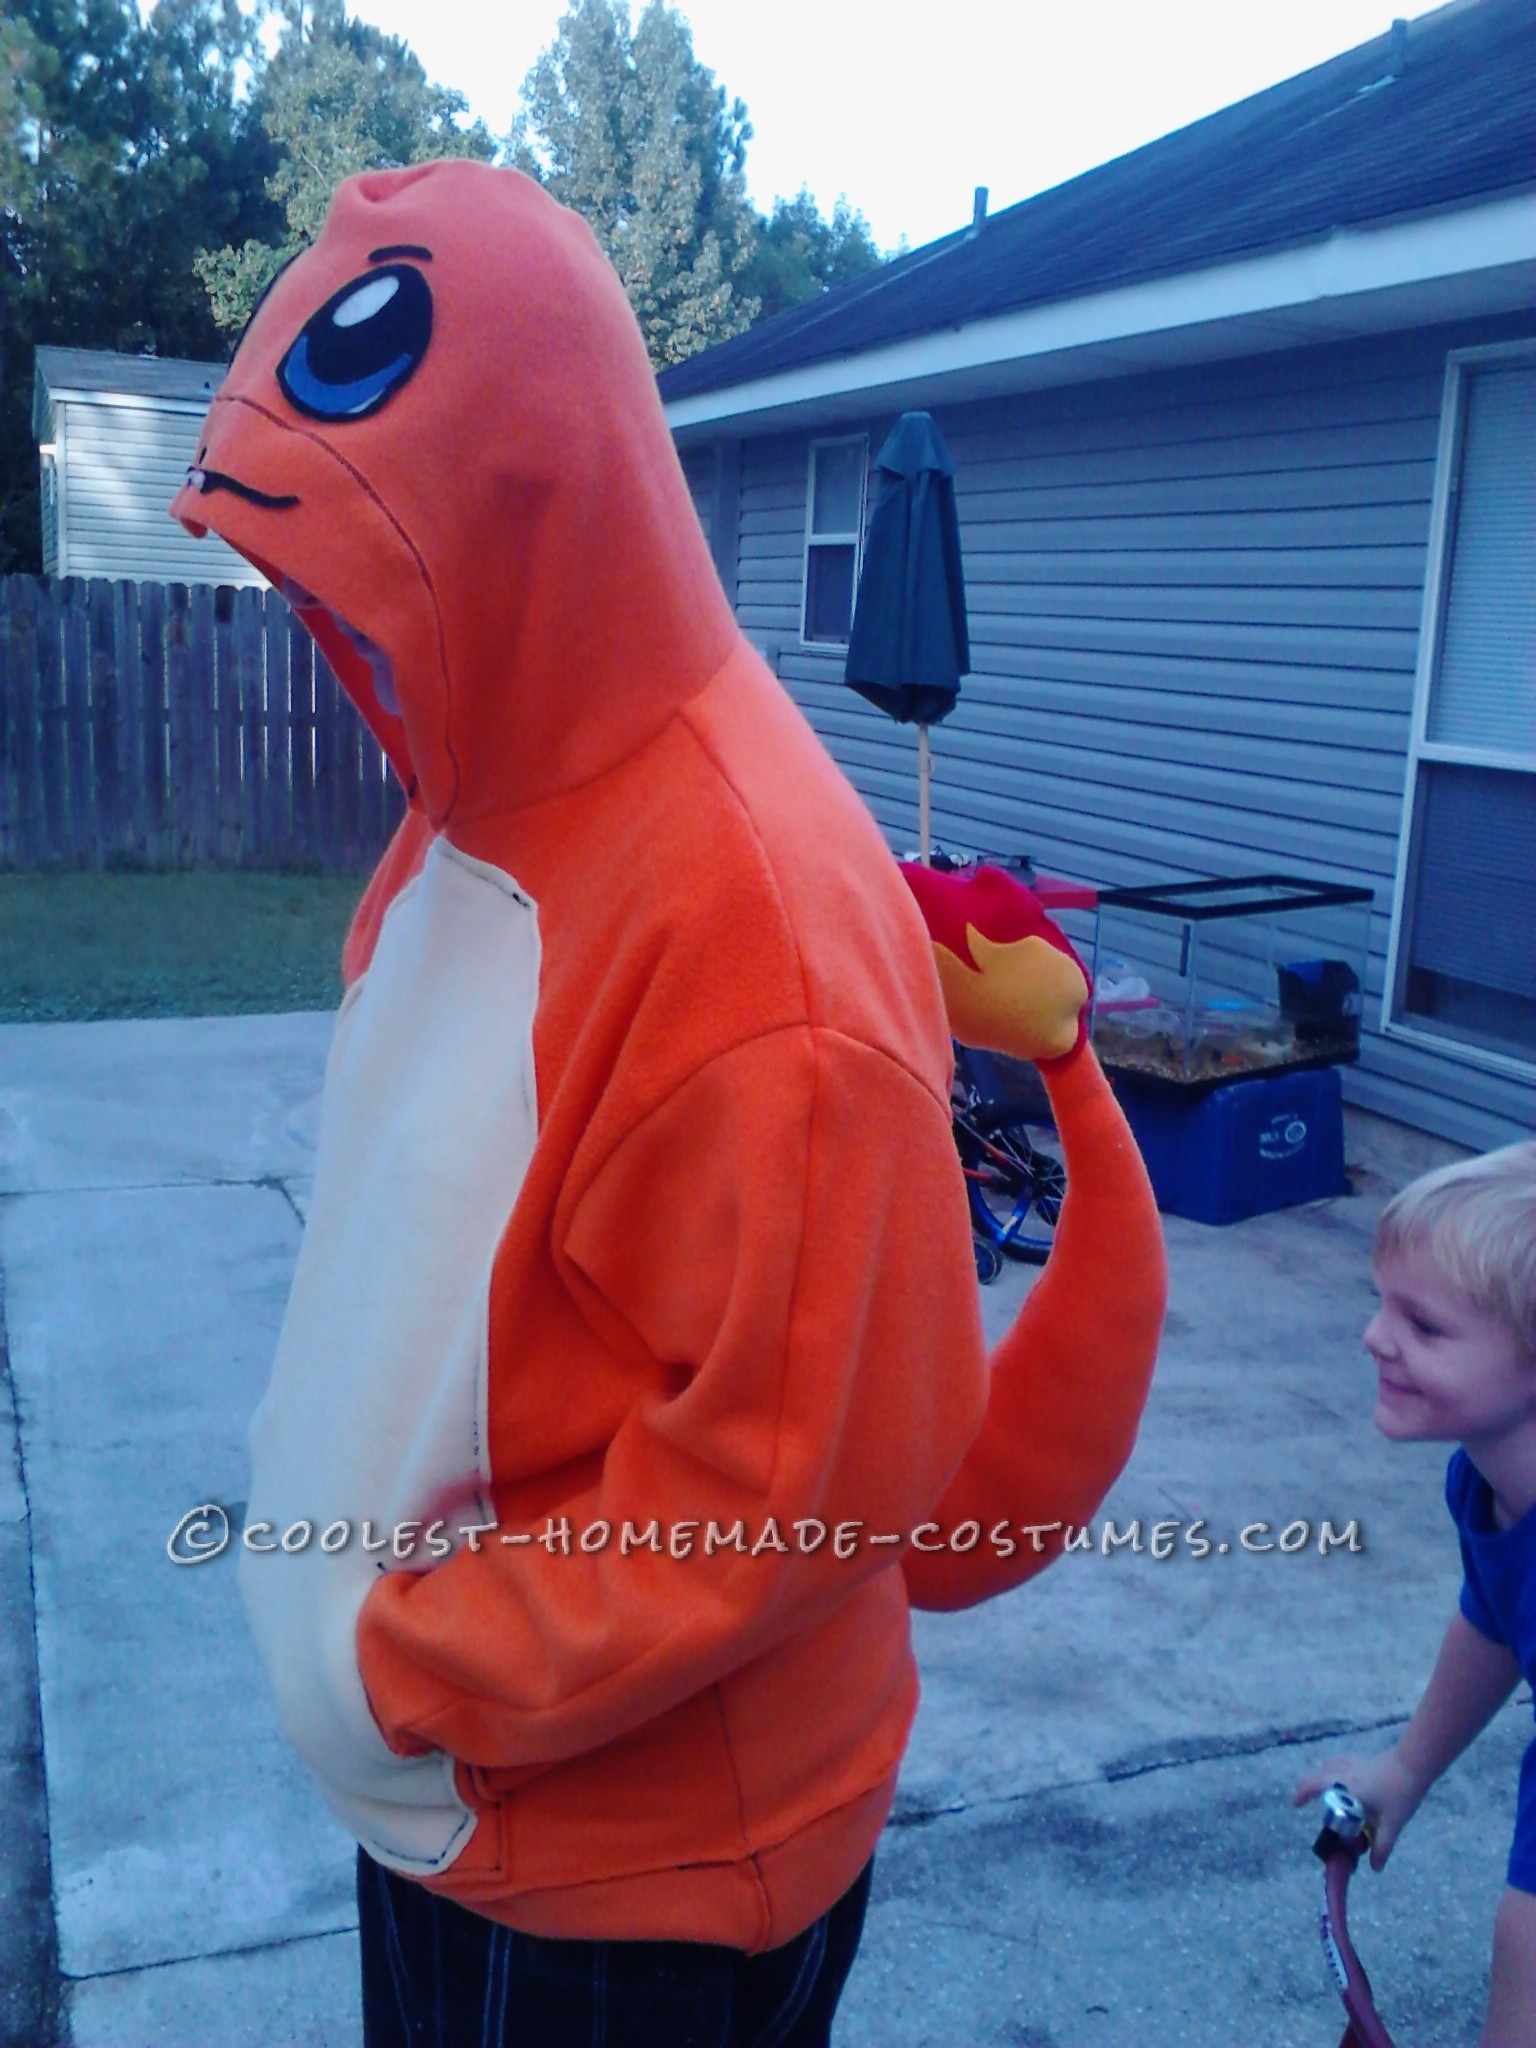
Pokemon is our theme this year for Halloween as chosen by my boys. Zander chose Vaporeon, Kaiden chose Squirtle, and I chose Charmander. All of these Pokemon have been done before by various people online for Cosplays and such; however, none of them had instructions for the sewing-challenged like myself. I scoured the world wide web and saved photos of different interpretations of the 3 Pokemon into costumes as well as photos of the Pokemon from front and back views to use as reference. It took a lot of time, work, and trial and error to get it done but I’m happy with the result and hopefully I took enough pictures and can explain the process well enough that you can make your own without having to reinvent the wheel to do it.
Materials:
- fleece: orange(2 1/2 yards), light yellow(1/2 yard),
- *note* these amounts are estimates of what I used. I bought much more than I needed so I’m guessing on how much I actually used. And this was for an adult about a size large.
- felt paper: 1 sheet each black, white, red, yellow and your choice of color for the eyes
- sewing supplies: machine, pins, needles, thread, scissors
- poly fiber stuffing
- spray adhesive
- various: pencil, fabric marker, correction pen (white out pen), exacto knife
The Hoodie:
I had trouble finding a hoodie pattern. The only one I could find in stores was $16 and I wasn’t about to spend that much so I just used one of my hoodies and traced the parts for my pattern. The hoodie I used was a size XL, but I didn’t add seam allowances so the final hoodie ended up quit a bit smaller than the one I based it on.
I took photos of my patterns and used Photoshop to add the measurements, enlarge them to that size and divide them up on normal paper sizes, so in theory, you should be able to print them and tape them together. Here I have attached the sleeve, pocket, hood, tail, and front body. I didn’t include the back body pattern (forgot to take the photo), but you just add a little on the collar line like the picture shows in light blue.
PREPERATION:
Prepare your patterns. Trace the sleeve, front body, back body, pocket, hood, and tail on orange fleece.
***note*** You may want to trace the pocket on the yellow because the belly color will include the section the pocket needs to be. I forgot about the belly color and had to add the yellow over the pocket that I had made in orange***
All of these pieces need to be traced onto folded fleece. The patterns are labeled with which side needs to be on the fold. The tail does not use the folded edge, you just need 2 of them so its easier to trace on a folded piece and cut once than to trace and cut twice.
**note** I wanted my hood a little bigger so I added an extension afterwards.**
***note*** I added a band at the bottom of mine. If you want to skip that step just make your body pattern longer by a few inches.**
Cut out all your pieces. You should have 2 sleeves, 1 pocket, 1 front body, 1 back body, 1 hood, and 2 tails.
Open up your front body piece and lay it out. Use paper or poster board to draw the belly color pattern. I forgot about this part and thus didn’t make a real pattern like all the other parts. I added the belly color after the rest of the hoodie was already finished. (see photo) Cut out pattern and trace it onto a folded piece of the light yellow fleece. Cut it out.
ASSEMBLY:
Let’s start with the body. Get the front body panel and the back body panel. Open them up. Align them one on top of the other with the right sides together (marks from tracing facing out). Pin along sides and shoulders. Sew sides and shoulders. Leave the arms, neck, and bottom open. Set aside.
Prepare the sleeves:
You have 2 sleeve panels both are folded over already from cutting out. One at a time, pin the long side and sew. Leave both ends open. Turn inside out so the sewed edges are on the inside. Now you have 2 tubes for the sleeves. Set aside.
Prepare the hood:
The hood is already folded from cutting out. Align and pin the curved part which will be the back of the hood. Sew, leaving the bottom and front open. Turn inside out like the sleeves. Set aside.
Add the sleeves:
This is a little tricky and hard to explain without pictures (which I don’t have). Grab your body section and one sleeve. You need to insert the sleeve into the body through the arm opening, small end first. This way the large opening can be aligned with the arm hole. *The body is still oriented with the sewed edges facing out but the sleeve is oriented with the right side facing out.* Pin the sleeve to the arm opening and sew. When finished, reach in and pull the sleeve out. Now both the sleeve and the body are oriented with the sewed edges facing out. Repeat with the remaining sleeve.
Add the hood:
This is the same as adding the sleeves. Insert the hood inside the body through the neck opening, closed side(top) first. Make sure the seam at the back of the hood is aligned with the center of the back body panel. Align the hood with the neck opening, pin, and sew. Reach in and pull the hood out. Now the hood and the body are oriented with sewed edges facing out.
The Band:
If you want to add a band cut a really long piece of folded fleece about 3 inches wide (6 inches wide when unfolded). I inserted the bottom edges of the hoodie into the opening of the band and pinned (one side of the band on the inside and the other side on the outside). Sew the band on all the way around the bottom. Let the band overlap a little and cut off the excess. Then sew the open end closed.
Flip the entire hoodie inside out. Go ahead and try it on… I know you want to. Now that is out of your system, we move on.
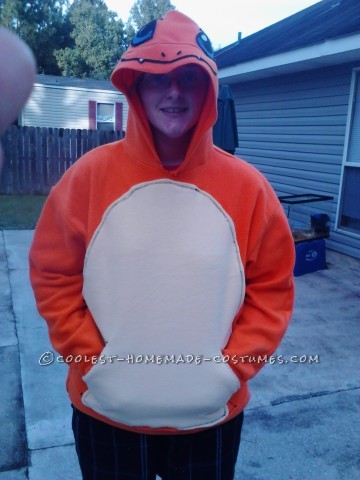
Okay, here is where you learn from my mistakes. I sewed on the pocket in orange and it caused issues for me later when I added the yellow belly color. You should first align, pin, and sew the bell color to the front of the hoodie. Then align, pin, and sew the pocket that was traced on the yellow over top of that.
To sew the pocket on align the center of the pocket (the fold) with the center of the body along the bottom edge of the hoodie. Pin in place. Sew along the bottom, top, and sides. Leave the diagonal side open.
If you did the pocket first, now you have to align and pin the yellow belly color on. Cut the yellow fabric on a diagonal paralleling the opening of the pockets. Pin one edge to the pocket opening and the other edge to the front panel as seen in photos. Sew all but the section on the pocket opening. Hand sew the pocket openings.
The Tail and Flame:
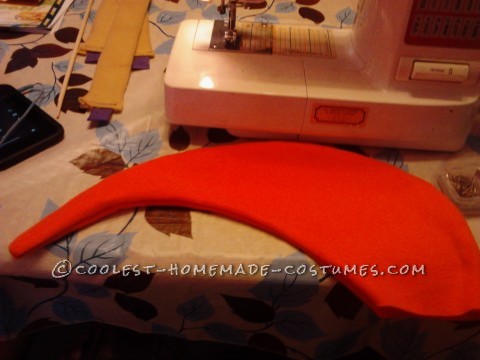
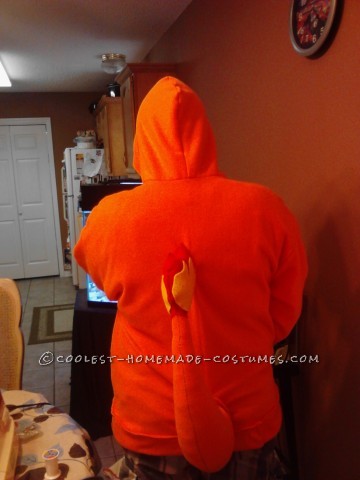
So we already cut out our tail pieces in the previous step. Align the 2 pieces and pin together. Sew all but the large end. Turn inside out and stuff with the poly-fiber stuffing. Set aside.
Flame:
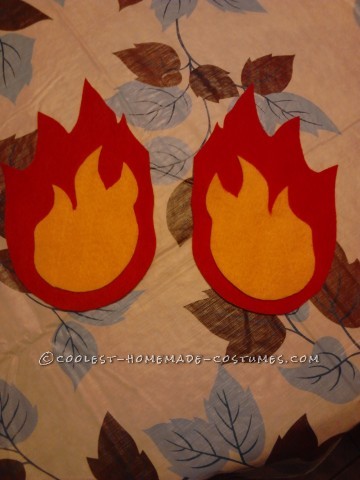
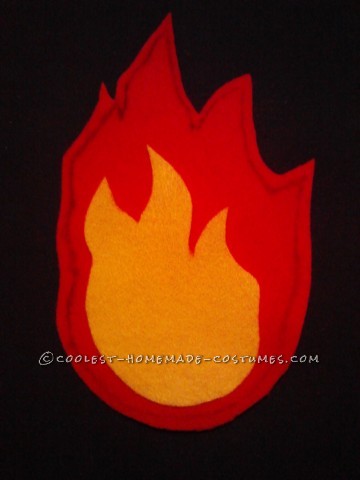
I’ve included the flame I drew. It should be the right size so just print it and trace it onto a piece of folded red felt. Cut out. You should have 2 red flames.
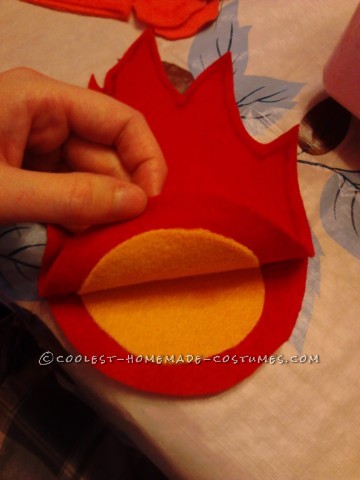
Cut the pattern on the line of the smaller flame. Trace the smaller flame onto a piece of folded yellow felt. Cut out. You should have 2 yellow flames.
Turn 1 of the sets of flames (a yellow and a red) over so you have mirror images( see photo). Go outside with a can of spray adhesive. Spray the back of one yellow flame and apply it to the front of one of the red flames. Repeat with the other set. ***Make sure the 2 sets are mirror images so when you align the 2 for sewing, the yellow flames face each other.***
Align the 2 flames, yellow flames facing each other. Pin and sew all but a few inches at the bottom, just enough to be able to turn it insides out and stuff. Turn inside out. Now the yellow flames should be showing on the outside. Stuff the flame. Sew most of the gap you left. Leave just a little section open, just enough to accommodate the small end of the tail.
Assemble the tail:
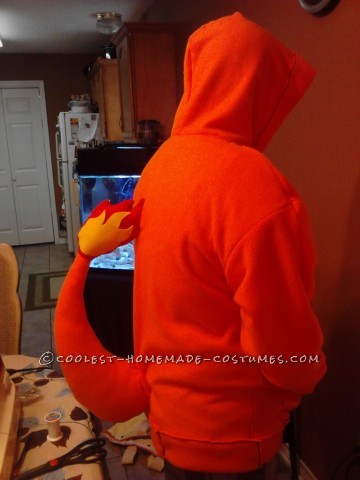
Now insert the small end of the tail into the hole we left in the flame. Align it so the seams of the flame align with the seams of the tail.(see photos). Pin and sew the opening closed to the tail.
Apply tail to hoodie:
Arrange the tail on the back of the hoodie where you want it. Press the open end of the tail to the hoodie so that the sides of the opening are touching the hoodie on both sides of the tail. (one side of the opening gap on each side of the tail). Pin and sew in place and cut off any excess. Align the side of the flame on the back of the hoodie where you want it. Pin and sew in place. It is a bit difficult to keep it in place but it is possible.
Again, give in to temptation and try it on.
The Face:
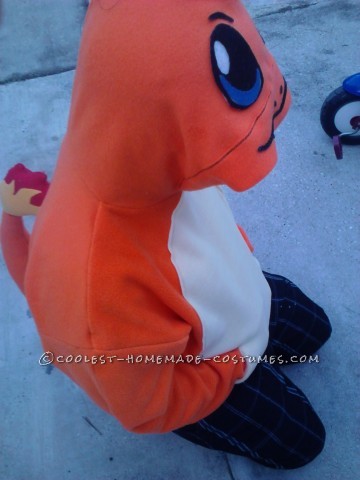
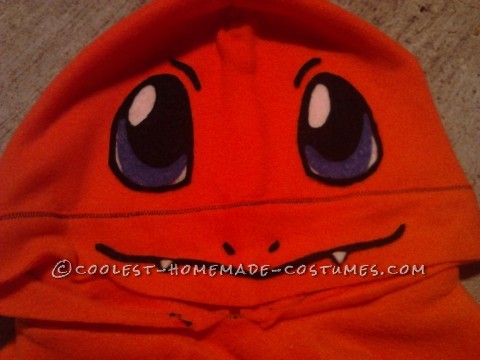
Almost finished. Just the face remaining.Print out the Charmander face I have attached. Carefully cut out each section of color with an exacto knife. You should have 2 black eye pieces, 6 white eye pieces, 2 colored eye pieces, 2 black eyebrow things, 2 black nostrils, 2 white teeth, 1 black mouth with teeth.
Trace each of the black pieces on a piece of black felt. Use the white-out pen to trace on the black. Trace the color eye pieces to a piece of felt of your desired color. Trace the eye openings left in the paper on white felt. Its easier to just free hand the white triangles for the teeth than to trace those little things.
**note: trace all the pieces flipped over so the marked side will face down in the end**
Cut out all the pieces. Carefully cut out the openings in the black eye pieces. The black eye pieces should align perfectly on top of the white eye pieces. The colored pieces may be a bit too big to fit in place like they should, leaving those little slivers of white on the sides so just trim them until they fit correctly. Check the fit of the white triangles on the mouth. When you are happy with the alignment take all the pieces including the paper we cut it out from and the hoodie outside with a can of spray adhesive.
Spray the white section of one eye with adhesive. Align and press the corresponding black piece on top, followed by the colored piece. Repeat for the other eye. Spray both white triangles with adhesive and stick them in place on the mouth piece.
Lay out your hoodie with the hood centered and flattened so we can apply the face. Take the paper we cut the pieces from and use it as a stencil to help with the placement of the parts. Lay the paper on the hood how you want it.
Turn over one eye. Spray with adhesive and stick it to the hood through the opening in the paper. Remove the paper and press the eye firmly to the hood. Replace the paper and repeat with the other eye. The same goes for all the other pieces; however, these pieces will most likely be a little bigger than the opening so it takes some finagling to get them on through the holes.
And we are done. I’m looking forward to wearing it this Halloween.






Thanks for the instructions! I’ve been looking for a Charmander costume for my brother’s baby Charlie. SO he can be a Charliemander
Thanks for the instructions! I’ve been looking for a Charmander costume for my brother’s baby Charlie. SO he can be a Charliemander