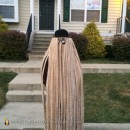
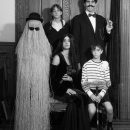
Cousin Itt was always one of my favorite characters in the Addams Family TV series. I really wanted to do this for Halloween this year and soon discovered the only way to do the costume was to build it myself. I’m a really short pipsqueak, so figured I could pull it off.
Searching high and low for “Cousin Itt” costumes yielded one conclusion, get a LOT of hair and cover myself with it. The challenge was to get that much hair (given my very limited budget) and cover myself head to toe???
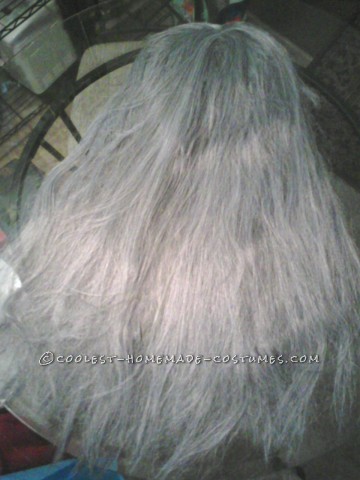
First, I searched the web for ultra-long wigs. OUCH…expensive!! Okay, I give up. Then, seeking an alternate costume idea, hubby and I went to our local Goodwill store. There I discovered lots and lots and lots of very cheap hair! Only problem was….it was in the form of gray witch wigs. Not to be deterred, I bought everything – all six wigs. This resulted in a net yield of about 8 pounds of streaky gray synthetic hair.
Next on the agenda was coloring. Cousin Itt was not gray! (Well, he might be after all these years,but ‘Cousin Itt on Medicare’ wasn’t my costume goal). I searched for a way to “dye” synthetic hair and found a solution….a mixture of acrylic artist ink and isopropyl alcohol. This mixture could be sprayed on the fake hair for more-or-less permanent coloring.
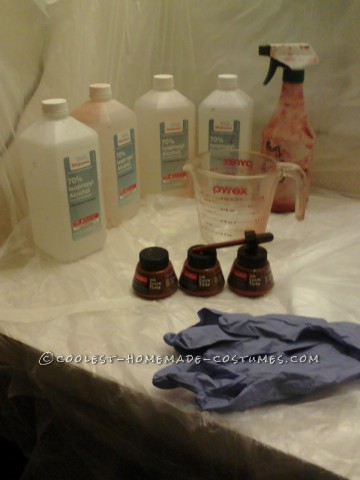
Off to the hobby-craft store I went and there I purchased three bottles of Burnt Umber Speedball Ink. Next stop was the local Walgreen’s drug store for 6 bottles of 70% isopropyl alcohol. Last stop was at Lowe’s Home Improvement center where I grabbed some cheap plastic drop cloths. I had an old “Windex” spray bottle at home, so figured I was good to go.
One more stop, back to the Goodwill store for something to sew the hair to. Again, got lucky and scored a dark brown bed sheet for a few bucks. This would subsequently be sewn into a hooded sheath that the hair would be sewn to. We don’t have any sort of garage or workshop so I commandeered our bathroom for the spray-up/dyeing project.
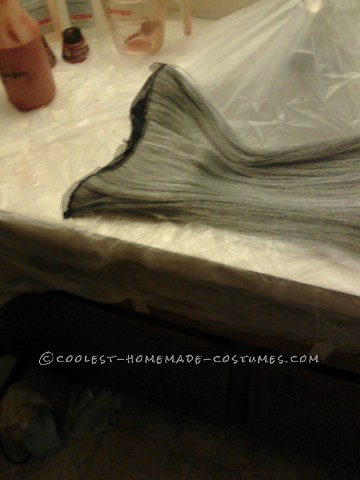
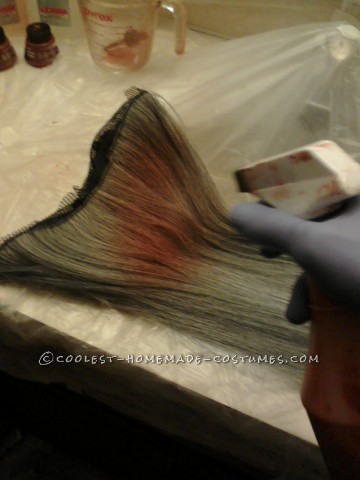
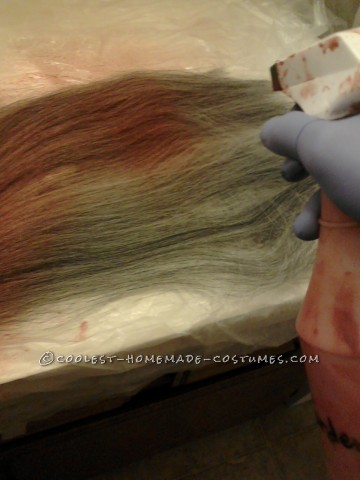
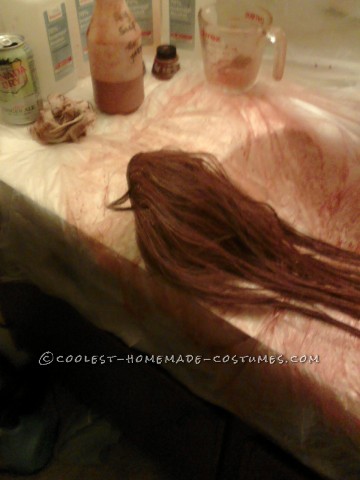
First, I cut the wigs apart, which rendered many sewn-together 12-14 inch “wefts” of hair (I learned a “weft” is a bunch of hair sewn into a linear strand). Turning the bathroom into a spray booth was a fairly simple matte, as the pics will attest. Lots of plastic was taped to the mirror and walls so the red-brown spray would be contained.
Next, using an eye dropper, I mixed 7 droppers of ink to one cup of alcohol. Put it in the spray bottle and shook it to mix well.
Ready…..set……GO!!!
Laid the first ‘weft’ of hair on the plastic-draped counter and began to spray. OH MY! The gray strands slowly took on the red-brown ink color, but it was running all over the place. Quick, how to evaporate the alcohol so ink pigments would stick to the hair? Dug out the blow dryer, set it on the lowest setting and began spray and blow. Yes, the ink began to “set” quickly, but droplets soon covered my makeshift spray booth. Looked like Norman Bates had paid a visit.
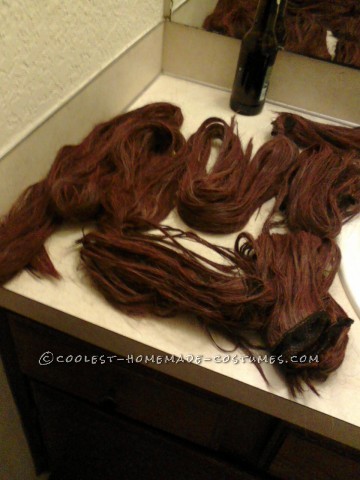
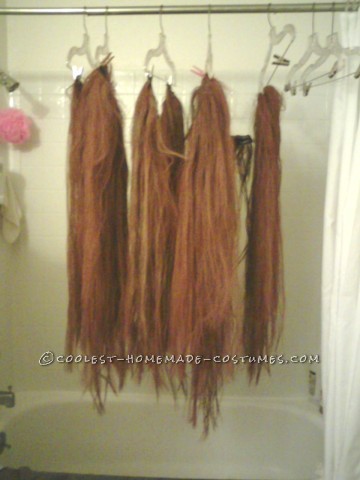
I didn’t let the mess stop me and proceeded to “spray-dye” all the wefts over the course of three evenings. As each was sprayed, I used a cheap Dollar-store hairbrush to distribute the dye through the strands, blowing with the blow-dryer all the time to set the “dye”. Once sprayed and semi-dry to the point of not dripping too much, I hung the newly-brownish hair to dry on coat hangers suspended from the shower rod (after seeing that, I’m sure hubby will never again gripe about drying lingerie over the tub).
Day four: Once dry, the ‘wefts’ had to be rinsed. Figuring this wasn’t going to be quite as messy as the dyeing process I didn’t bother to drape the bathroom in plastic. I filled a sink with warm water and “squished” each ‘weft’ of hair until I could see the excess ink bleed off into the water. Uh Oh….how am I going to de-tangle this mess? Pantene to the rescue! I placed a dime-size blob of hair conditioner in my hands, rubbed it into the weft and managed to work my Dollar-store brush through what resembled wet dreadlocks.
Again, each weft was hung from the shower-curtain rod to dry. This time, excess ink kept dripping, but at this point I was simply too lazy to rinse all that hair one more time. I figured once it dried, it wouldn’t rub off much. This was “Norman Bates Moment #2″….all the leaking red-brown ink in the bathtub looked like a zombie-fest had taken place. All showering activity in our household was suspended until I attacked that mess with scouring powder.
At last, lots and lots of hair was dyed, rinsed, combed-out and dry, ready for final assembly. Now, while the hair was drying I had to come up with something that met certain criteria:
(1) I could sew the hair to;
(2) I could get in and out of;
(3) I had to be able to eat, drink, go to the potty. (the last being the most serious challenge).
I sewed the brown bed sheet into a more-or-less tubular shape, just big enough for me to shinny into. I made an opening for my face, then a slit down the front below my chin. Thus I could step into the costume instead of trying to pull all that hair over my head and subsequently de-tangle it again. I attached Velcro to the front opening so it could be closed once I was in the costume.
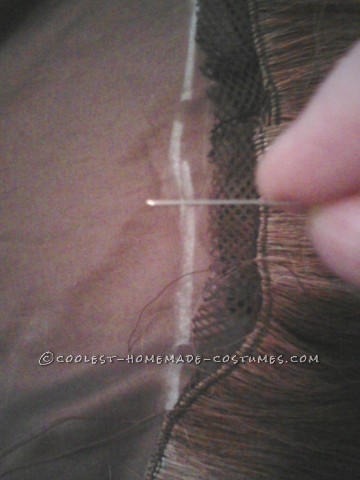
After measuring the lengths of hair, I divided the hair wefts into four sections that would be sewn in layers onto the brown ‘sheath.” I then used chalk to mark on the sheath where each layer would be sewn. I left arm holes in each side and decided wear a black long-sleeve T-shirt and black gloves (I figured this out after watching a few Addams Family re-runs featuring Cousin Itt).
I laid out the whole mess on our dining room table and commenced with final construction. Each ‘weft’ of hair was hand-sewn to the brown sheath. Surprisingly, this was easier than I anticipated, though very time consuming.
At first try-on I was really excited! Hubby had some “Beatles” round sun glasses that he donated and I’d also scored a derby (bowler) hat at a thrift store. Once I had all the minor props in place (glasses, hat,gloves) I grabbed hubby’s glass of beverage, flashed a hippie peace sign and hubby snapped the picture of the now-finished costume.
Lots of work, but it was worth it! I wore it to a Halloween costume ball on 10/26 and it was a huge hit, lots of people wanted pics taken with “Cousin Itt”. Got loads of compliments and positive feedback.


When was this made? How many wigs did you actually have to use? I can’t see only six being enough.
Sorry I haven’t answered sooner – just now saw your post.
Six wigs was indeed enough because they were pretty thick wigs. I thinned them out, cut them into strips, and sewed them onto dark brown fabric, so they no longer looked thin. I just had to be careful that no skin showed through all the hair when I moved around too much. I danced a lot at the costume party (and even won a $200 second-place prize!) and at no time did I have issues with the hair being too thin in places. If you get cheap enough wigs, just buy a huge bunch and make the hair as thick as you want as you sew it to the “sheath” made of fabric. A word of warning, though….it’s HOT in there!!
When was this made? How many wigs did you actually have to use? I can’t see only six being enough.
Sorry I haven’t answered sooner – just now saw your post.
Six wigs was indeed enough because they were pretty thick wigs and were thinned out, cut into strips, and sewn onto dark brown fabric, so they no longer looked thin. I just had to be careful that no skin showed through all the hair when I moved around too much, but I danced a lot at the costume party (and won a $200 second-place prize!) and at no time did I have issues with the hair being too thin in places. If you get cheap enough wigs, just buy a huge bunch and make the hair as thick as you want as you sew it to the “sheath” made of fabric. A word of warning, though….it’s HOT in there!!