Well, the debate started at the beginning of the school year. I make Halloween costumes every year cause I can’t bring myself to buy them. It’s like a drug! I stress out every year, but I can’t help myself!!
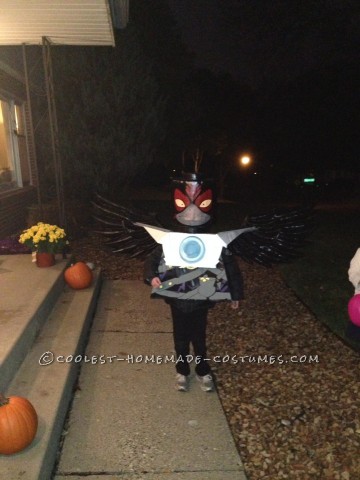
ANYWAY, I asked my 3 kids what they wanted to be and my 7yr old son says a Chima Lego figure. I was like what?! He’s got one Chima figure and never plays with it, so it was completely out of left field. I tried to steer him otherwise n finally decided I wanted to take on the challenge.
it was a LOT of work!! I do not have a handy hubby, so we have no tools like saws or even sandpaper. All of it was completely by hand.
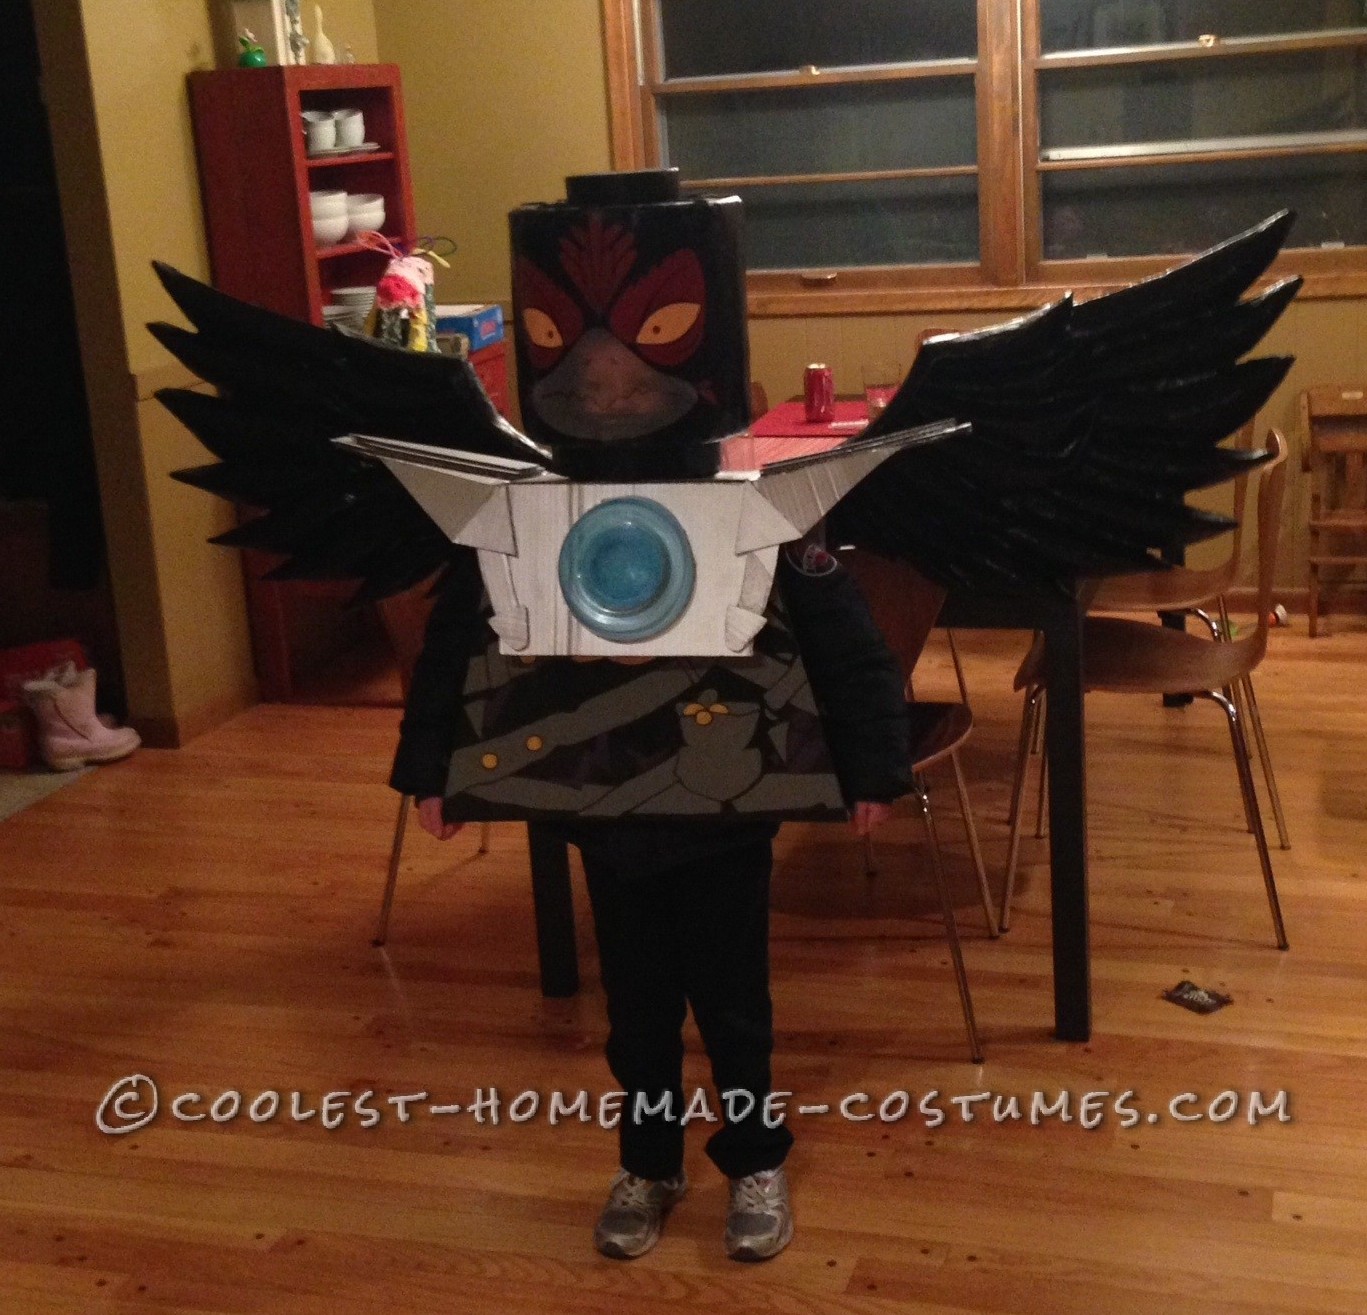
BODY: I measured my son’s shoulder width to make the tapered shape of the body and added 4″ to each side at the bottom. I cut poster foam board into the shape needed for the main body. I taped the 5 pieces together (top, front, back, n 2 sides). I then cut holes for the head n arms. I spray painted the body a shiny black. Then I drew the body art on free hand with a pencil and painted it all in with craft paint.
HANDS: I bought pop coozies at Michael’s. They have 5 different colors and one happened to be purple like I needed. You just pull the bottom out and cut in half. On the opposite side of the cut you make an X cut big enuf to squeeze the hand through.
This is where I wandered around Home Depot like a moron for some foam board. They’re very helpful even though I showed them the lego I was making for a Halloween costume. I bought a 2″ thick piece of home insulation board. They had to cut it in half, so I could fit it in my van. At this point I was like what the hell am I getting into?!
HEAD: I cut 2 big circles out of the insulation for the head or I should say rings. I sanded the edges to make them rounded. Then I measured out how many inches around they were n cut a piece of white poster board 10″ high n so many inches around. I spray painted the white poster black, freehanded the lego face with pencil n painted it in. I cut out the beak part for my son to see out of n glued some white see through fabric I happened to have lying around. I then glued the poster around the two foam insulation rings. I also cut a small circle out of the insulation foam for the top of the lego head.
Now, the most important part about home insulation foam or any other foam probably is you can’t spray paint it. It will disintegrate. I researched how to get around that and the solution I chose was paper mâché. I paper mached every piece of foam I cut out. I used 3 parts flour to one part water. You make it whatever consistency you’d like. It took forever!!!!! I hated it, but it really worked.
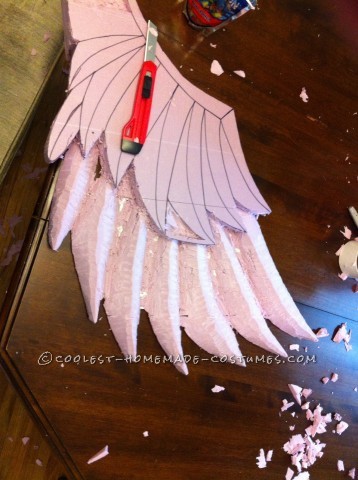
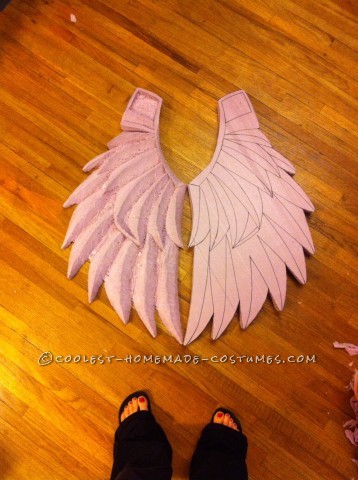
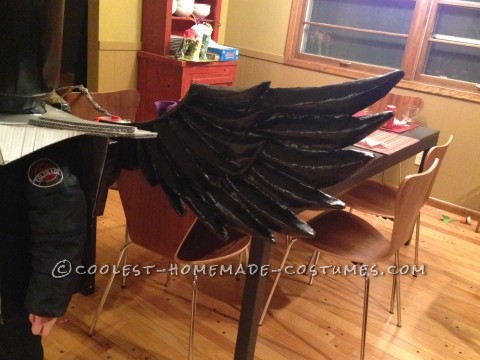
WINGS: These were the best feature of the lego n the hardest. I was stressed out n not sure where to start. The insulation foam was bittersweet. First I decided how big to make the wings. Each wing was 3ft long n 2ft wide maybe. I drew the wings on poster board. I just held a little lego wing in my hand n tweaked it over n over on the poster board til I was satisfied. Check out the posted pics for a better understanding. It’s hard to explain this stuff! I traced my cut out wing drawing on the insulation foam. One time was right side up n the second time was wrong side up. The carving was a nightmare!!!!! It took me a few days n the whole family was wading around in a sea of foam chunks n shavings. I used a dollar store utility knife. I’m extremely proud of them. After paper mached them, I realized how well I had done (patting my own back). Of course, i spray painted them black too.
ARMOR: I made this out of cardboard, duct tape, n a hot glue gun. The bright blue round piece on the front was hard to figure out. You’d have to see the real lego figure to understand, but I just cut up a Tupperware container n colored the inside with a blue marker n hot glued it on.
I chose not to do legs because little kids don’t have much patience. Past experiences with difficulty walking made me skip that part. I also didn’t make the really cool helmet the lego wears because I developed arthritis in my hand from carving the wings!!! JK! I’m pretty sure I could have done it, but I was running out of steam.
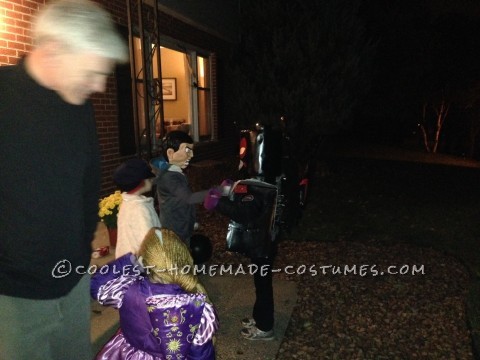
We got to take pictures of the costume, but before we could go trick or treating my little man bumped into his uncle n broke a wing off!! I was a little sad, but we decided to take the wings off while he walked around. Most people loved the costume without knowing what it was exactly. My son loved it for sure!
My hubby thinks I’m crazy for all the work I put into the costume n only a couple hours of wearing time, but I love the look on people’s faces when they see a costume they’ve never seen before. Every year you see the same costumes hanging in the stores. A homemade costume is so refreshing and the appreciation is so great. Plus, my kids will always remember mom making those crazy costumes they asked for every year!!!





Wow, I ran across from someone else pinning my kids’ LEGO Chima costumes. Your costume is amazing! My older one was Laval this year, and our younger one was Leonidas.
Any chance you’d love to let another kid use it this year? My son LOVES Legos, but no way can I make that happen before halloween. Can we buy it off you? : )
We’ll send you pictures! Then it will get at least double the hours of wear and we promise to pass it on!
any chance you’d love to let another kid use it this year? my son LOVES legos but no way can I make that happen before halloween. can we buy it off you? : )
we’ll send you pictures! then it will get at least double the hours of wear and we promise to pass it on!