After seeing Gauardians of the Galaxy, I knew I HAD to make a Rocket costume! He’s just so furry, sarcastic, and amazing! Just like me! Well, minus the fuzzy part, ha ha ha ha!
There was a convention happening in my city in just over a month and I set a goal to make it for then. And so armed with my wacky, crafty brain, and a list of supplies, I set forth to make Rocket a reality
The costume started off with the quest for a head. I knew that sculpting the head was going to be difficult to do with such a short time frame, so I hunted around for a mask that I could use. I happened to come across the child’s Rocket mask with the moving mouth, and luckily for me, I have a small head. Perfect!
After the quest for a head was completed, I headed off to the fabric store for furry goodness! There wasn’t much of a supply of fur, but I managed to find a nice beige and dark brown fur that would work well. The movie version of Rocket has more light brown/beige fur as opposed to the comic book version that is the traditional grey and black. I left the fabric store with at least 10 pounds of fur and other fabric, and a much lighter wallet. I headed home to start work on the costume.
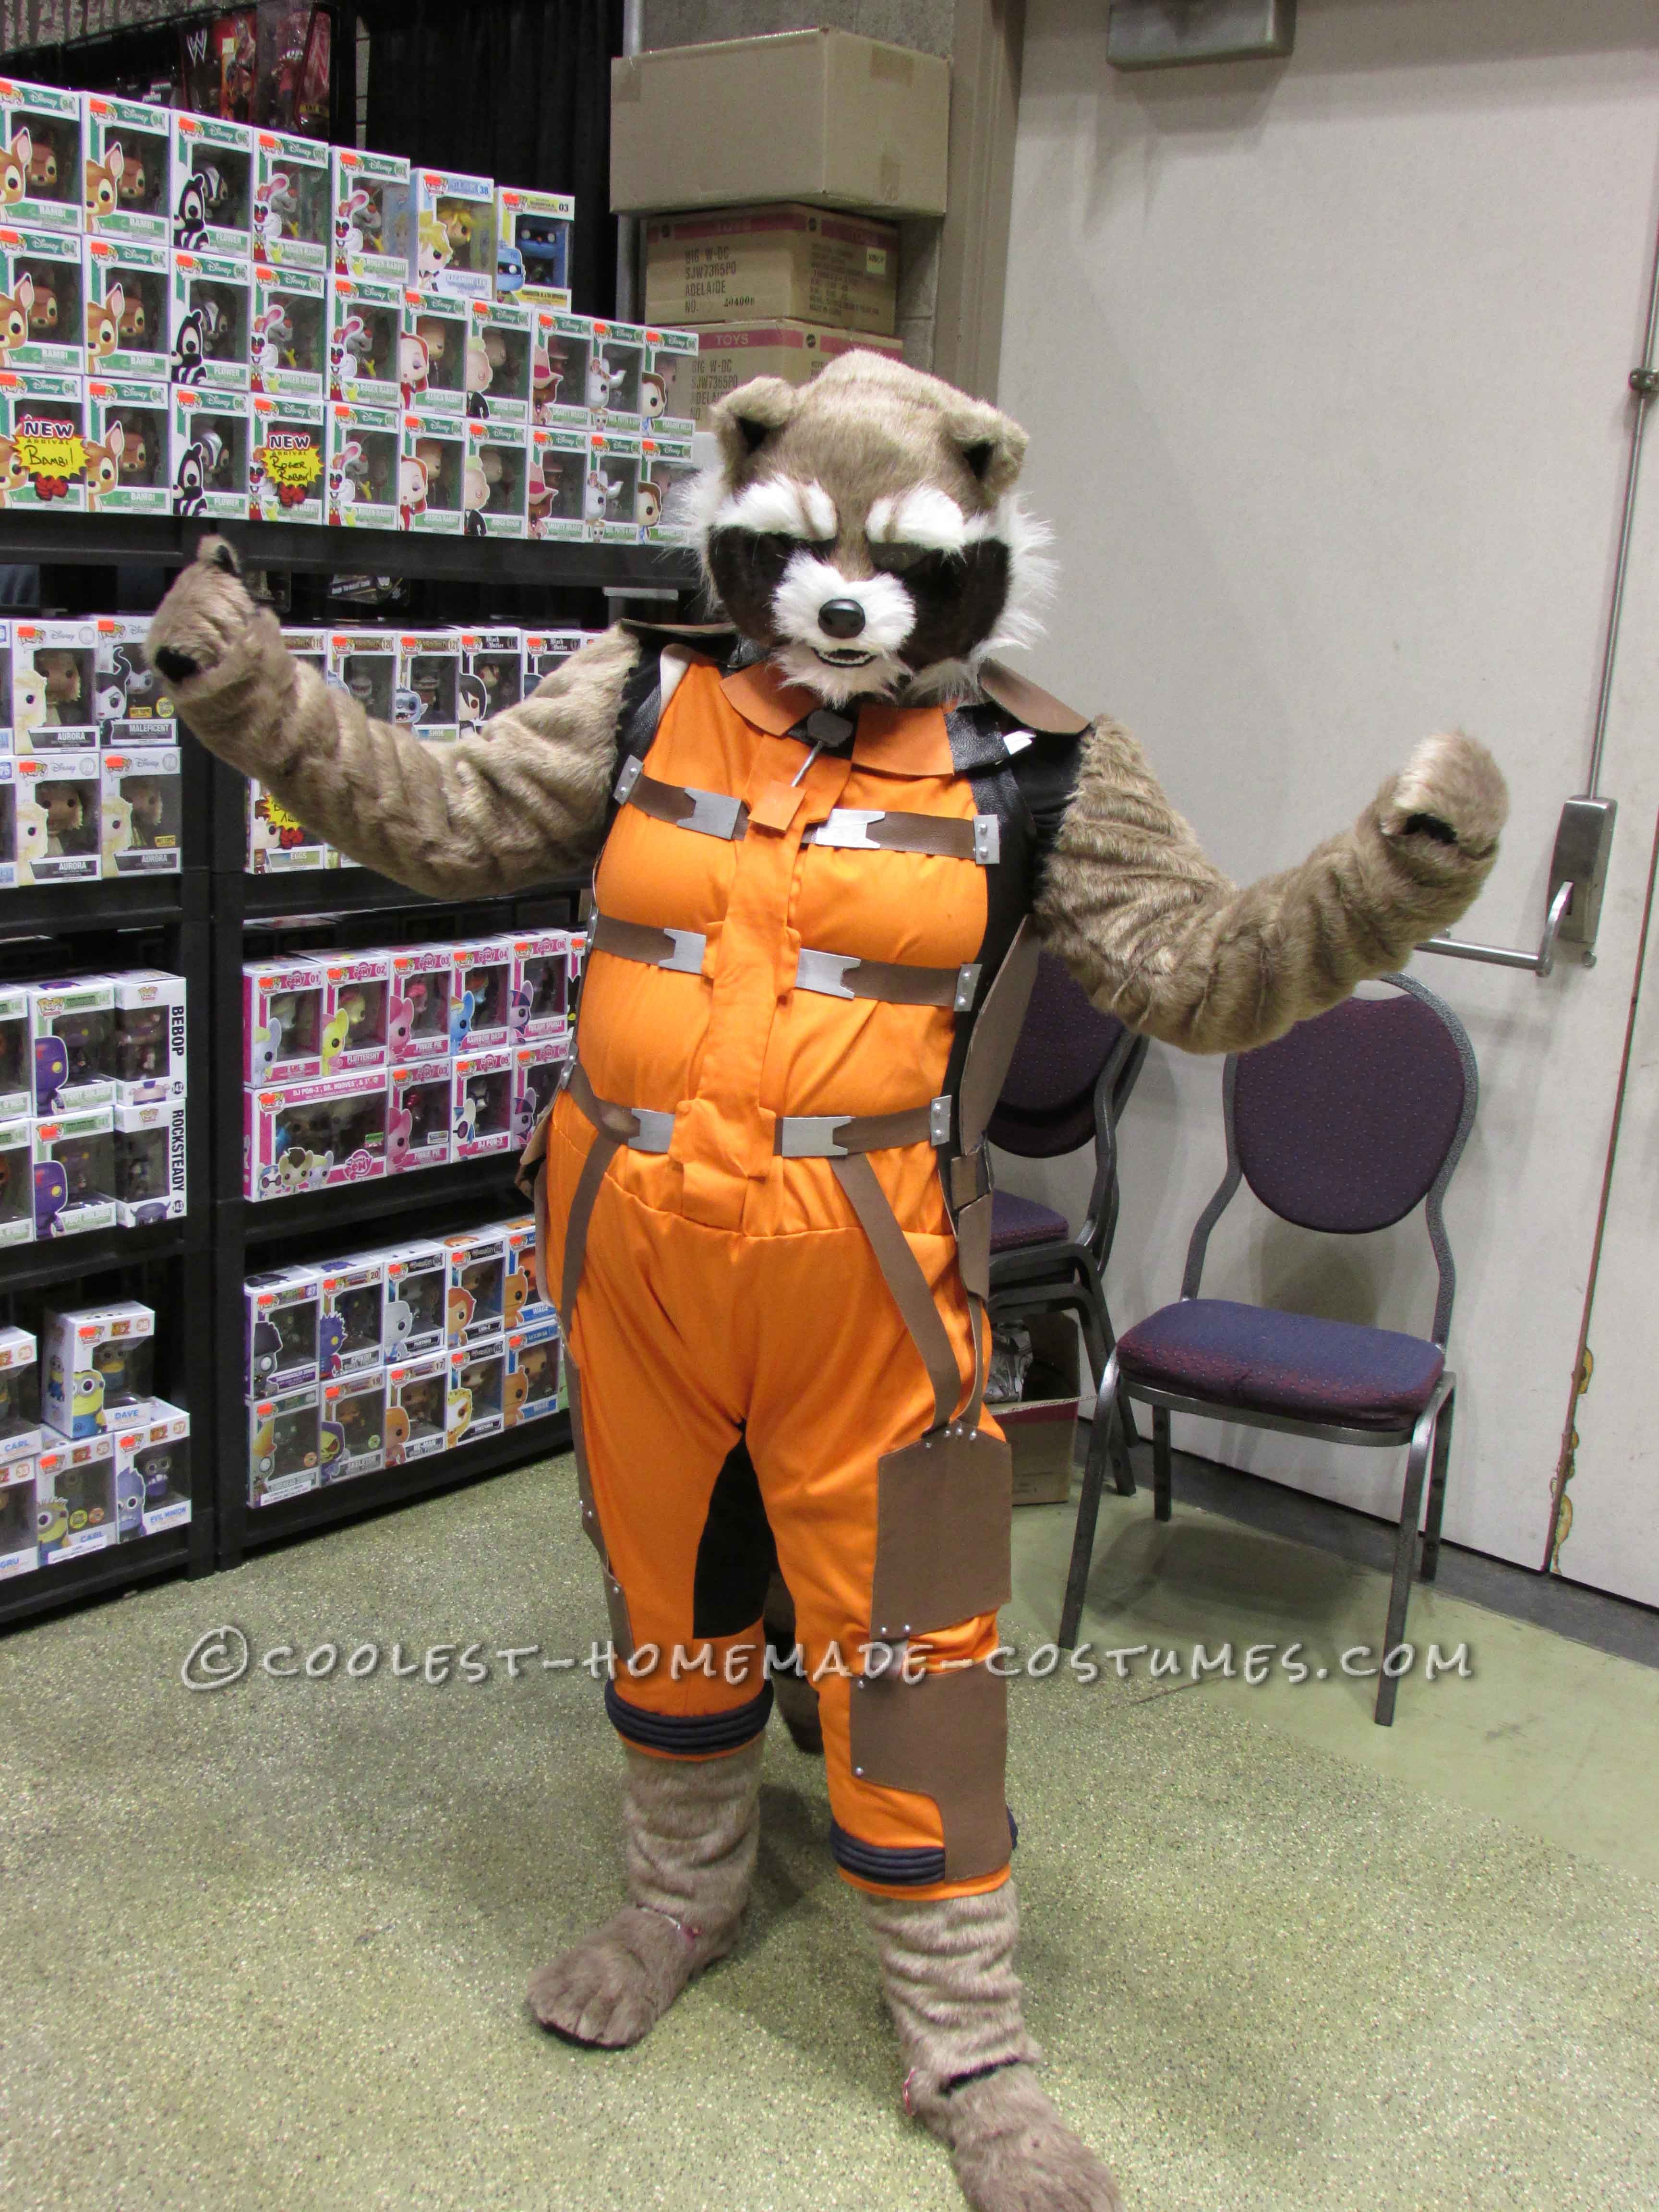
Since a pattern for this costume doesn’t exist, I used existing clothes and sketched out my own patterns. Thank goodness for my Fashion Design night courses! The orange bodysuit pattern was crated from a pair of capris and a tank top. This, along with the tail, were the only two pieces that were sewn with a machine. I wasn’t able to access a sewing machine after a week into working on the costume, so everything else was sewn by hand. My fingers still hate me to this day.
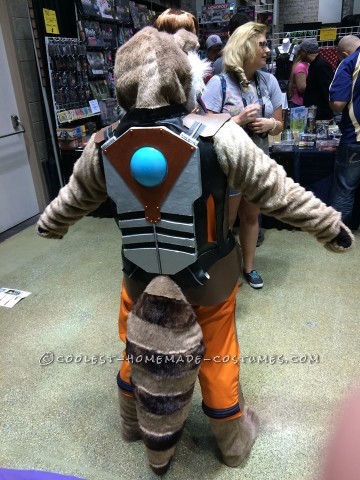
The backpack that he wears was created completly by scratch from vinyl, fun foam, some zippers, a touch light, and two piece of the foam puzzle floor mats. All of the vinyl was beige when I first bought it (It was on clearance, YAY DEAL!) So after cutting out all of the pieces, I had to paint everything in glossy black, flat black, and brown. I cut the center portion from the foam puzzle pieces and fun foam. I ran into problems with the puzzle piece foam though as no matter how many coats of paint I used, I wasn’t getting good enough coverage of the silver paint and you could still see the black foam underneath. I ended up making a slurry of paint and artist molding paste (similar to wood filing compound) to make a thick base for the paint to stick. After FINALLY getting the silver to stick, I used a colored glue poured over the touch light to make the center light. Unfortunately, the light inside wasn’t bright enough to shine through but that didn’t matter too much. Everything was glued together with Fabri-tac glue and Velcro was added on the straps to secure it. Small fun foam pieces were added as details.
As for the arms and legs, I measured and used my personal fashion design blocks (again, Yay for Fashion Design night courses) to make the arms and lower leg fur pieces. I sewed the seams on those by hand. I then sewed them onto an existing pair of leggings and a long sleeved shirt. I also added a puce on the front of the shirt to hide the chest portion and my neck.
The gloves were just a cheap pair of knit gloves from the thrift store. I traced them out onto the fur and then sewed the fur to the top of the glove.
As for the feet, I bought a cheap pair of flat soled shoes. I then used a cutoff from the puzzle foam to extend the foot by about 1 1/2″. To create the toes, I used Crayola model magic to mold toes and after it dried completely, covered the entire shoe in fur. I trimmed the fur between the toes and used some paint to accentuate the individual toes
The head was an interesting challenge. I had the existing mask but wanted it to floe with the rest of the costume. Using tissue paper and the curves of the mask a guide, I made individual patterns for fur placement. I then cut the fur out and glued it onto the mask with Fabri-tac. I cut a large piece for the back of the mask to make it into a full headpiece and glued that to the very top rim of the mask. I then used the curves of my head to mold the back piece to my head. The tricky part with fur if making sure it all lays the right way. I had to re-cut a few pieces because I had the fur going the wrong way. UGH! The fur was given a haircut and some shaping. I also used some paint to add some more depth and detail.
The tail was sketched out by me and then each band was cut and sewn together. Remember the troubles with fur? I had an entire half of the tail going the wrong way and just barely had enough of the darker fur to complete it. I stuffed it lightly with fiber fill and added a nylon strapping loop to the top. The loop was then fed though a small slit in the bodysuit and the fed though a belt. This would make the weight of the tail be on my body and not on the actual bodysuit.
I got the entire costume done in a month and only working on for about 4-5 hours a day. I took a week off while working to celebrate my birthday (I deserved a break.) I was ready to debut it at the Hamilton Comic-Con.
The costume was extremely hot to wear with all of the fur and the vinyl. Add in a packed convention hall and you have one hot chick! Ha ha ha ha! Despite this, I had a blast wearing it. I was swamped with people asking for pictures and they were all amazed that when I spoke, the mouth moved on the mask. I had children and adults petting me too which I thought was funny. I entered the Costume Contest and was thrilled when I won Best Female Costume (even though I was dressed as a male character, ha ha ha!) I was the only female to win a prize in the contest (Best Group and Best Overall were all men)
Hope you liked reading through my mad journey to make Rocket a reality!
Your comment has been sent successfully.