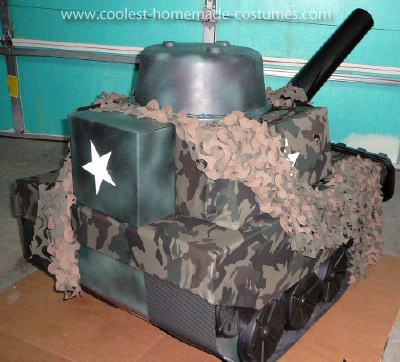
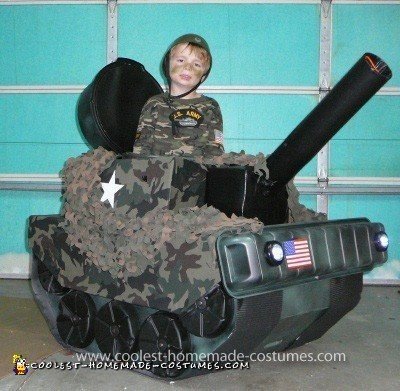
My five year old son wanted to be an army tank and marine for Halloween, so that’s where my idea started for this Homemade Army Tank Costume. I used a toy army tank of his to model the costume after.
1. Bottom part of the Tank:
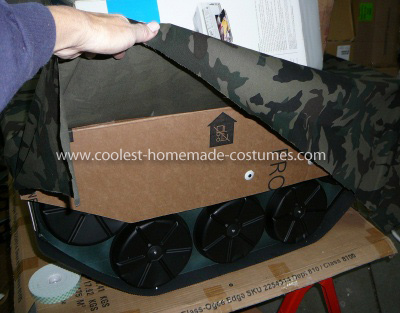
The bottom part of the tank is a box in which I had to cut the sides to form a rounded edge. After cutting, I taped the edges together. The bottom of the tank is hollow. I then spray painted it black. After drying, I then lightly sprayed army green on top of it in places, but allowed the black to show through as well. This gave it a camouflage look.
2. Wheels:
The wheels are made of clear plastic drainage plates one places under flower pots. I spray painted those black with paint used to cover all types of surfaces. To make the wheels more sturdy I cut round, white Styrofoam pieces and placed them under each wheel. I then attached the wheels to the cardboard tank bottom with a screw,washer,and nut. I covered the outside silver screws with round brown felt pads
3. Treads:
The black treads are made of corrugated black paper that I ordered on-line. It comes in a large roll. I cut two strips, one for each tread. I first made two strips of plain cardboard the width of the tread and attached it to the bottom the box. These two pieces served as a reinforcement under the treads which would be next to the ground. It also gave me something to attach those tread portions to because the bottom of the box was hollow.
I attached the treads with double stick tape on the sections that were visible. On the areas that were not visible, I stapled the treads to the cardboard. I reinforced the top sections with metal E-Z anchors.
4. Middle section:
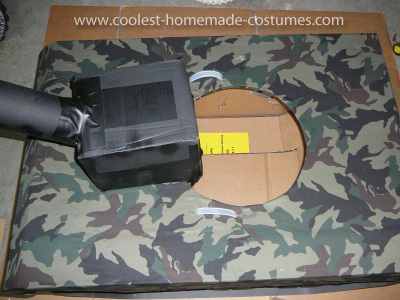
The middle section of the tank is another box in which I used three sides of. I attached the middle of the three sides to the top of the tank’s bottom section (#1 above). I later cut a hole in the top of it which served as the area my son would be standing in. I cut and angled the two sides of the box and draped them over the sides of the bottom section, covering the two top sections of the side wheels. I screwed the sides to the bottom section of the tank above the wheels.
To give the tank a front and back bumper, I scored the middle/top section at each end and folded each piece over. After everything was tightly secured, I used spray adhesive to cover the middle section with camouflage material.
Before attaching the last and top section, I placed plastic handles through the middle section in order for my son to pick up the tank and walk with it. The handles were ones I had saved from old boxes.
5. Top section (turret):
The turret section was made from, yes, you guessed it, boxes! I used one medium and two small boxes. I cut most of the bottom portion off the medium box, but left an edge so I could screw it into the middle box (#4 above) section. I also cut a hole in the top, proportionate and directly above the one I cut in the middle section for my son to stand through. I did angle the sides of the box to give it some dimension.
On the front part of the medium box I attached small box and a barrel. The barrel was a mailing tube. I cut a hole in a small box and placed the barrel in it. I tightly packed the inside of the small box with packing peanuts to hold the barrel steady, yet not make it heavy. I then used Gorilla black tape to secure the tube to the box and covered the box and barrel with black contact paper.
I used two E-Z anchors to attach the small box and barrel to the middle section of the tank. It fit slightly under the front of the top, medium box, which gave it further support. After attaching the medium box to the bottom section, I covered the box with the camouflage material using spray adhesive. Also, I attached another small box (spray painted black and green) to the back of the medium box to give this section further dimension, hide an open spot in the back of the box, and allow a place for the opening/lid to rest on.
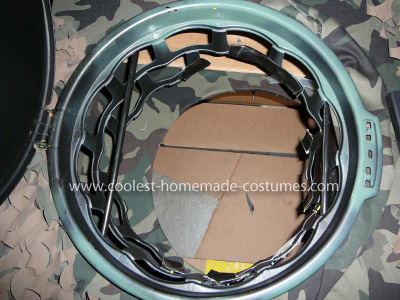
The opening/lid section was made from a hodgepodge of stuff. I used a basket with an attached lid and a black Halloween cauldron (pot). Here’s how I did it: I cut off most of the bottom of the basket, leaving the lid, rim of the basket and about two inches of basket. I then removed the cauldron’s handle and cut the holes off the cauldron that the handles went in so it would sit level upside down on top of the basket’s lid.
I used silicon glue and glued the cauldron to the top of the lid and let it set overnight. I then spray painted the entire cauldron and basket with black spray paint. Before placing this piece in the circular cut out (#4 and 5) sections, I did wire the lid to the basket where the hinge was to further secure it.
Lastly, I placed this lid section through the circle I had cut out in the top box section. I secured the lid section to the rest of the tank by using two thin, white curtain rods. I drilled two holes on each side of the top (turret) section. The curtain rods went through the center section, catching the webbing portion of the basket and then proceeded to go out the other side of the box.
I did this to the front and back portion of the basket. I held the curtain rods in place on the outside by using cable ties in the holes on the ends of the rods. I also covered them with black Gorilla tape. I used black tape to cover the rods inside the tank as well because they were white it color.
6. Final Touches: (some of the final touches were:
• Front bumper was a long plastic paint tray, turned upside down and spray painted black and green. I attached LED stick-on lights which were great, especially at night. Lastly, I placed an American Flag decal on the bumper.
• Cut and painted cardboard stars white and placed them on the sides and back of the tank.
• Hung pieces of camouflage on various areas of the tank. I purchase the camouflage at a local military outfitters/hunting store.
• Inside the barrel I placed a coiled up seven foot piece of orange EL lights. We set it to a flashing mode, so it appeared to be shooting.
The Homemade Army Tank Costume was not too heavy, so my son could carry it with no problem. During the process of making the costume, however, I realized it was too heavy and awkward and I did have to cut it down by about a foot. It put me a bit behind in schedule, but I was able to correct the structure (tank) before I had gone too far.
All-in-all, we had lots of fun! To top it off, my son dressed up in a camouflage outfit we put together. I bought some various iron-on army patches and placed them on his camouflage sweatshirt. I placed some camo make-up on his face and topped it off with a helmet and he was ready to go.
Everyone seemed to like the costume. It was also nice to honor our troops.
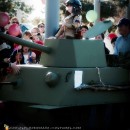
Here are a few more process pics:

I love this tank and want to adapt it to use with my handicapped scooter. Thanks for your clear instructions. I think we’ll be able to do it for Halloween and cosplay conventions! Thanks so much for sharing this.
Hi Jamie,
I’m sure you’ll be able to adapt this to your scooter. The size can always be adjusted when one uses cardboard boxes. I’ve also used PVC pipe to build frames inside of cardboard boxes for other costumes I’ve made to provide more stability to the costume.
If you have other questions, feel free to ask. Good Luck!
Hi! Awesome Job!! I usually make all of my sons, but this year I am running behind. Would you consider selling this one?
Thanks!
Tracy
Hi Mar! We are in Missouri also- wondering if you would consider selling this costume?