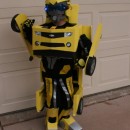
My 3 yr. old son loves Bumblebee the Transformer, so my wife and I started looking in stores for a Bumblebee Transformer Halloween costume to buy, only to be horribly disappointed in the quality of the costumes available. I had made his costume last year, but used foam core board and I wasn’t convinced this would be the right material for Bumblebee.
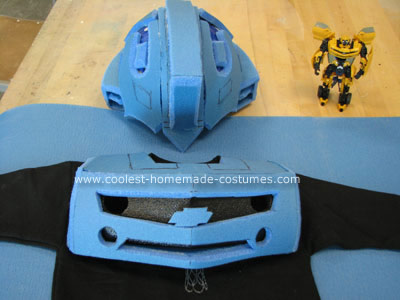
After exploring on-line a bit, I saw that someone else had used blue camping foam for the basic structural material, and I knew that was the perfect choice, especially since 1 roll was only $6.
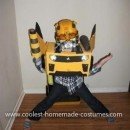
I started the second week in October so I knew I couldn’t afford any mistakes. After having made my son’s first costume way too big last year, I decided to trace around his body on a large sheet of paper and take various measurements of him before I began. This costume is a hybrid version of my son’s bumblebee toy and the bumblebee in Transformers the movie. I drew the main elements onto his outline and used tracing paper to cut out patterns so I could transfer the design to the camping foam.
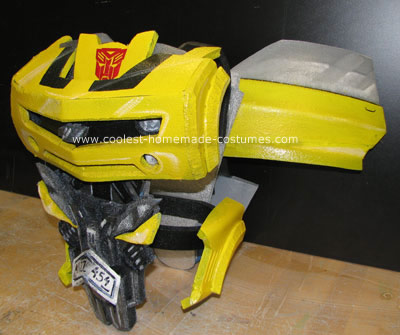
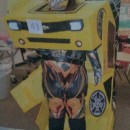
I used an x-acto knife to do all the cutting, and a hot glue gun for the construction. As I worked, I discovered that I could achieve very realistic looking car body parts, such as the doors, by holding the blade and a 45 degree angle and cutting a “V” out of the back side, which enabled me to bend the foam and “weld” it with the hot glue. This gave this costume a very dimensional look. I also used the same technique to create the relief of the various robot parts in the abdomen section. In some areas I cut small sections of the foam’s thickness in half to further allow for detail. Keep using a sharp blade, or it will start to tear the foam and create fuzzy edges.
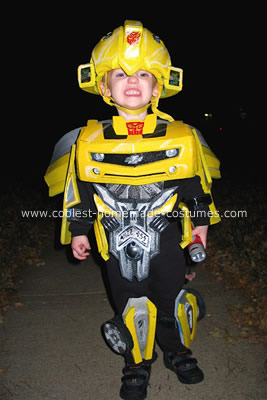
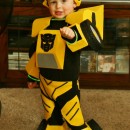
We knew friends and family would want to see his expressions so I decided not to cover his face. I used an old bicycle helmet as the support and again added the blue foam for the overall shape. I knew this part of the costume would be a bit out of proportion, but for a 3 yr. old, it added to the cute factor.
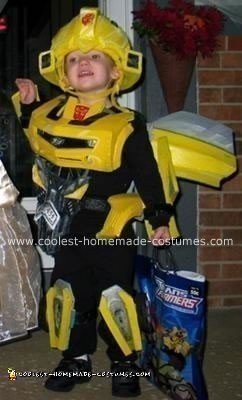
To connect all the pieces to his body, I made 1 ½ inch straps that I glued to the back of all the pieces so they could wrap around his arms and legs. The chest piece and back wing sections were held together with straps over the shoulders and one around the waist. I hot glued Velcro to the foam to secure them in place, but if I were to do it again, I would also sew it to the foam, as it started coming off at the end of the night. We had to put his costume on and off quite a bit due to the car seat.
For the finishing touches, I first used spray paint, but later found it started to fleck off as the foam flexed a bit, so I started to seal the spray paint in with acrylic medium (Mod Podge). This not only protected the paint from the flexing foam, but also gave it a nice gloss luster and helped fill in the porous edges. Detailed areas were brushed on with acrylic paint. The autobot decals were created by printing off scaled images from the internet, cutting out the background, painting it red, and connecting it with Mod Podge.
His costume consisted of 96 separate foam pieces and used 1 ½ rolls, 2 cans of yellow spray paint, about 5 coats of Mod Podge, and was held together with approximately 10 feet worth of hot glue sticks. Including the black sweat outfit, it was still cheaper than the $30 Wal-Mart / Target Bumblebee costumes. And even after my son fell flat on his back, the costume held together perfectly.


This is cool and very artistic. It is amazing how much detail is in this.
Wow…..you showed the world that imagination, time and effort can produce THE most fantastic outfit…..
good job man, can you make one for an adult with a bit of more detail, that be sweet, still look really awesome..
that is so cool!!! how long did it take you all up?
How much would you charge me to make a bumblebee costume for a 4 year old?
My sons want to be transformers this year and we can’t afford to buy them. You did an awesome job, I hope mine turn out as good as yours.
This costume looks amazing!!! I am going to try to copy your design for this years Halloween. Great job!
I live overseas with my husband who is stationed in the army . A lot of the materials are hard to find here, however I don’t like the craftmanship of a lot the Transformer costumes. This one was to me the cutest for a young child. My son is going to be five this month so it still works for him. He loves Bumblebee that or Optimus Prime. What other materials do you suggest I use if i can’t find camping foam where we are ? You had a lot of great ideas . Hope to get some suggestions. Christy
Where did you get this?
My nephew is a big fan himself and was crying when he saw this.
Thanks for all the nice comments, hopefully this motivates people to build their own costumes. Patience and just “going for it” is all it takes, however a background in artistic skills will always help.
Christy, you could also use foam core board, located at most hobby / craft stores, or even cardboard. You won’t quite get the rounded forms unless you bevel the edges and use sandpaper, but in this costume’s situation, you should be able to get a similar look. You might have to layer some pieces together to get a thicker looking edge. Good luck.
I hope you get this. I would pay you decent money to make me this costume in adult small
Do you have any more detailed instructions for how you made the chest piece and doors? Joined it all together?
this is awesome!
What did you use for headlights? I’m going to attempt to make this for my boyfriend for Halloween, I’ve had 2 years of my 4 years of art school so i should be good… lets hope. We are going to be Bumble bee (me being an actual bumble bee) vs. Bumble bee (him being transformer’s bumblebee) And we are going to take votes :P either way I’d win since i made both costumes :P :D … Awesome job! good luck on this years costume!
do you have pictures off the back? how are the doors attached?
Thanks for the comments. As far as how to join it all together, I used a hot glue gun for the pieces. The straps that go over the shoulders to connect the front and back are connected with Velcro, which I glued to the foam. In retrospect, I might try to sew the Velcro onto the foam to help keep it attached even better. The chest piece, doors, and ab section were all made with smaller sections glued together. Since it’s foam, it can be bent at parts and held in place with hot glue on the backside if you bevel the edge with a knife. Using paper patterns first, really helped figure out angles and the individual pieces.
As far as the main headlights. They are simply painted on with acrylic paints. The fog lights were made with copper domes (I also make jewelry), then painted. Layer the foam to give depth.
I have a back pick, but not sure how to post it on here. If you send me an email, I could send you the pic. Good luck to all and hope this helps.
hey i live in olathe to wish i could of seen it. so cute. im making my own this year. but im using the helment, the voice changer