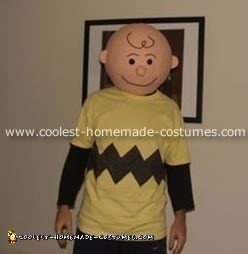
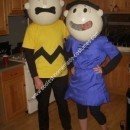
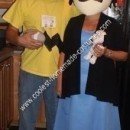
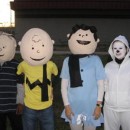
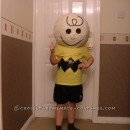
Charlie brown has always been a childhood favorite of mine and I decided to search for a Charlie Brown Halloween costume from the internet by searching the internet. I got the paper mache idea from this site and other paper mache how to info from the internet.
This was a two part process, first the shirt and then the head. The shirt was easy, I made a zig zag pattern with cardboard and used a pencil to trace it out. I then used a permanent marker to color it in.
I started my paper mache project with a punching balloon. The paper mache paste I used was the 4 cups of water boiling when I added 2 cups of water and 1 cup of flour (already mixed) into the boiling water and let simmer for 3 minutes. I then put the pot into my sink filled with cold water to add in the cooling process. I drew a line near the bottom of the balloon to assist me with the newspaper application for the portion that will go over my head. I actually measured my head and gave a little extra room which worked well. I did four applications.
The first layer of newspaper I applied to the balloon. I dipped into the paste and removed the excess with my fingers. This of course is the messiest (arguably the funnest) method. I actually used a paper towel to absorb some of the excess paste after the first application.
The second application I got wise and used a basting brush to paint past onto an area of the balloon (I started with the bottom of the balloon i.e. the wearers head portion and applied the newspaper to the first layer. Note, I took the straight edge of a newspaper that I creased and tore into pieces, 1.5 inches by 3 to 4 inch pieces. Once I went all the way around I then used pieces 2 to 2.5 inch by 4 inch. Once I applied a piece I then painted over the piece which helped in smoothing out the newspaper.
The third layer, I drew horizontal and vertical straight lines around the dried second layer to assist me with what portion of the balloon has been and not been covered. This worked well.
The fourth layer was just like the second and third (basting brush) and used the lines again.
Note, I pasted a light coating of Elmer’s glue after the 2nd, 3rd and 4th application to assist with the hardning of the newspaper.
To assist in the drying porcess I used by radar dish heater. This actually worked very well and allowed my to do two layers in one evening.
Once the fourth layer was dried I took a pencil and drew the eyes, the eyebrows, the smile and the cow tail of Charlie Brown’s forehead.
I took a jewelers screw driver and twisted it in the middle of the eye. I took a bigger size and made it bigger. I did this with other “devices” until the eyes were big enough.
I then went and bought skin tone paint, black pipe cleaners and Styrofoam balls. I glued the pipe cleaners one by one and the nose and ears I took one layer of newspaper and worked it onto the Styrofoam molds I made where the molds had Elmer’s glue all over it which worked well. I did not have good success trying to paper mache the molds hence the glue.
Once it was all dry, I painted. Note, the pipe cleaners were added after the paint.
First off let me say your charlie brown head turned out excellent. I’ve been following your steps one by one, with a couple changes to fit my likings. I’m in the last phase of the project and I’m having a major problem getting the pipe cleaners to stick to the mache. The eyebrows went on fine, but as soon as i moved on to the mouth and cowlick, they won’t stick.
I’ve tried white, tape and glue, and super glue and no luck so far. Any tips?