This year my girlfriend posted on Face Book that her daughter wanted to be Rainbow Brite. So, I Googled the store purchased costumes and found out they were not so hot. So I told her I would make her daughter a Homemade Child Rainbow Brite Costume as long as she purchased the materials. I had a sewing machine and had only used it to sew on a few patches to uniforms and to make one alteration to a dress. Needless to say, I was a noob at sewing. I will include as much detail as possible. After reading blogs and researching the internet, many people were confused on how to sew the sleeves and booties.
My friend agreed and was actually quite excited to have a homemade costume for her daughter. We looked up previous Rainbow Brite costumes.
Sleeves/Booties:
The first part of the costume I decided to make were the sleeves, followed by the booties. The same method can be used to sew these two parts of the costumes. First, take a base fabric you want to use for the inside of the sleeve. I used an old sheet we no longer used. The reason I chose not to use the satin as I did for the rest of the costume is because the legs and arms needed to have a firmer type of fabric to uphold to a child’s activity level. The fabric was relatively strong, so it was perfect for my numerous attempts. (I failed about 5 times before I figured this out!)
I exaggerated the length and width of the fabric. I think I used 14” by 12”. Although I took the measurements of her arm, once the material was filled with stuffing, the length and width would shrink dramatically. You can always take away fabric, but it is extremely difficult to add! Additionally, you will need to mark on your fabric where you want each color in the sleeve to end and begin. Rainbow Brite’s colors started out larger near the shoulder, and tapered off towards the wrist. I think I used half inch increments in difference. Your color strips also need to be exaggerated as they will be stuffed! The red fabric can be excessively wide because it will then allow you to take or allow for more length once the sleeve is sewn onto the costume. Once again you want to slowly taper the fabric’s width as the colors get smaller.
First, start with the color closest to the shoulder; in this case it is red. Flip the fabric over so the top is facing the white of the sleeve. (Additionally, you only need to sew the BOTTOM seam, leave the top open for now.) Now get the orange fabric, place it face up, and match its seam with the marked seam for red. The red fabric should be placed over the orange (red is upside down!). Pin, and sew the seam. (see picture). Now take the orange fabric and leave some of the width you wanted so it can be stuffed. Pin it to the previously marked seam. Now grab yellow fabric and flip it over so the back of the fabric is facing up. The top of the yellow fabric needs to be matched up with the seam for the bottom of the orange. Match, pin and sew. Repeat this process for all of the colors. Once you get to blue, fold the fabric over the edge of the sleeve. You can fold the ends of the fabric so no frayed edges will show. For sewing this seam, I sewed across the fabric twice to add additional strength.
To sew the purple pointed end with the star I drew out a pattern on some poster board. While doing this, you can draw half of it, fold the paper in half, and then cut. This way you know it will be identical. Make sure the width is over exaggerated so you can fold the cut seams inward and to have extra room to sew the fabric onto the seam you made with the blue fabric. I cut the fabric into a rectangle and then traced the pattern onto the FRONT side of the fabric. I did this because I needed to iron the fabric along the curve and I needed to see where I was ironing. You may need to cut slits in the fabric to get the curve to lie correctly. If you use stitch witchery it can help your fabric from fraying and sticking so you don’t have to pin it. The star on the purple portion was a foam sticker I then sewed on. (I thought the seam around the star was cute.) Set this piece aside, it will be sewn on after the rest of the sleeve is sewn.
The sleeve has to be stuffed and sewn together. Mark along one edge of the back side of your base fabric a straight line you wish to sew. Sew the seam using whichever thread color you think works. Now you can begin to stuff each individual color. You can put more fabric in each side that you think you will need so that it is heavy on one side. You can do this so you can easily sew the seam on the other end and then move the stuffing around after it is sewn. In order to sew the sleeve, make sure it is inside out. Match the open end of the sleeve with the side with the seam. While pinning the open ends down, make sure you make folds in the fabric so it doesn’t get all bunched up and look weird after it is sewn. Then sew using a large stitch in case you mess up, with the sleeve inside out, on the previously sewn seam BUT leave a slight opening at the top of the red fabric. Remember the sleeve should taper as you get closer to the wrist. When you get to the red fabric, make sure to leave some extra material and fold it like the others so it can be stuffed later. Turn the sleeve right side out. You are pretty much done!
The body section:
1. The Top Front:
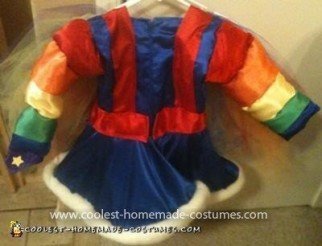
To sew the top I doubled my fabric so it wouldn’t be as thin. I gave myself an extra inch on both sides, and extra length on the bottom of the top. You can always adjust the length once you fit it with the skirt. On the back side of the front piece of fabric, I began to mark my measurements. Leaving enough room for the sleeves was the hardest part, not sure why…because they just were. I gave some extra room in the armpit so it would be comfortable to move. In order to mark the measurements I measured everything from a center line I had marked on the fabric. My other line came off of a line I drew on the top of the fabric which represented the seam for the top of the shoulders. I then marked the opening of the neck going off of these lines. You can make this a little bigger than it needs to because the red fabric that is on the front of the costume can be placed over the opening if it is too big.
2. The Top Back.
The back of the fabric is sewn a little differently. I used a zipper so the fabric needs to have extra inches on both back pieces. Make sure the pieces are identical. Additionally, you can make these bigger than needed in case you mess up. It can be taken in when sewn to the front top piece. I used an identical length to the top front piece. You can also find a “how to” video for a zipper on youtube. Then I matched up my marked seams with both the top front and top back pieces of fabric. (see picture of how it looked pinned together, both inside out and right side out)
3. The Skirt:
See a tutorial…
4. The Details:
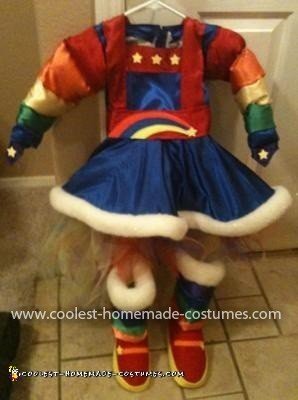
The details on the top of the dress include the red pieces (some yellow if you are true to Rainbow Brite). I ironed red strips of fabric into the following pieces: suspenders (2), waist piece (1), neck piece (1). Then I pinned the waist piece onto the dress and began to sew the bottom portion. When I got to the front part, I carefully pinned the suspenders into place and then sewed over the seam. Then I pinned the neck piece into place and sewed it onto the dress. After the neck was sewn into place, I finished pinning the suspenders. (While doing this, you had the seams around the neck so it comes out looking really good. So if it wasn’t straight or an error was made it won’t be noticed.) Then I sewed the suspenders. I used a seam ripper along the back side of the dress to insert the bottom of the suspenders and then re-sewed over the removed seam. Lastly, I used sticker foam for the rainbow. I stuck it on another piece of foam and then sewed over each individual color. Then I sewed it into place.
5. Sewing the Sleeves and Dress Together:
This part was slightly difficult. At first I had hand sewed the sleeves into place (noting the red still wasn’t stuffed). I left a little opening to stuff the fabric and had the kid try it on. Of course I had to take in the sleeves so the red material became smaller. Once I had my length correct I then made a seam along the red material, left a small opening to stuff it, and then closed the opening. Then I placed it onto the dress, turned the dress inside out and hand sewed the fabric into place. I also had to let go of some of the fabric around the armpit so it was more comfortable. After everything was sewn together I had her try it on again and run around and do various exercises to make sure it was durable enough.
6. The Tutu: (mesh and elastic)
You can find instructions on youtube.
7. The Booties:
Sew the booties in the same method used for the sleeve. However, you can just close the bottom color onto the main piece of fabric. I had a lot of fabric coming out of the bottom so I could attach it to the rest of the shoe. Set the stuffed portion aside. If you want full instructions for the booties, please contact me.
The Candy Bag:
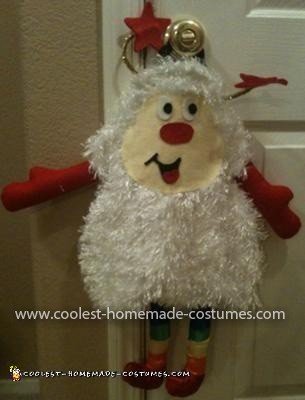
I traced half of the fella on the backside of the fabric. Then I got a piece of paper and carefully marked the outline by lifting and drawing. I was able to draw the other side by using this as a stencil. The legs were made the same way as the Rainbow Brite sleeves and booties.
The Sprites face was not sewn but hot glued onto the main fabric. For the handle I used some rope I purchased and sewed over it multiple times. For the little star antlers I used bottle brushes and twisted them together. I bent the bottom around and sewed it into place. I used hot glue on felt stars on the tips.
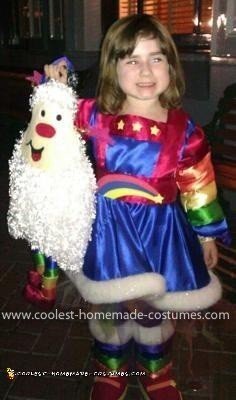
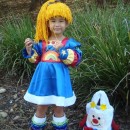



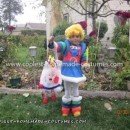
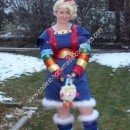
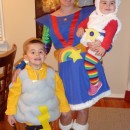
Adorable and very accurate costume! I Loved Rainbow Bright and would have loved this when I was a little girl
would u sell me this costume if it the right size and price
Let me know if you’re really interested and we can see what your needs/measurements would be.
-Laura
you can email me @ nlvrelay2010@aol.com
How much would you charge for a new costume in a girls size 7/8?
JamieG-
I am unsure. It depends on the type of fabric you would like, the size of the child (I need measurements, I don’t have kids so I’m not framilar with their sizes)and it would also depend if you just want the dress. (tutu, booties and candy bag would be extra.) The candy bag material in the picture I used was about $10 a yard or so. Additionally, the fluffy fabric on the bottom of the skirt was also expensive (a boa from hobby lobby would work though, about $7). Please email me and I can try to work details and price some fabric (I’ve moved since last year so I don’t know types of fabric/prices my local town has). The sooner the better, I would have to complete the costume by the end of September due to a work trip beginning in Oct. Please directly contact me at nlvrelay2010@aol.com. If you can give your price range we can negotiate a fair deal.
Thank you for your interest, I’m flattered :-)
-Laura
That costume is awesome! Are you willing to make another? I am going to a huge costume party and I really want to be Rainbow Brite, I do not know how to sew, nor do I have the time to sew. I am an adult medium, I have been searching t purchase a costume and can’t find a good replica of Rainbow Brite. I would pay for that exact costume in my size. Please let me know asap if your interested. Thanks in advance! I can be reached at Gretch718[at]yahoo.com
Hi! I wanted my 2 year old to be rainbow bright this year. I’ve researched and found only yours. It looks decent enough for her to wear and I can’t find anybody to make it for her to wear to Disney land and I wanted to know is it possible for me to pay you for one.
I’d love to get this made for my little girl for next year. Could you possibly help me in 2016?
Hehes