The whole thing started when my son wanted to be something from Star Wars, as all little boys are apt to do at some point in their childhood. We pulled into my in-laws & my eye fell on an old R2D2 cooler (like the kind you find at a gas station) laying in their side yard, it’d been there for almost 20 years & we paid little attention to it . Well, I figured we could cut out the bottom & add some wheels & let him walk around in it. My husband had other plans, however.
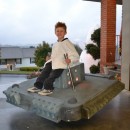
Using almost entirely scrap pieces of wood that were in our barn & small electronic gadgets we had lying around, he built a fully drivable R2D2 costume for my 6 yr old son. We gutted the cooler & used just the exterior shell…which we repainted & did some touch-ups. He built a frame with seat, control panel & gas pedal & slid the shell of the cooler over it. My son sat inside the R2D2 body & drove it around.
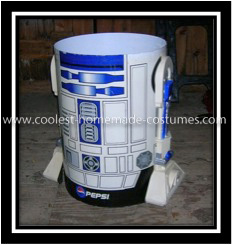
This is an old cooler, the kind they fill with ice & use at gas stations for promotions. We removed the rubber lining, scraped out the (gross) foam lining & used just the shell. We did a lot of touchup paint on the entire piece & legs. It was essentially a thin, flimsy piece of plastic.
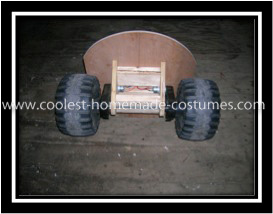
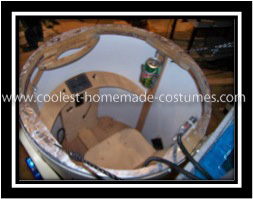
My husband started with cutting a base for the R2 shell out of wood to support the bottom &strengthen the outer plastic. He fashioned a small chair that attached to the circle. The driving mechanisms were actually from an old Power Wheel truck that my son had outgrown. We used the tires, motors, electric- basically the entire rear end from the truck. He made mounts & braces for the axles & ran all of the wiring up through base & up to where the controls would be.
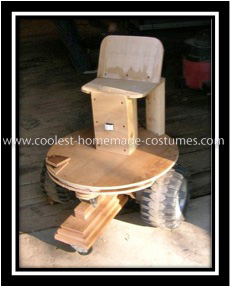
This is the wood frame he made for the bottom, to support the base of the shell. The top layer is a full circle. The layer beneath has flat edges to allow room for the tires. The wood in the front has 2 casters, 1 out front & 1 closer to the center. There’s a 3rd caster in the rear. These helped R2 turn &made it so that the body didn’t tip with just the 2 large tires. You can see the switches on the front of the seat that were originally the forward & reverse used in standard Power Wheels trucks, as well as the gas pedal.
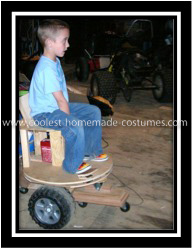
This is my son trying out the base with seat. You can see both casters underneath the frame, as well as the 1 in the back. The battery is under the seat. We eventually changed driving methods, as using a steering wheel was proving tricky in the small space.
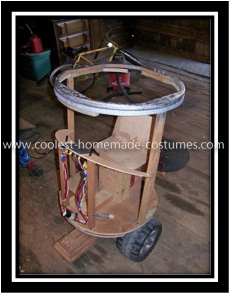
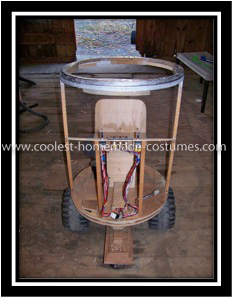
This is the main frame for the interior. We created a control panel on the front which has several switches & 2 toggle switches (which ran the tires, having forward & reverse for each tire independently). This allowed both switches forward to drive the unit, both back to reverse, & 1 each way to turn & do donuts. This steering method proved much more efficient in the space allowed within R2s body & worked great for my son, who was 6. The additional switches were for the speakers (which were hooked up to an MP3 player with downloaded R2D2 sound bytes) & the lights. There were several lights, including the telescoping lenses in the head, the red light in the front of the head, & strobe lights underneath for extra flare.
The top circle is a double layer of wood, hinged at the back. The top layer was attached to the head & had pegs on the underside, which seeded down into matching holes in the bottom piece. Opening the fliptop head was how my son climbed in & out. The entire wood structure for the head then rotated back & forth to mimic the movement of R2D2s head.
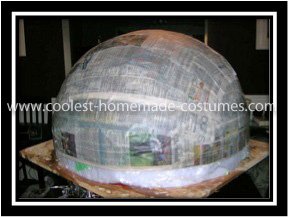
The head was the tricky part, as the original head for the cooler was long gone. After searching for bowls, pots & planters large enough to span the body’s diameter, we gave up & decided to make 1 out of paper mache. We ended up using a body-sculpting ball (for workouts) & added a layer of foam to get it to the exact size needed. We covered the foam with plastic wrap so that it would release when we were ready. We did many, many layers.
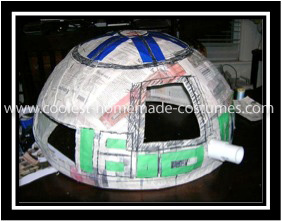
We drew on the squares & shapes for R2s head & cut out many of the holes to allow my son to see out. We used 2 pieces of PVC pipe for the telescoping lens in the front as well as the 1 on the back at the top. We masked off parts the squares before painting to maintain the sizing & placement of the sections drawn on.
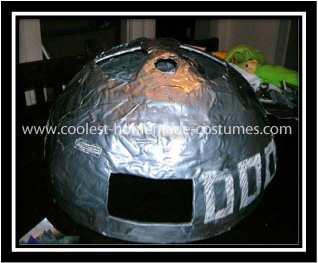
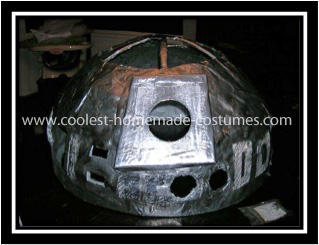
We fashioned the front box from cardboard & attached it to the head. The clear lens in the front of the box is the curved part of a clear 2-liter bottle, which we glued in. We cut holes for the PVC lenses in the front & the red light, both of which lit up with lights attached to the control panel by the driving switches. We then painted the entire thing silver with several coats of spray paint.
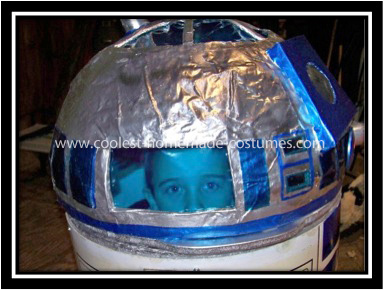
This was the finished head, attached to the wood structure mentioned previously. Note the handles on the side for opening the head easily. We filled in the large holes with blue cellophane, found in the wrapping aisle at Hobby Lobby. It allowed light in & for him to see out, while maintaining the blue color. The other blue squares were a thick blue plastic used in making non-glass stained windows, also found at the hobby store. They were glued in place. The rest of the accents & the protrusion on the front were painted blue metallic.
My husband dismantled a Power Wheels truck & used the tires & axles from it for under R2. He had switches attached for each tire, allowing it to drive forward, backward & turn, & made a place for the battery packs under the seat.
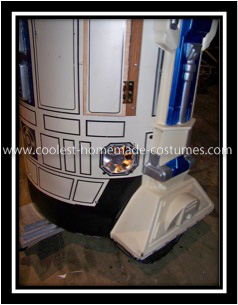
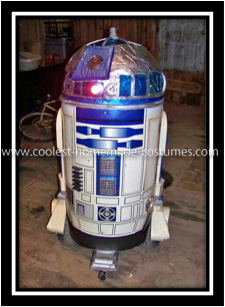
These pictures show some of the many small touches we added to the body. There’s an actual fan near the foot with a light behind it. This piece came from a copy machine & was operated by 1 of the 3 toggle switches on the control panel. Above it, we cut the shell open & hinged it, so that my son could open the panel & reach out for his candy. That was a big hit. We added some other extras, like the water lines in the front, a strobe light underneath & had an MP3 player with downloaded soundbites for R2 that played at intervals through speakers mounted behind the vents in front.
The 2nd picture shows the 2 vents from an old truck dash that we painted silver & added where R2s vents are in the center. To the left of those, we used more pieces from a copy machine to some of the ports to give it depth. In the back, there’s also a silver drain cover from Lowes over 1 of the fan ports. The picture below shows the inside with the shell on, as well as the cupholder my husband added.

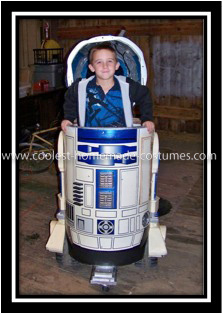
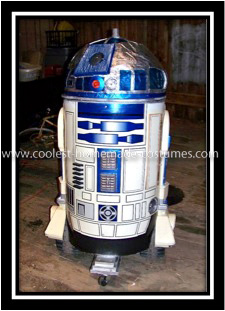
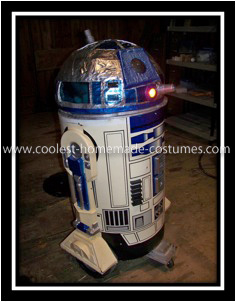
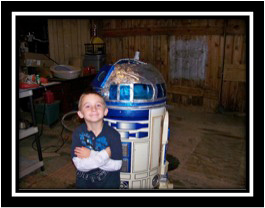
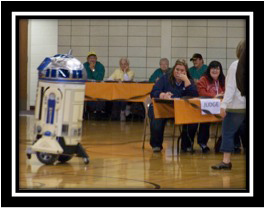
These are some of the finished pictures of the costume. The last picture is 1 of my favorites. The expressions on the judges faces for the costume contest we entered were classic. We had a great time doing this. Like I said, we had very little invested in the costume itself. We used a lot of scrap wood from other projects & utilized items we already had. I think total we bought less than $40 worth of supplies for the entire costume. We spent 2 to 3 weeks in the evenings & weekends working on the project & were really happy with how it turned out. The best part was that my son never complained about having to walk around & carry his costume! Ha!
We’re not professionals & just did this for our son on the side! This year we’re working on a drivable Wall-E costume! Looks like we’re in for a long few years of costume making. Thanks for your consideration.
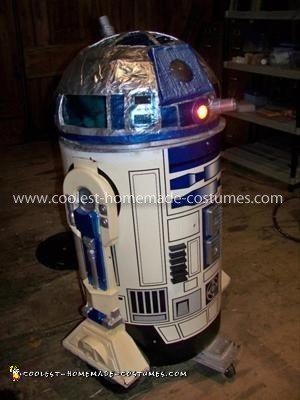
Very cool indeed!
Awesome, awesome! Coolest costume I’ve ever seen!
Huge Star Wars fan. That’s the coolest thing I’ve seen. Very realistic and I can’t believe it drives. Is it for sale?
I’m a huge Star Wars fan. That is AWESOME!!!!!
Coolest dad of all time award
Bootless is a theater company in Wilmington, Delaware. In June, 2012 Bootless will premier an original work, Star Wars, A New Musical Hope. An R2D2 unit that is operable with a person (actor) inside would be terrific. If available, please contact us at director@bootless.org. Thanks.
Best Dad in the world award.. SO COOL!!!
Omg! This is the most awesome costume I’ve seen on here. My son is a huge Star Wars fan. We’re in the process of making him a Luke on a Tauntaun costume this year. There is no way I would be able to do something like this costume. Amazing job well done!