When I got engaged in July 2011, my mind was more on the spring wedding than any other holiday. But when Halloween was approaching, I realized that for the first time ever, I would be part of a “couples’ costume!”
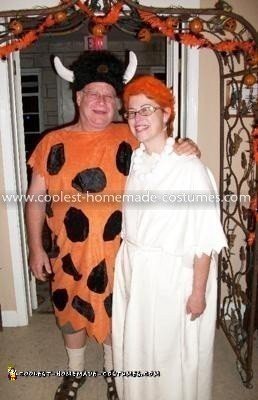
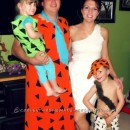
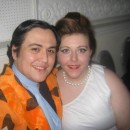
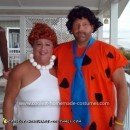
I was inspired to do the Fred and Wilma Flintstone Couples Costume for two reasons: One, I recognized that my hairy-legged fiance would make a perfect Fred, and I was somewhat red-headed already. Two, I also realized that the original TV show celebrated its golden anniversary just last year, so we’d be “retro campy” as well.
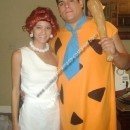
To create our Fred and Wilma Flintstone Couples Costume, first, I stopped off at the Salvation Army “superstore” in our area (Waco, TX) in my quest to find an orange and a white bed-sheet for the basic tunics. I was not successful, but what I DID find was the furry-horned hat (for $4) that I envisioned as Fred’s lodge gear (“The Loyal Order of Water Buffaloes”). I found a can of orange hair spray for $2.
Rather than spend more hours that I didn’t have in a likely fruitless search for old bed sheets, instead I went straight to a local fabric store, where I was lucky to find that many cloth selections to my liking were already 50-percent off. I was afraid of getting caught short (we’re both kinda “substantial”) so I opted to get 3-yards each of the orange and white (which was a microfiber that resembled suede — pretty cool for cave folk, eh?).
The scrap bin had some fur-like swatches of black (perfect for the leopard spots) and even the robin’s egg-blue felt for his tie (which I forgot to tie around my man’s neck before we left for the party, danggit!) All together, I think I spent less than $40 at that store.
At Michael’s craft store, I found the plastic-foam balls for Wilma’s famed baubles (necklace and bracelet), and a pin in the clearance bin that resembled the kind of military-style badge one would find on a lodge helmet. That shopping trip cost less than $10.
Then the REAL work began — I do not own a sewing machine, so it was all done my hand. I measured my fiance to figure out an appropriate neck opening (I folded the fabric like a poncho and made a 12-inch slit in the middle for his head), measured another 16-inches on either side from the center opening, and trimmed away the excess fabric. I cut a foot off the very bottom before I started sewing the sides together (good-side facing good-side so when you turn it right-side out, the seams are inside).
Then, I made a template of stiff paper in the teardrop/egg-shaped “spot” that I used to cut out the spots for Fred’s tunic. Even though I merely tacked on each spot, in a random pattern, with a few stitches in about five place, I still spent far too many hours on his costume because I severely under-estimated the time it would take. If I had to do it again, I’d either use a glue-stick or magic markers to save time.
My dress took only a little over an hour to make. I followed the same basic idea, but didn’t cut Wilma’s tunic as narrowly. I also chose not to use the one-shoulder style (I didn’t have the right foundation garment for underneath). After sewing up her sides, leaving about 8 inches for the arm holes, I used the scissors to cut the “ragged” edge effect on the bottom of the tunic and its sleeves — just as I had done for Fred.
We were a hit at the church Halloween Bash on Oct. 29. 2011. I was pleased that even some of the children recognized us right away. We were quickly dubbed “cutest couple” of the night!

Your comment has been sent successfully.