I have always loved art but had not considered myself an artist. Until I became a Face Painter. I fell into the profession by accident. I started as a volunteer and discovered to my delight, I was actually good at it! I may not be able to draw a tiger, but I can make you into a tiger! (Much preferred, don’t you think?) That was back in 2004. I downloaded pics from the Internet, found groups online, ordered books, and practiced, practiced, practiced! Eventually, I started getting paid gigs and joined a guild to continue improving my skills and to develop my business. I have attended many workshops and even a professional convention in Las Vegas. I have been a professional Face Painter for 7 years.
Why am I telling you all this? Well because, I still feel I am not as skilled at line work, shading, highlighting etc. as most artists in my field. So I always try and use the slower times of the year to try and improve. It was this that motivated me on this quest to make a Zentangle costume. (if you don’t know what Zentangling is, go “Google” it, I’ll wait). Pretty cool, isn’t it? Gets any artist’s or crafter’s fingers itching to play! I had never heard of the Art of Zentangle, but could immediately see how I could adapt the style of repetitive patterns to my profession as a Face Painter. After one quick look I ordered three paperbacks and one Ebook immediately.
I especially love that the Zentangle motto is “Anything is possible one stroke at a time”.
As a professional artist, I always feel added pressure to come up with a costume that shows off my face painting skills and will also be fun for the kids at my boys’ school to see on Halloween. It’s an added bonus if I can reuse my costume at parties and gigs. (With this Zentangle costume, I plan on adding Zentangled wings this winter so I can be a “Zentangle Fairy” )
But what is a Zentangled Costume? Will anyone know what it is? Nope. But I was okay with that. Someone has to be the first to design a costume or to create a character. Why not me? ( Everyone loved it anyway! I received several compliments including, “That is the most detailed, coolest costume I have ever seen” from a janitor at my kids’ school… and “true work of art” from a random person at the grocery store. ) Through an Internet search I discovered that many people have Zentangled shoes, but I couldn’t find a single completely done outfit. Fine. I will be the first!
Please join me on my 80+ hour journey. (Don’t faint! You can easily adapt this costume to just Zentangling a part of your clothing such as the bodice and back in just one or two days… )
It’s abstract art and could theoretically be finished at any point!
Learning how to Zentangle and choosing my materials.
As I was trying to learn a new art form while simultaneously creating a costume, I first read through a couple of books. Only then did I start to practice patterns in a sketchbook. The idea was to find a pattern, practice the pattern on paper and then transfer it to the dress. But what dress to choose?
First of all, I am a lousy seamstress. I literally can’t draw a straight line with a ruler, let alone cut on one or even attempt to sew one! For those of you that can sew, you will have the luxury of making exactly the “canvas” you want to decorate. (Note: Zentangling is done traditionally only in black and white with shades of grey, so you will want to choose to either use black fabric markers on white fabric or white markers on black)
After much Internet browsing I found the perfect dress for me (it was supposed to be an Egyptian Mummy dress…Not anymore!) I had lovely visions of doing different Zentangle patterns on each of the hanging strands and then “tangling” them together on the bodice and back of the dress.
I bought several black and grey fabric markers and was ready to go!
Once I felt comfortable with a few patterns I decided to try one on a ribbon strand from the dress. I soon discovered it is nearly impossible to just draw on sheer fabric.
So, I ironed the ribbon strands straight and then taped the one I was working on to a fresh piece of wax paper on a cutting board. (As the fabric was so sheer, using wax paper allowed me to have a clean surface on which to work so I wouldn’t have to worry about transferring stains to the dress or cutting board). After I finished each strand I rolled it up and secured it with masking tape to keep it out of the way while I worked on the next one.
To better show my thought process, here are a couple of my Facebook posts from that first week:
Oct. 9th:
Slightly worried about the obscure Halloween costume I am creating. The amount of detail is daunting. I may have it finished by October 2015. But seeing as nobody else will have anything like it, or even understand it… I definitely Need to keep going, if only to test myself!
Here are a couple of pics so far (I did not sew the dress, I am merely adding all of the designs, one squiggle at a time!)
If looking at the strands so far doesn’t give you a clue, you’ve either never heard of the hobby/art form or I’m failing miserably. I’m doing this in part to have a fun way to practice techniques that will hopefully transfer into embellishments on my face painting brush designs. If I can get in 2+ hours per day I may finish…
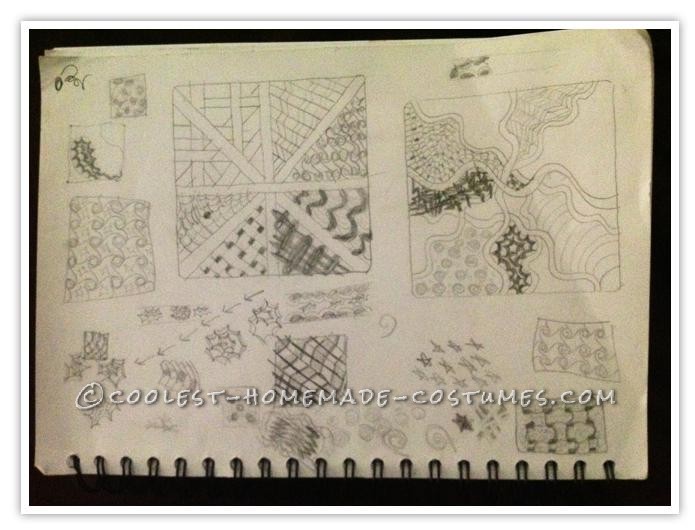
sketchbook where I practiced new patterns
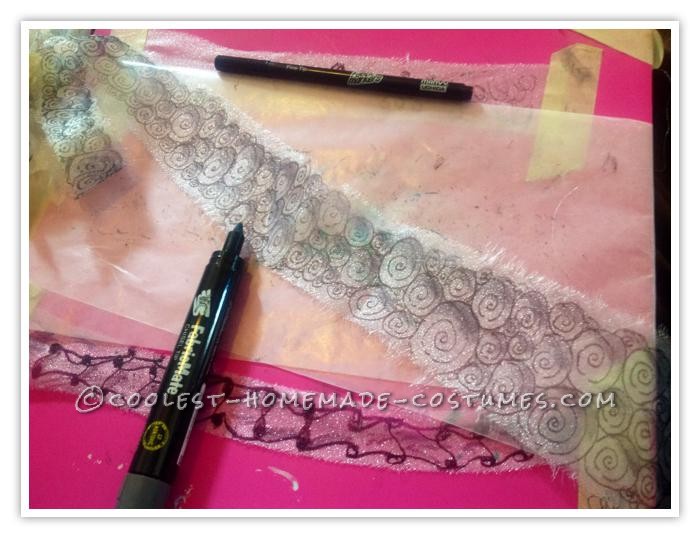
A strand in the process of being Zentangled
Ribbons galore!
Zentangling as an art form is usually done on little 3 1/2 inch square paper “tiles” using a meditative 11 step process. This was to be a relaxing way to spend 20 minutes a day.
It wasn’t designed for a (probably over-ambitious) fabric project where each “tile” was going to be a 30 inch long sheer strand of fabric just for starters. So much for relaxing. (But is sure was fun, addicting, and nearly hypnotizing to do the respective strokes of the patterns.)
I soon discovered that it was a good thing I began a month before Halloween as each strand was going to take me an hour or two and there were over 60 strands just on the bottom of the dress!
After that first day, I also ditched practicing on the scrap paper in pencil first and just jumped right into putting it on the fabric in permanent marker! (Daring I know, but this way at least the dress is a true testament to my learning process and progress!)
As I mentioned, each individual strand was taking me between one and two hours to complete. (What had I gotten myself into? At least I will get good muscle memory development from this! I am never one to shy away from a daunting task, so I started devoting more and more hours per day to the project. I was having so much fun, I not only adapted and deconstructed the patterns I was learning, I started creating my own patterns as well!
Facebook posts:
Oct.18th
Each one of these takes an hour plus to finish, I’ve done about 16 so far and have at least that many plus the entire bodice and maybe some shoes to finish by Halloween. Not that I’m feeling overwhelmed about my self-inflicted project or anything (yeah right) but if anyone has a great movie or series that is great to Listen To (rather than actually look at and watch) I would appreciate a recommendation to occupy the part of my mind not busy drawing!
Oct. 19th:
This one took almost 2 hours…. May have to pick up the pace, but I have so much fun drawing the patterns and then seeing them develop as I add shading and auras…
Oct. 27th:
Bottom strands are done (and ironically taped up so they don’t “tangle” back strands (4 feet long) are done. Time to work on the bodice and then do the arm strands if I still have time.
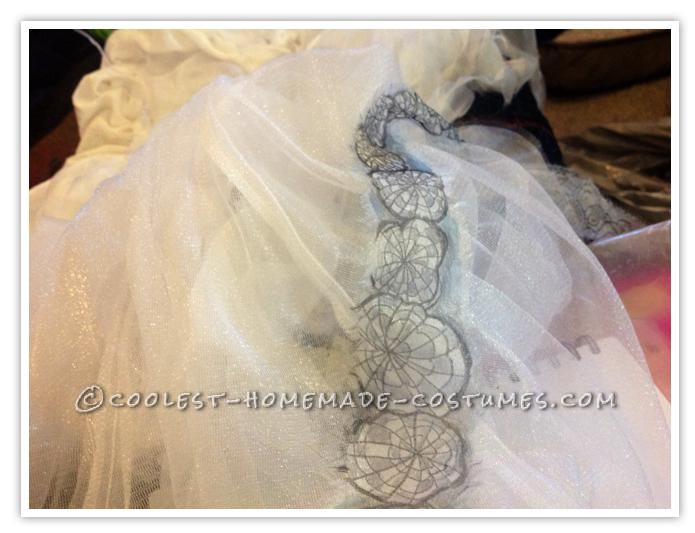
This one took almost 2 hours…. May have to pick up the pace, but I have so much fun drawing the patterns and then seeing them develop as I add shading and auras…
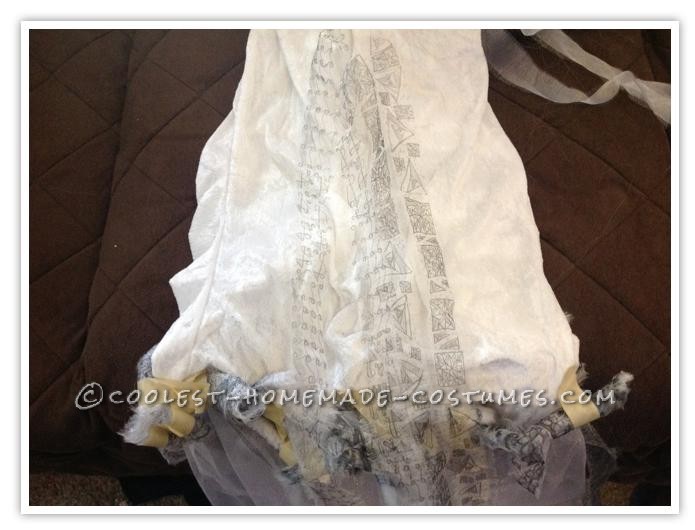
back ribbons were 4 feet long! also shows how I rolled up the completed strands to keep them neat and out of the way.
Time to Tangle! (Zentangling the bodice and front)
Now that I had a pretty good understanding of how to make single repetitive patterns, it was time to learn how to intertwine or “tangle” them in true Zentangle fashion.
I determined which pattern to put where based on which patterns I liked, and which patterns I thought would look best covering, ummm, certain areas.
To work on the dress, I put it around the same cutting board surface I had been using which gave me a firm surface on which to work, no tape necessary!
After I would finish a section I would examine it from a distance to get a different prospective and then would try it on and look at it in the mirror to determine the next section on which to work.
When you make your own costume, please remember you can add dramatic effect by leaving strategic “white space” as I ultimately did with the one arm,one side of the collar, and by only Zentangling a few strands on the shoulders.
(Note: For those of you that already have a good understanding of Zentangling and/or are going with a simplified version of the costume, this may well be your starting point. In fact the picture showing just the bodice done, but not the rest of the front, could be your end point if you wish or are short of time. Just add some accessories! )
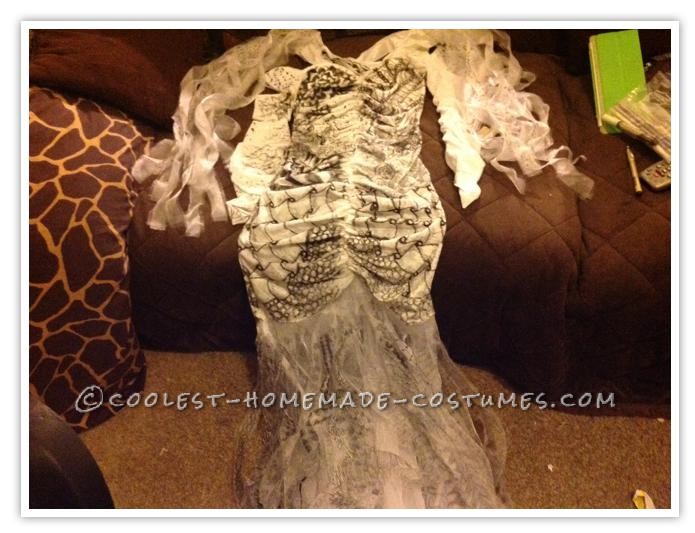
just finished zentangled front of dress
(Baby got too much) Back:
I love the optical illusion type patterns and thought putting them on the bottom back of my costume would be a cool choice. Then I tried it on and realized the pattern was actually right on my rear and made me look like I had a square behind. (No I am not a fan of square pants!) So I decided to fill in the sides and add a lot of dark tone to the center thus making it less of a, ummm,focal point.
(Side note: Speaking of Optical Illusions…while trying to decide on a costume for this year, I found and tried your “Costume Wizard”! Very clever! However, being an artist -yes, I called myself an artist,- and a lover of science, I was disappointed and a bit horrified that under the category “optical illusion” almost all that came up were headless bloody gory images. yuck. I was thinking more Escher than Sleepy Hollow! So here is a costume for those that want something truly unique but not horrific!)
As I continued to work on the back I added a large link style pattern down the spine. While I tried to stay true to the spontaneous Zentangle principle of letting the patterns develop and mutate, I did consciously choose which type of patterns to put where. I not only picked patterns that were fun to draw and appealing to my eye, but also took into consideration which patterns would best flatter my figure. I carefully, (okay sometimes whimsically) chose a pattern based on tonal value scale and then added shading, highlighting, etc. to zoom in on some focal points (like my spine and chest) and minimize others (like my hips and rear!).
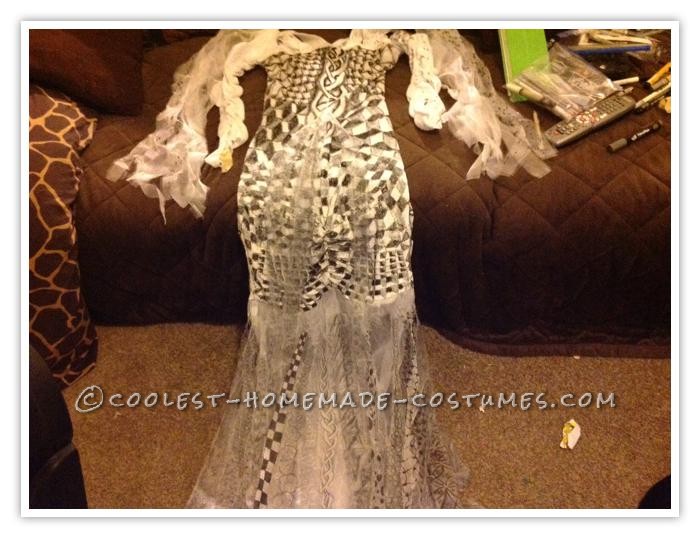
just finished Zentangling back of dress
Makeup. (it’s all about the eyes)
After choosing this costume specifically to put a spotlight on my face painting, I ultimately and ironically went with minimal designs on my face.
I first tried to make my entire face a white canvas and then started to put Zentangle shapes around my eyes. I decided I looked too “clownish” so I washed it off and went with something more simple.
(Note: Unfortunately – or maybe fortunately- I didn’t get any pictures of this first attempt)
Instead I went with patterns that were more abstract and matched my shoes. I am certain that every time I wear this costume, the makeup will be different! (Especially once I add wings and turn it into a Zentangle Fairy! I also plan on making a pair of matching Zentangled shoes and maybe a purse or other accessories)
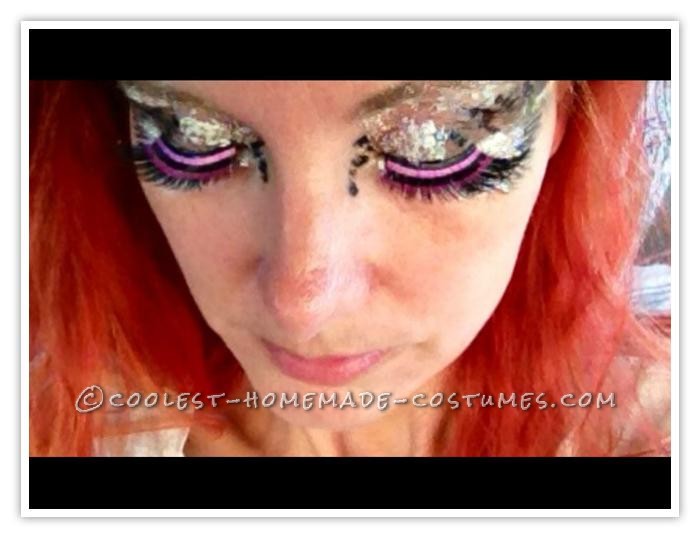
It’s all about the eyes
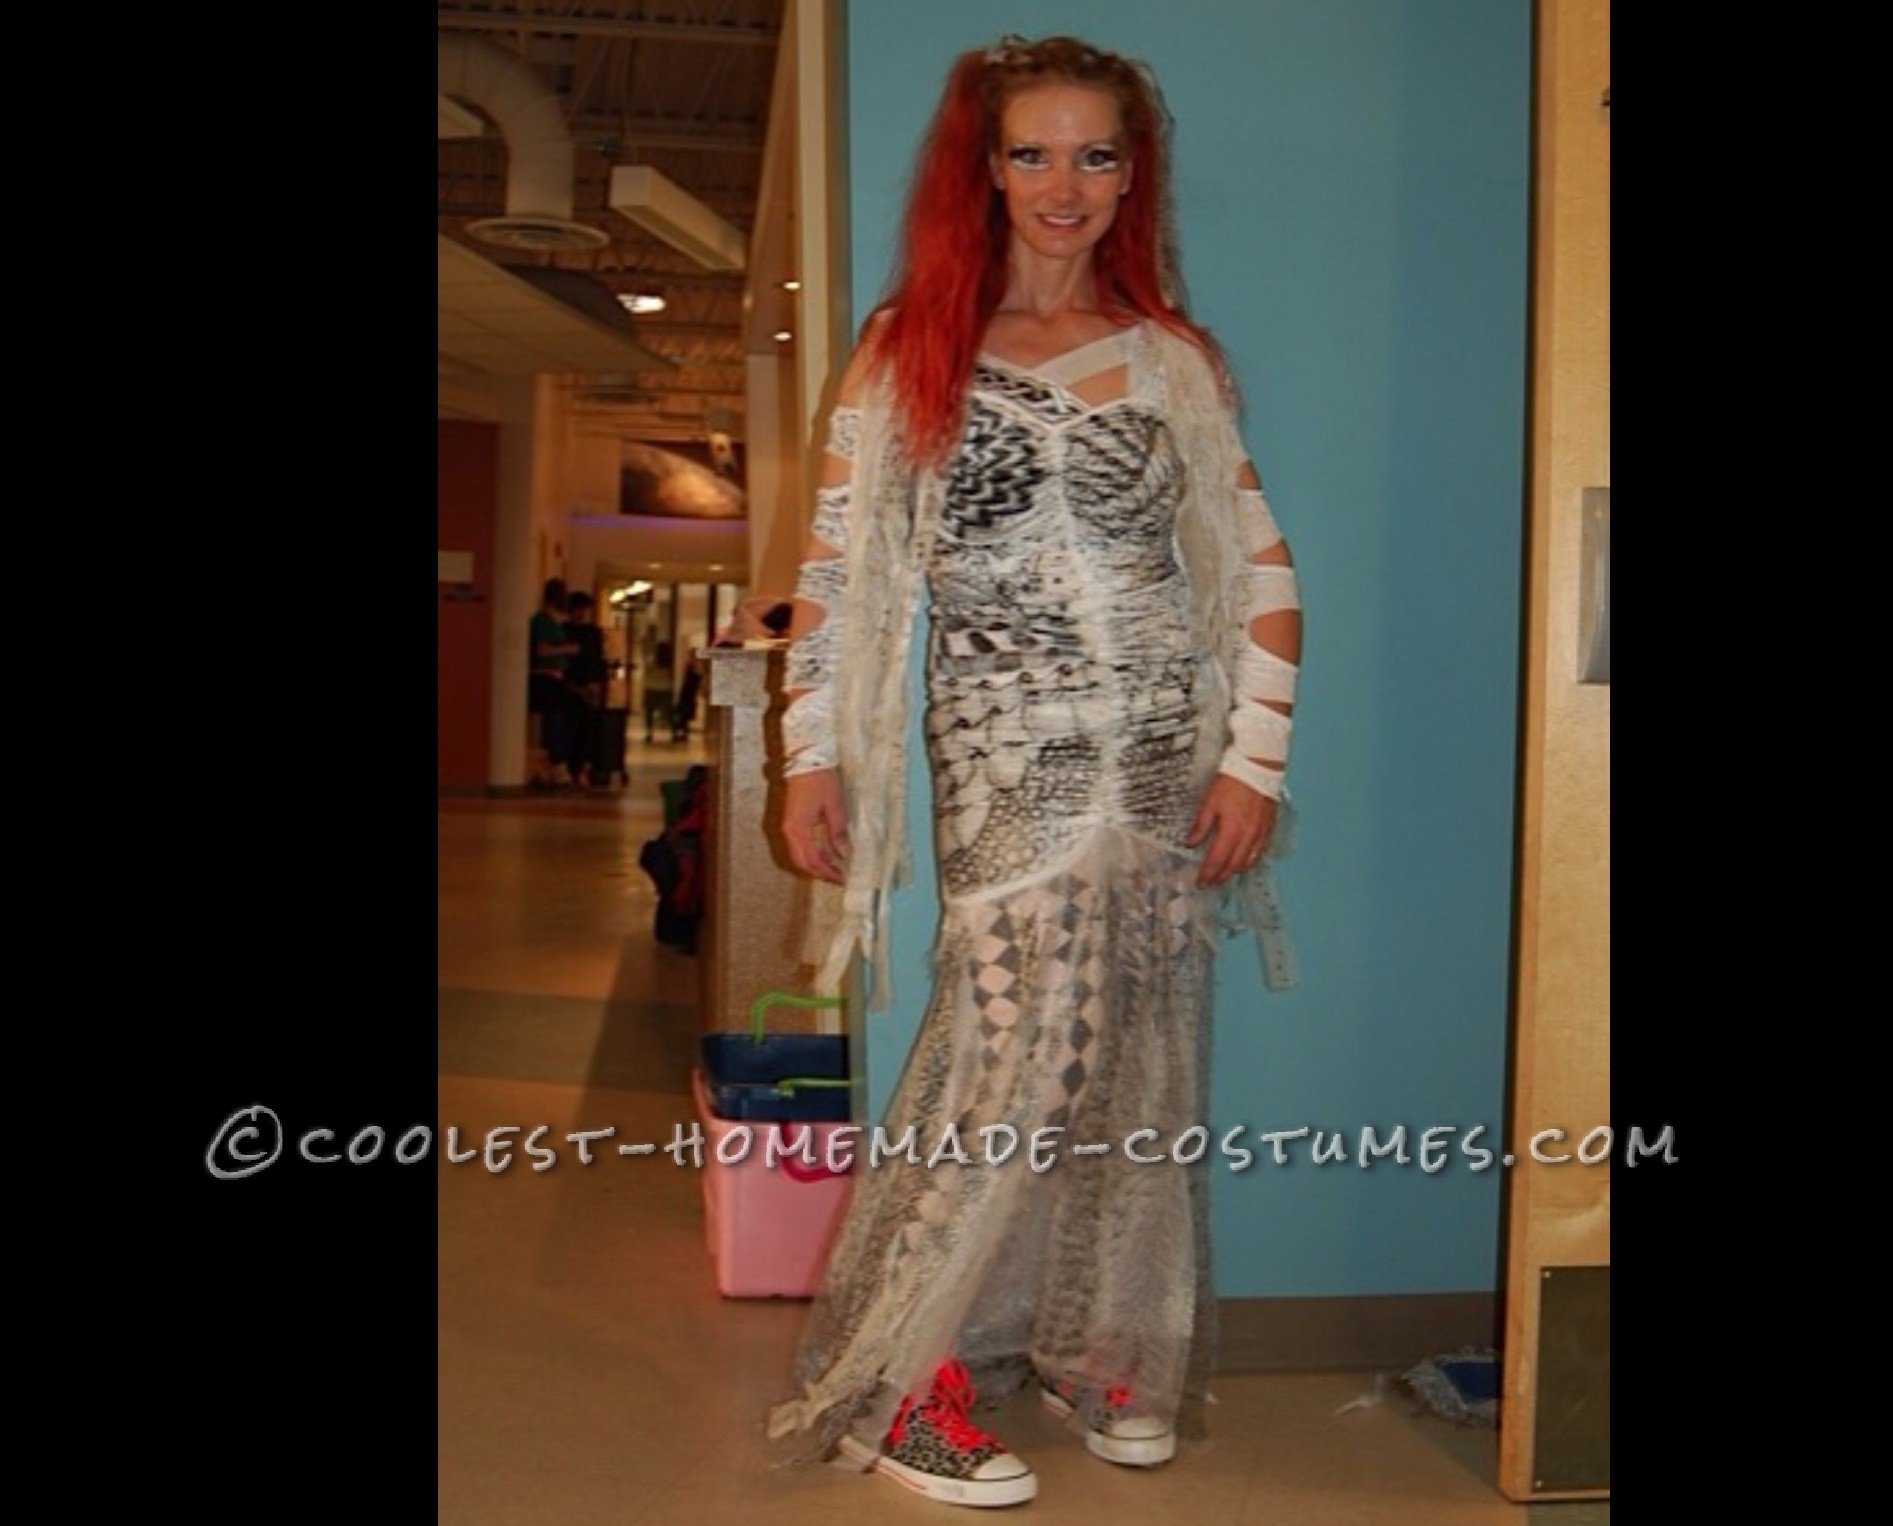
(are you sure it’s not 26?) Finished Zentangle Obsession Costume:
In addition to the makeup and the patterned shoes, finishing touches included tights with a bold diamond pattern, Zentangled ribbons in my hair, and pinkish shoe laces, eyelashes, and hair to add a splash of color and draw the eye to the black and white abstract patterns for greater contrast and impact. (The “hair ribbons” were strands that came off of the dress accidentally after I had already finished Zentangling them)
This costume ended up being a quest in artistic development and expression rather than “just another Halloween costume”.
Not only was it enjoyable to make, but I could add something new to it (wings, shoes, purse, hat, jewelry.) to make it ever-changing and re-wearable without being boring. (I also think most of the ribbons strand patterns would make a great line of neckties! *patent pending*!)
I love the fact I became a living work of art, that hardly anyone understood, but nearly everyone loved. I hope you enjoyed my journey. Now, go out and Zentangle!
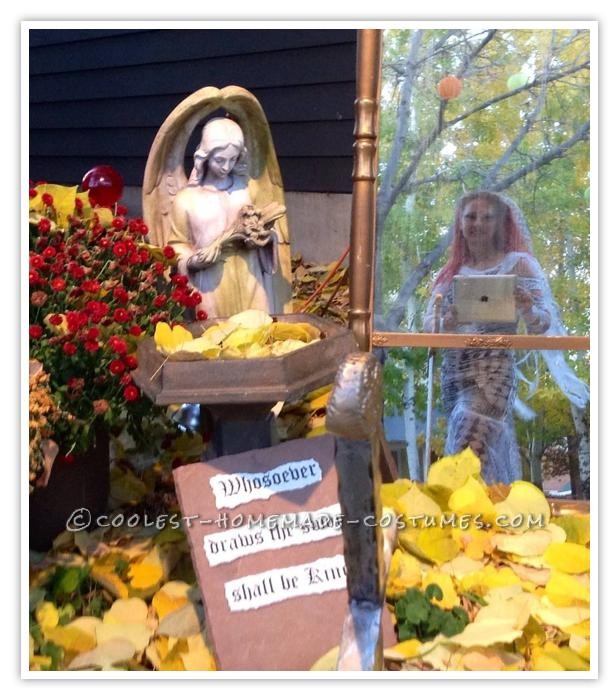
Finished costume on Halloween! (wish I could photoshop out the Ipad!)
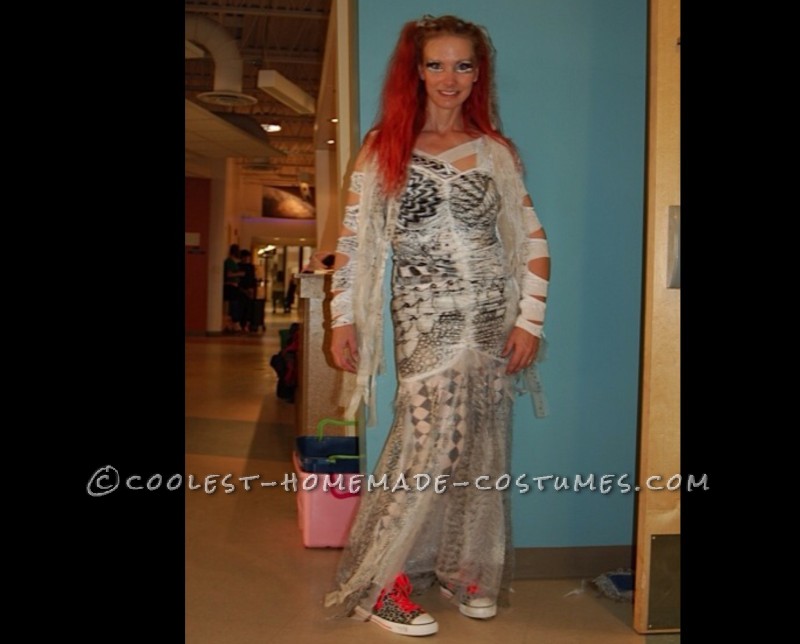
Finished Zentangle Obsession Dress with diamond tights and patterned shoes
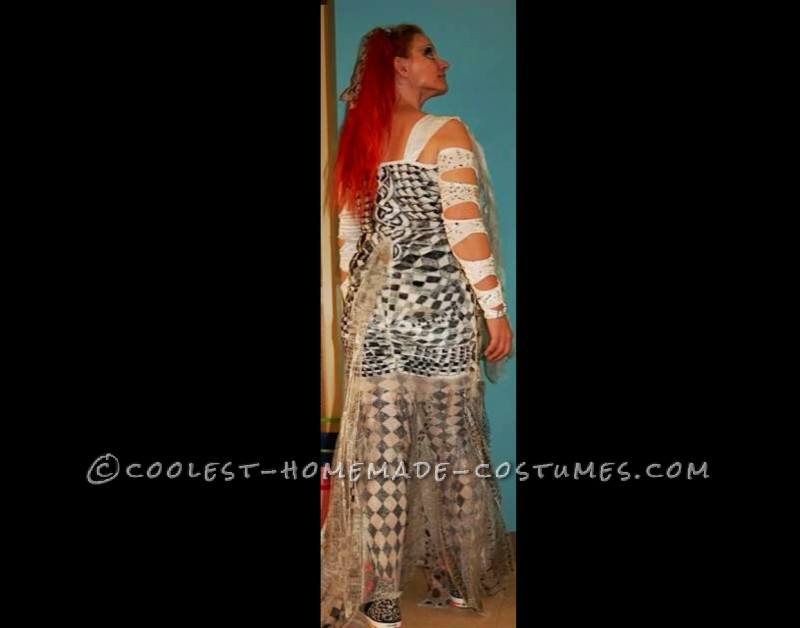
Finished Zentangle Obsession Back of Costume



Very cool Zoe! Great job. The patience required….wow.
Thanks! It was actually very fun and relaxing, and rewarding to see the patterns develop. You should give it a go!
Very cool Zoe! Great job. The patience required….wow.
Thanks! It was actually very fun and relaxing, and rewarding to see the patterns develop. You should give it a go!