Homemade butterfly costume designs:
So my girls wanted to be butterflies for Halloween this year. Well, I did not want to go and buy some cheap (or not so cheap) butterfly wings, when I knew that I could make them myself. And while I was at it I did not want them to be tiny wings, because, compared to their bodies, butterfly wings are NOT tiny- they had to be “realistic”- which means HUGE, lol. After contemplating the logistics, I realized that I was not going to be able to use tights… hmmmmm… so here is what I did:
Wire
Wire cutters
Electrical Tape
Fabric- Jersey and fleece
2” Foam
Elastic
Paint
I vaguely sketched out the size I wanted to make, measured and went to the hardware store to purchase some bulk wire, long enough to create 4 big pieces of wings (well, 8 for 2 sets). I had to strip the plastic coating off of the wires for reasons that will be clear soon. To do this I simply set the wires out in the sun for a bit, took a box cutter and ran it along the wire, once I got one side stripped the rest just peeled off.
I bent the wire into the shapes that I wanted, using one piece of wire for the top and bottom pieces of one side, so that they are connected in the middle, using electrical tape to secure the ends in place. I then created the other side using the first side as a template, since I wanted them to be symmetrical. Once I had both sides made, I joined them with copious amounts of electrical tape, so that they were very secure.
Just a note, don’t cut your wire until you’re basically finished creating your shape. It may take more wire than you think to create the curves and details. I then shaped it into the styles that I wanted, creating all the detail that I wanted to have in the final product.
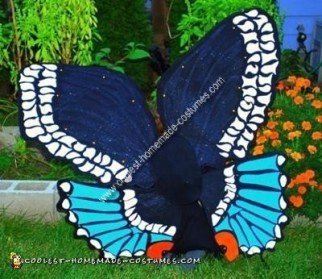
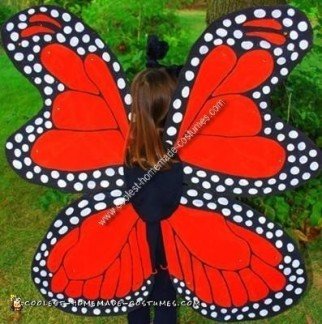
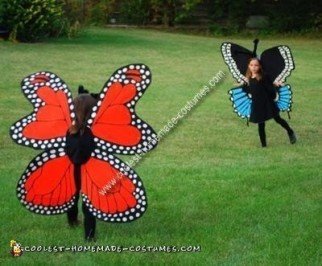
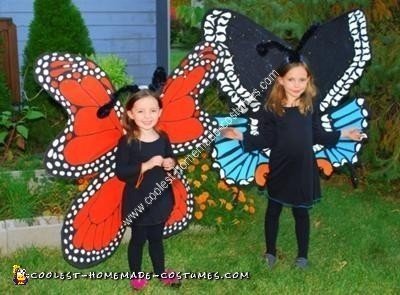
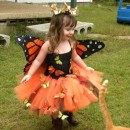
My girls choose a Monarch butterfly and a Black Swallowtail butterfly, each having its own unique wing shape, which I found pictures of online. Once my frame was made I figured that it had to be secured in some way in order to maintain its detailed shape. I thought that I would make a “skeleton” for it using wire clothes hangers. So I unwound and cut pieces of the clothes hangers long enough to reach from one side of the wings to the other. I used, probably, around 10 pieces of various lengths per side. I then used a glue gun to attach the coat hanger to the wire, which is why I felt that I needed to strip off the plastic coating.
Once the frame and skeleton were put together, I found a nice stretchy jersey fabric for the base of the wings. I used black for the Swallowtail and orange for the Monarch. I laid the wire shapes on the fabric, having the stretch facing the center of the wings, where all the tape is. Using chalk, I traced the wing shape onto the fabric, working with only one of the 4 sections at a time. I cut out the shape, leaving about ¼” seam allowance. I then sewed probably 2/3 of the wing shape up, and stretched it over the frame.
The Swallowtail wings had an especially detailed shape so I found it helpful to sew the most detailed parts with my machine so that I did not have to deal with them when sewing the rest closed by hand. While sewing them closed by hand, I pulled the fabric tight, making sure the fabric was stretched around the frame and not loose.
This is the part that took the longest:
Now it is time to paint the wings. First, I sketched out the basic design I wanted. For the Monarch I had to paint the black onto the orange base and then the white onto the black. For the Swallowtail I had to paint the white, blue and orange onto the black base. I used the acrylic craft paints that I had on hand; I don’t know if there is something better??? Because I had to go over the paint about 3 times, letting it dry between coverings. It really soaks into the fabric… doesn’t sound too bad until you realize that you have to go over each section 3 times, on BOTH sides.
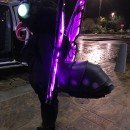
Once one side was finished I held the wings up to the light to “trace” the same pattern onto the other side and repeated the same thing. Phew, embarrassingly, this probably took me 20 hours to paint 2 sets of wings. Just for some added fun I painted on some black glitter glue, added some sparkly jewels and used glow in the dark paint on all of the spots that were white.
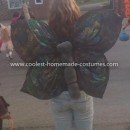
Once the painting was complete I used a piece of 2”foam to cover the wire bump on the center back of the wings and to provide straps for wearing the wings. This is the size I had on hand and I thought that the thicker it is the less the bump in the middle would bother them. I cut out the foam to a nice size that would be comfortable on their backs. I then traced the foam onto the fleece, cutting 2 sides, a front and a back, again leaving a bit of a seam allowance. I also cut two more pieces the same size. Then I cut 2 pieces of elastic and placed them inside the fleece where you would place backpack straps.
I sewed up the cover (2 pieces), catching the elastic and leaving a hole to turn and insert the foam. Stitch the hole closed. I also sewed and turned the other two pieces and them top-stitched them closed, no foam in this one. I placed the foam piece in the front center of the wings, over the large bump and stitched it onto the wings by hand, since this is the side holds the wings onto your back, you want to make sure that it is very secure to the wings. I then used the other piece of fleece to cover the backside of the bump, again stitching by hand onto the wings.
I made a simple headband for the antennae, sewed a simple black dress and used black tights to accent the wings. Phew, we now have ENORMOUS Monarch and Black Swallowtail butterflies invading our yard <:-)
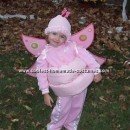
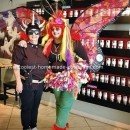

Those wings are absolutely gorgeous – they are the best butterfly costumes I have ever seen!!!! You did an awesome job :)
Your butterfly wings are done amazingly well- all your hard work and long hrs paid off:) They look like they belong as a costume in a Broadway musical! Well done:)
You did an amazing job! best butterfly costume I have ever seen. I wish I had seen this sooner and I would have made them for my daughter to wear for Halloween. Maybe next year
Those are AMAZING! I wish I could see detailed pics of each step! I would love to make them!
I love these butterflies!!
I wish to see pictures of the back as well, to see how the straps are suppose to look exactly.
I want to try to make it, I’ll buy a colorful fabric to save the painting time and effort…
It won’t be as nice but I don’t have as much patience!
you are the best mom! wow! those are REALLY beautiful wings! I hope they enjoyed wearing them!
These are beautiful! Could you possibly explain how exactly you used the stretchy mesh for the wings?
Thank you all so much- we have gotten so much use out of these wings through the years. They hang on our wall as art when not in use <:-) I will try to answer some of the questions: Re: The back and straps- The "body" in the back middle of the wings is made from 2 pieces of foam covered in black fabric. I stitched the outer part of this foam body all the way around attaching it to the wings. This helps stabilize the wings. The elastic is sewn into the top and bottom of the body like backpack straps. Re: The fabric for the wings- I used a black jersey fabric, not stretchy mesh. Once I made the wire frame I laid it on top of the fabric and traced the shape of each wing. I then cut it out leaving a seam allowance. I used my machine to sew up about 2/3 of the shape, leaving the other 1/3 open so that I could insert the wire frame. I then hand-stitched the remaining fabric, taking care to follow all of the curves in the wire frame. Hope this helps <:-)
OK ~ so my daughter wants to be a butterfly for Halloween and I make their costumes EVERY year and came across your butterfly costumes when googling. They are incredible and right up my ally! I am heading to the store today for materials. I may be bugging you for help! :)
Absolutely fabulous! I am going to make this for halloween for my daughter. so terrific! i think you have a career waiting ahead of you! costume designer! thanks so much for taking the time to share, so we can have more beautiful butterflies running around.
They are beautiful. Where are you located at. Are you willing to make me some and I’ll pay you.
How do you connect it to the child
Wow, I love that I am still getting comments and inspiring people with these wings, Thank You! <:-) I wish that I had more time to make some for you. I am in Eugene, OR now. At this point, however, I am a couple months deep into making this years costumes- my most ambitious builds yet <:-) I would need at least 1-2 months notice for a custom set. The wings are attached "backpack" style. If you look about five comments up I have described how I made the straps.
I would love to try to make one of these – so beautiful!! Just wondering what gauge of wire you used?
Thanks!
I am not sure what gauge of wire I used. I just went to the hardware store, talked to one of the workers and we tested them until I found one that I was able to bend into shape but strong enough to keep that shape with some resistance.
Shoot! I missed the skeleton bit (reinforcement) and I think I picked Jersey that was too thick. My wings are bowing. I might have to start over. With 1 week until check off and a trip to the Sequoias, I am a little nervous. Puffy paint smoothed out works a little better than acrylic. I bought some pre-stripped wire which helped too. Great wings!
Hello! These wings are incredible! I would love to pay you to make me a set. Please let me know. Thank you!
Are these for sale?