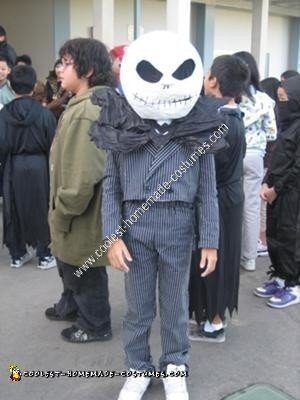
For the first time ever, my 10 year old son was excited about dressing up for Halloween. He’s a big Jack Skellington fan and was set on dressing up in a Homemade Jack Skellington Costume. I happen to work for the “Big Mouse” but couldn’t find one decent costume for kids his age. They were all cheesy, generic looking and expensive. So, with 1 week left before Halloween, I had to think fast and find a way to make his costume that wasn’t going to empty my wallet and still look great.
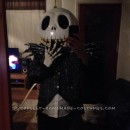
Luckily, I found this site and was able to reference several of the postings while making his costume. I referred to Jack Skellington 17 and 20 for guidance on making the mask. We used a large balloon and homemade papier-mâché (recipe below) to build the mask. My daughter “contributed” to the paper for the project by shredding up old homework. It took about 5 days of continuous layering before we felt that we had a solid shape for the head. We had to make sure each layer was dry before we could apply another layer, which is why it took a couple of days.
We popped the balloon and we were left with a decently shaped head that wasn’t too heavy. We then tried the mask on and cut the opening as needed to fit his head. I had wanted to use the idea of placing an old helmet inside, but because this was a much smaller head than an adult sized one, it didn’t fit like I wanted it to. If I ever have to make this again, I would definitely use that suggestion. Instead, we used foam padding that I glued inside. It was a decent substitution.
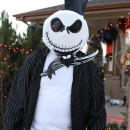
Using an X-acto knife, we cut out the holes for his eyes, nose and mouth. We then used some Air-dry clay to give dimension to the eyes. Once that dried, we covered it over with more papier-mâché. While that dried, we drew on the smile and stitches with a large sharpie. A quick trip to the dollar store got us the opaque/sheer material from a scarf that we needed for the eyes and a child’s costume angel wings were used to make the large bat collar for his suit. The scarf was cut up and glued inside the mask and the wings were covered in black material. We cut out the shape of a bats head and glued it to the center of the wings.
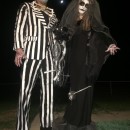
I had planned on making his suit, but as time ticked away, I had to make do with a trip to the costume store. I lucked out and found a pin-striped Gangster costume that was missing the shirt and tie. Since I only needed the pants and jacket, this was exactly what I needed. I ended up paying only $10 for it. I spend a few hours hemming up body the jacket and adding some length to the pants since they were a bit short for the size. I used the material from the jacket and sewed it to the hem of the pants. You can hardly tell that I even added them because I matched up the stripes perfectly. I also cut the back of the jacket to create the coat tails and zigzag stitched it to give it more of the “look”.
When he tried on the entire costume, he was thrilled at how “cool” it looked. All his friends at school were very impressed and even some of the eight grade girls wanted to take a picture with him at the school parade. Later, when he was out trick or treating, to my daughter’s disbelief, he got extra candy because his costume looked so good.
All in all, I have to say thank you to all of you for your great suggestions and posts. I wouldn’t have been able to pull this off without them!
Your comment has been sent successfully.