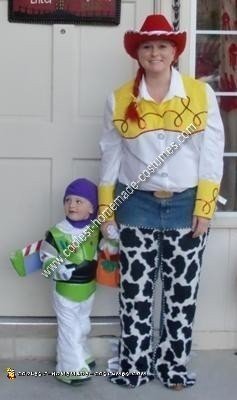
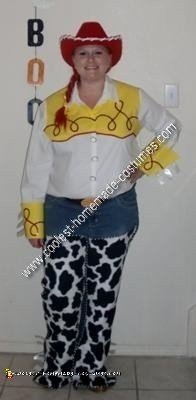
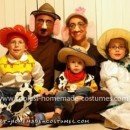
For this homemade Jessie Halloween costume idea I started with a long sleeve shirt that I bought at Old Navy.
– I took pattern paper and laid it on top of the shirt while it was unbuttoned and traced around the left and right side of the front of the shirt at the stitched seams.
– I cut the pattern out and cut the yellow fabric 1/2 inch wider to allow for a hem.
– At the bottom of the right and left front pieces I made the yoke at the bottom of the shirt pointed like Jessie’s in the movies. I sewed on red double edge bias tape around the bottom.
– Then I placed the yellow fabric on the right and left sides of the shirt and folded the 1/2 inch allowance to make a clean seam. The fabric covered up some of the button holes but the buttons were still able to be button because I cut around them so they poked through the yellow fabric and they didn’t show since the buttons were on the under side of the seam.
– For the back I decided where I wanted the back of the shirt to stop and I did the same as with the front, traced the pattern around the stitched seams, cut the yellow fabric out with 1/2 inch allowance and stitched red double edged bias tape at the bottom and sewed the fabric on.
– Then on a pattern paper I made the design of the red robe swirls on the front and used a fabric marker to transfer them to the front of the shirt. I used red sequins since red piping would be hard to stitch down and wouldn’t lay flat. I fabric glue to glue sequins down on the front of the shirt.
– For the cuffs of the shirt I bought heavy strength iron-on interfacing and made a pattern that angled out like Jessie’s and then cut a piece of yellow fabric out and ironed it onto the interfacing. Then I made a smaller pattern for the red rope swirls and used the fabric marker to trace it onto the cuffs and used fabric glue to glue down the sequence. Then I opened the buttons of the sleeve and sewed the bottom of the cuff to the white cuff of the shirt. Then I added 3 strips of white fabric to the sleeves and then sewed up the slants of the cuff together.
– For the chaps I took the pattern paper and traced the front of my pants starting with the bottom of the zipper and down the front of the legs and adding a few inches since I was wearing boots and added a small bell flair towards the bottom. I traced the pattern onto cow print fleece and cut it out and stitched black and white piping along the edges. Then I added 5 strips of white ribbon to the left and right sides just like Jessie’s in the movie. I had use fabric glue to get the fleece to stick to the pants because after I chose fleece I realized you can’t iron it and use iron on seam tape.
– To replicate the buttons like Jessie’s I bought the largest smooth faced silver buttons Hobby Lobby had and painted a white circle on the front of them. Then I hand stitched them on the front of the shirt barely above the shirt’s original button holes so that they would cover the original white ones.
– I bought a plain red hat and added the white rim around the top and brim with satin ribbon and adhered it with the hot glue gun. Then I took a hole punch and punched holes every 1 1/2 inches around the hat and fed white cording through each hole.
– For the belt buckle I bought the Woody accessory kit and cut the belt buckle off and hot glued it to brown 2″ ribbon and put velcro strips on the back and on the edge of the ribbon to make it fasten.
– I sprayed my hair with bright red Halloween hair spray and braided it and added a yellow bow.
– It took me about 6 hours total to make and is by far my favorite costume I’ve worn yet!!



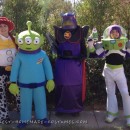

Your costumes are both awesome, my little guy is obssesed with Toy Story, do you still have the buzz costume? Would you be willing to sell it and your jessie costume?