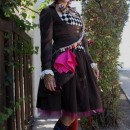
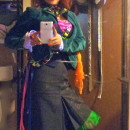
The moment I walked out of the theater after seeing Alice in Wonderland shortly after its release, I just KNEW that I had to pay homage to Tim Burton’s genius by recreating a homemade Mad Hatter adult Halloween costume. Shortly thereafter I began picking up various findings at local thrift stores, the first of which was the pink sash material I would later use for the scarf on my hat.
I wanted my Hatter costume to look as though it had been around for some time, so I sought out vintage clothing, fabric, and sewing notions to construct every bit of the costume from head to toe. In the end, the cost of all the materials was $150 (including every last button and spool of thread). The construction began in May and ended on October 20th, right in time for my first costumed event on the 23rd. A detailed ‘how to’ follows to help any fellow Hatter make their own costume :)
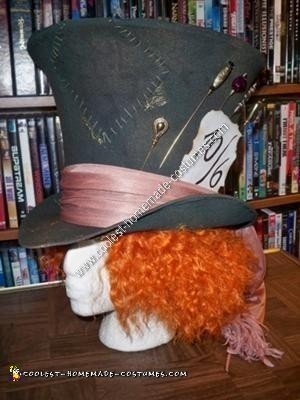
To start, we will work from the top down, first discussing the construction of the hat. For that I will direct you to a very detailed write up I’ve written on my personal blog since it is also filled with a bunch of photos showing the making of my hat from beginning to end, check it out here.
As for the hat pins that are on my hat, I made the pins myself, ordering all the materials online since I couldn’t find any beads to my liking at any local hobby stores. I also sold several sets of these on eBay, so maybe some fellow Hatters out there might have been lucky enough to grab a set!
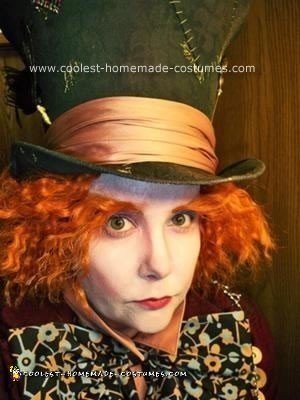
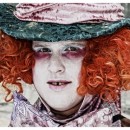
Moving down to the wig… I purchased my wig from eBay and it is usually sold as ‘Deluxe Mad Hatter Wig’, but it is manufactured by Charades. This wig was VERY natural looking, but way too ‘fluffy’, so I removed some layers of hair from the wig cap, so it would fit better and used the extra hair to make some eyebrows!
To fasten the eyebrows on my face I purchased a bottle of spirit gum (found at any costume shop or specialty store like Party City) and covered my eyebrows with it. I went over my eyebrows several times and then lightly tapped the surface of them with the tip of my finger until they felt ‘tacky’. When they did, I cut small bunches of hair from the strips I removed from my wig and pressed them over my real eyebrows and continued to do this from the outer corner to the inner corner until I had my natural brow covered. I then trimmed and shaped them with a small pair of scissors and gave them a quick spray with firm holding hairspray…
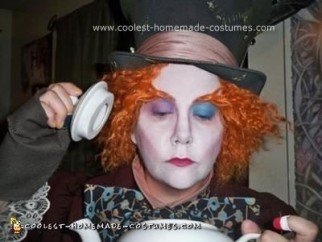
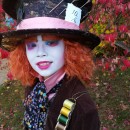
Then it was on to the make-up… for beginners, use a reference photo of The Mad Hatter (Google is your friend) to find a guide to work from. Once you’ve done the make-up a few times, you just kinda remember where everything goes. For the face, I use Mehron Clown White for the base, dabbing it on with a triangle shaped make-up sponge from my forehead down. I set the white by brushing baby-powder over my entire face with a puffy blush brush.
For the eyes I used three different colors of matte eyeshadow (purple, blue, pink), as well as a coat of white mascara for my bottom lashes. I also used the pink shadow to highlight the sides of my nose and cheekbones and finished my make-up with an application of bright pink lipstick.
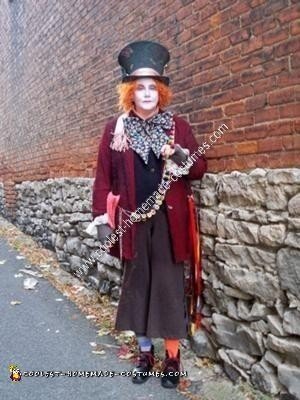
Now on to the clothes… let’s start with the ‘underthings’ since they’re quick and easy to put together. I picked up a salmon colored button up dress shirt from a thrift store, as well as a suede leather vest. I removed the buttons from the vest (they were plastic black ones) and replaced them with vintage brass buttons. I also altered the bottom of the vest to give it that slanted ‘V’ appearance in the front.
The bow was made handmade from vintage fabric :)
Next I started working on the coat. I found a two piece vintage pant suit at a thrift store, however it was a blah tomato red color, so it would need to be dyed before doing much to it. I used RIT dye on the coat, first putting it in a green dye bath (red + green = brown), then followed it with a dark brown dye bath. Since I had a hard time removing ALL of the original red color (coat was a wool blend), the final result was a dark reddish-brown (which I loved). After the jacket dried I gave it a spray over with dark brown and black upholstery paint, then rubbed a bunch of school glue all over the coat to give it a well worn aged look and then I set the coat outside in the sun to dry…
After the coat dried fully I brought it inside and glued some black ‘fun fur’ along the lapels and front seams, then I added some vintage ‘puff ball’ trim to the coat sleeves as well as some vintage lace.
The next project was making the bandoleer of thread spools that The Mad Hatter wears across his chest… to make this I purchased 25 vintage wooden spools of thread online and bought some jewelry wire and oval link chain at a Hobby store. I cut the chain into two 42″ length sections and then attached the thread spools to the chain by threading a 2″ length of wire through the holes on the spools and bending each end around a link of the chain on either side.
After this was complete I attached a toggle clasp to the top of the chain and ran a four foot section of the same chain from the top of the bandoleer to the bottom and attached it with a jump ring so I could wrap it around my back.
Next, I assembled the pin of ribbons by attaching varying lengths of ribbon to a 4″ long kilt pin, allowing the longest length to fall about 2″ above my ankle. I added a vintage pink scarf to my pocket and the jacket was complete…
I then moved on to making a set of fingerless gloves to wear. To make these, I put my hand on a piece of fabric, traced around it and added extra length to accommodate the seams and to allow the tops to be folded down. I then added a couple of buttons as an embellishment.
I also painted a couple of thimbles to match the ones the Hatter wears in the movie and purchased a vintage Clover pin cushion ring to match the accessories the Hatter wears on his hands. I also painted my fingernails yellow to match the Hatters.
To create the Hatter’s pants, I picked up a pair of slacks at a thrift store which I shortened to fall about six inches above my ankle. I then sewed black scalloped lace along the outer seams on both sides of the pants and glued a strip of black silk ribbon from the top of the pants to the hem. I also wanted to include the beautiful embroidered floral design on the right leg of the pants that also appears on Hatter’s pants in the movie so I used a reference photo of the actual costume to replicate the design with embroidery floss.
I also made a scissor holder to fasten to the pants similar to the one the Mad Hatter has on his pants in the movie. I made this out of suede leather and added some vintage ‘school scissors’ to the pockets of the holder, then I fastened it to the pants…
The final details of the homemade Mad Hatter adult Halloween costume were of course the mismatched socks and the boots. I purchased the boots at a garage sale and I found the orange socks on eBay and found the striped socks at a retail store. I removed the laces that came with the boots and replaced them with red ones.
So there you have it… this is how I constructed my homemade Mad Hatter adult Halloween costume from head to toe :)
I have this same write up posted on my personal blog with a TON of photos which may help out a TON when constructing this costume on your own. You can find more of the construction photos here…
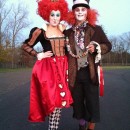
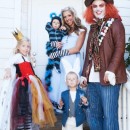
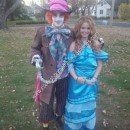

i really like your costume a lot. i haven’t seen a good mad hatter at all since the movie. i too made my own. i would post it but don’t know how to. i also started in may and finished a mad hatter and a queen of hearts by Oct 28th. no sewing machine. my name is Moses hidalgo and you could check them out on facebook. i would love to hear your thoughts and what you would have done differently. cant wait for next Halloween
I am so inspired by your amazing creation!!
I created my own Jack Sparrow costume years ago and I am a highschool teacher. It was an absolute hit with teachers as well as students. I plan to follow your instructions as closely as I can. I was looking for another great home-made creation and I think I’ve found it. Thanks, Rose