Super Coolest Halloween Costumes 2013…
Featuring Bowser, Dry Bones and Petey Piranha
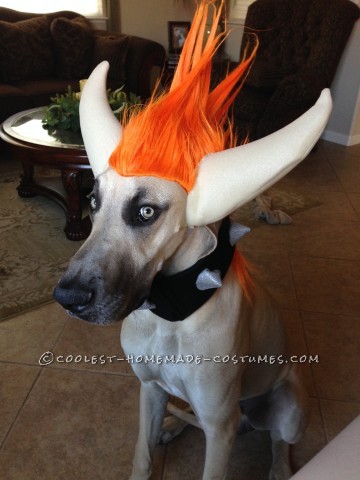
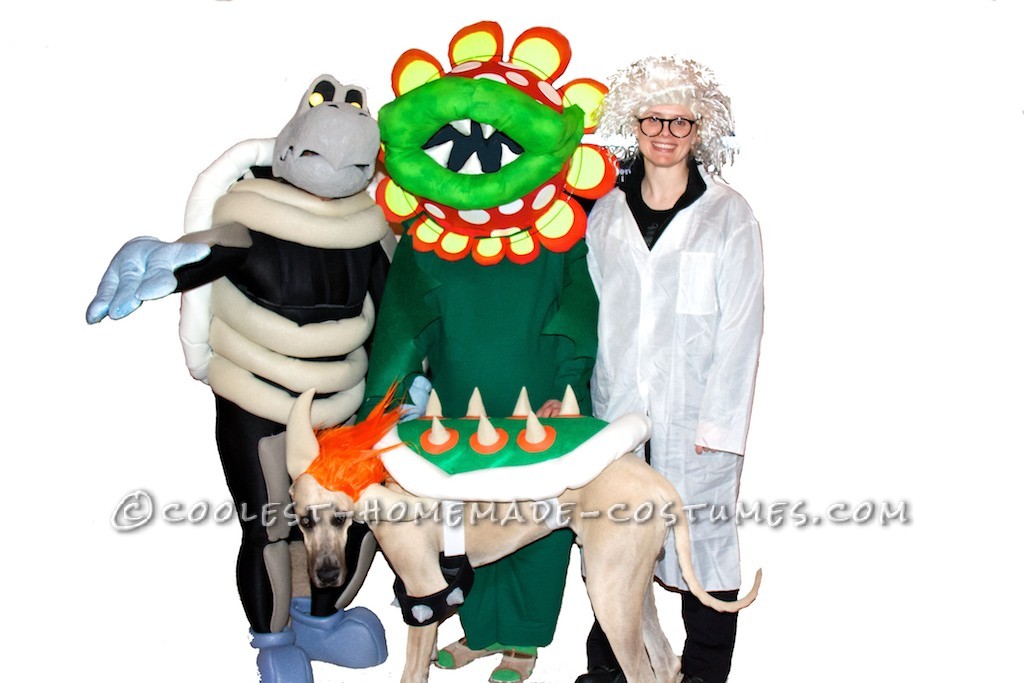
My name is Tami and our Halloween theme was easy to decide this year, with a new puppy we named Bowser, it was too obvious…Super Mario!
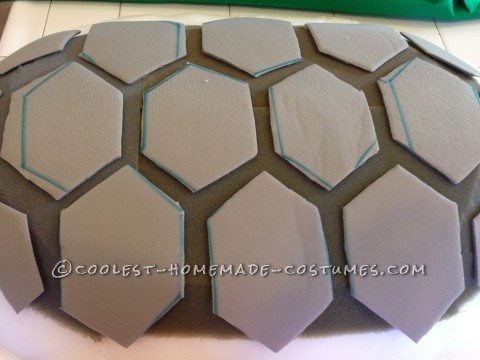
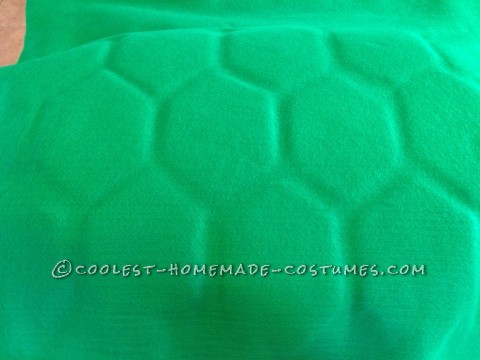
I’ll start with his costume, Bowser! I used 2″ foam for the shell and cut small shaped pieces of 1″ foam to emboss a shell like appearance. Then simply glued on green felt using spray adhesive. I incorporated some spikes made of 1/8″ foam, which were adhered to orange vinyl. White foam headliner was stuffed with polyester fiberfill to form the outer ring surrounding the shell. I had to hand stitch this because the foam and materials became too thick for my 25-year-old Singer.
The headpiece was a purchased spiked wig. I attached horns made of 1/8″ foam. The collar and armbands were made of black foam headliner detailed with metal spikes, which were also foam and painted with metallic spray paint. Wide elastic was used to strap the shell on his back.
The biggest challenge here was to see if my 10-month-old Great Dane puppy would tolerate wearing this contraption?
He didn’t just wear it… he owned it!
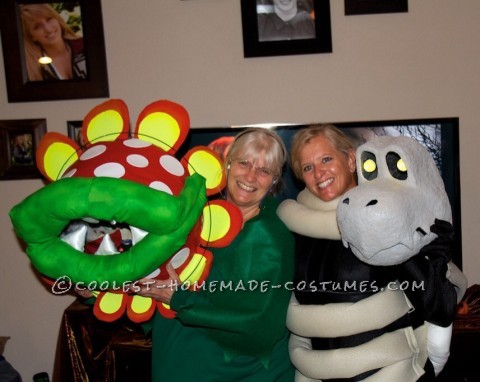
My costume was Dry Bones. I was so excited to attempt this headpiece!
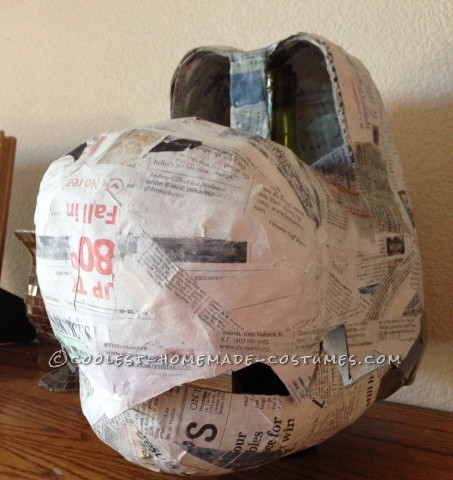
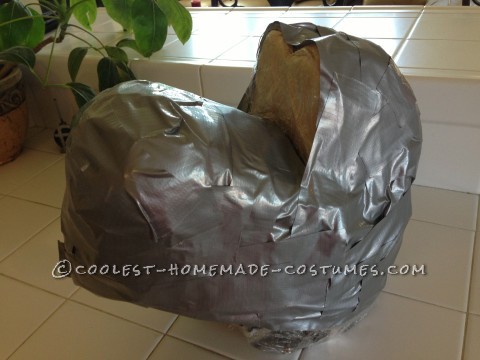
I started by using my daughters’ softball helmet as a general shape. I applied foam to replicate the nose/mouth and another to form the eyes. Next, I wrapped chicken wire around and duct taped the entire helmet with foam to make the base. Now the fun begins… Paper mâché! I layered around the base approximately 6 times using a flour/water mixture and newspaper strips. This takes time, as you must allow each application to dry. Also, I formed a lower jaw using the same technique.
Now I removed the paper mâché mask from the base (helmet/foam). I then cut out the teeth and attached the lower jaw with masking tape. A different type of paper mâché pulp called celluclay, which can be purchased at a craft store, was now applied. This adds depth and final form. Using matte primers, I spray painted the inside black and the outside a bone color. Battery operated LED lights were used for the eyes – painted and attached with ‘L’ brackets. Finally, lined inner foam for comfort and security.
I used 1/2″ foam to make my over-sized shoes and white foam headliner to make my gloves. My costume started with a black full body suit, which was purchased on line. Bones for the skeleton were made of grey foam headliner and attached to the body suit.
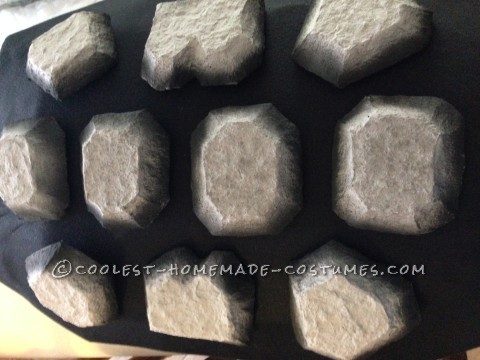
My shell was made of 2″ foam covered with black felt. The shell was defined with irregular shaped 1″ foam pieces which were covered with celluclay and spray-painted black around the edges. Once again, white headliner stuffed with polyester fiberfill to make the outer ring of the shell was hand stitched… with excruciatingly painful fingers! My belly bones were the most difficult thus far… 1/8″ foam formed tubes which were stuffed with polyester fiberfill. This completed the shell, however, the belly bones were too thick and would not stay Velcrod across my belly! Augh!! It’s Halloween time and I had to thin them out at the last possible minute! Can’t wait to see my Aunt Jan, who is making her costume… by the way, we create our costumes completely separate and amazingly always seem to compliment each other!!! This adds to the excitement and element of surprise for us!
My name is Jan and my character was Petey Piranha Plant from the Mario Brothers video game. Since video games have played a very small part in my life, I had no idea who Petey Piranha was, but once I saw a picture of it, it was like a calling! My niece, the instigator of all this, was the character Dry Bones, her dog was Bowser (which coincidentally is his real name!), and another niece was Professor E. Gadd.
Construction of Petey, which is a flower, focuses on its very large head. From past experience with costumes, I know my limitations are that it must fit through a doorway, and it must fit into the car! Being able to see where I am going is also a high priority. I started with chicken wire, and searched the house for something big enough and round enough to work as a template. I decided on the Webber BBQ lid for the front part of the head, and the biggest salad bowl I had for the back. I found a round wire frame for floral arrangements to be the perfect center piece, planning on it for stability and to help keep the round shape, and give me something to attach the flower petals to.
I attached this frame to the front part of the head, and kept the front and back pieces separate for now. Once I shaped the chicken wire, I covered both pieces with some batting to form a smoother surface to cover, using masking tape to keep it all in place. I used paper mâché, and covered both halves over several days, alternating the direction of the paper strips for strength.
Once solid enough, I paper mâchéd the head parts together, leaving an opening for my head so I could wear it like a helmet. Once dry, I then covered the flower head with red vinyl material and set it aside. To create the flower petals, I made a cardboard template for three different sizes, and cut them out of 1/8″ foam, added a narrow plastic backing for support, covered them with red fleece using a glue gun and trimmed to shape. Next I cut circles out of a bright yellow material to reflect the coloring of the flower. I used spray adhesive to connect these to the front and back of the petals. Using canned spray paint, I added some coloring and dimension to the petals. In retrospect, I should have used a sealer before I painted them because the fabric absorbed the paint, which diminished the coloring.
I set these aside to dry and tackled the lips. That was a much bigger challenge than I expected! I tried making a pattern to use to create the lips but ultimately settled on using tube shaped foam (for insulating outside water pipes) and free formed it as the base shape. I attached cut pieces of this foam to the head with a glue gun. It worked well because the curvature of the foam fit nicely onto the edges of the mouth opening. Once I had the lips the shape I wanted, I just did a free hand shaping of the green material to cover the foam and added batting stuffing as needed to smooth them out. I used glue to attach the material.
Next I cut the white spots out of adhesive backed foam board and attached them onto the red vinyl head. Then I sewed the teeth out of a glossy material, stuffed with batting and glued them to the inside of the mouth. After that I glued some black netting material inside the flower so it wasn’t so easy to see me through the mouth. Final touch was to attach the flower petals to the frame in a fashion that they stood upright, as they should.
Since the head of the flower is the main part of the Petey character, I chose to wear a simple pair of green sweats for the body, and attached a pair of leaves on my shoulders that were cut out of green felt material.
On Halloween night, all costume participants gather for a photo shoot. Following our family dinner together and once the trick or treating activity had subsided, the real reward for our costume efforts is to go outside and walk through the neighborhood to get the reactions from the crowds of people. Some comments:
Wow… Great costumes! You guys are too cool! Look, it’s the guys from Mario Brothers! We love your costumes! Awesome! And our favorite compliment (from a car which stopped in the middle of the road) BEST COSTUMES OF THE NIGHT!
Lots of people actually identified each character. This is when one finally feels that all that work was for a good cause. The people outside, total strangers, really appreciate and get excited by the craft of costume making. I actually got a handshake and a thank you for all the great games one young man had enjoyed. As he walked away, starry eyed, I heard him say to his friends… “I got to shake her hand!” And while I knew he was just being silly, It made Halloween just a little bit more special and memorable for both of us! Those exchanges, along with the appreciation for my participation from my niece and other family members, are what will inspire us to go ahead with the challenge again for next year!
Your comment has been sent successfully.