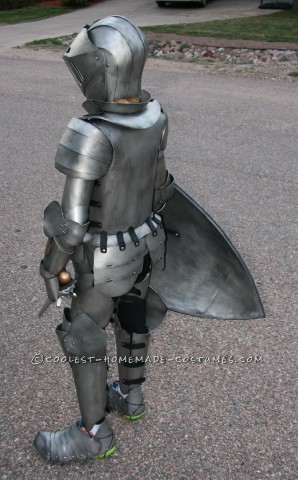
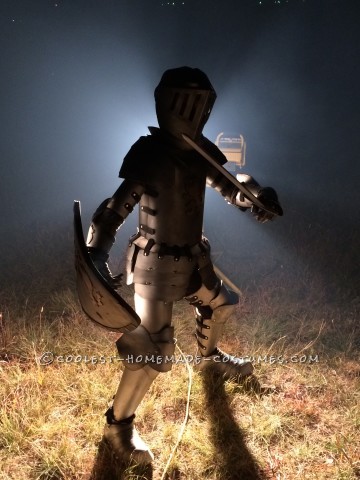
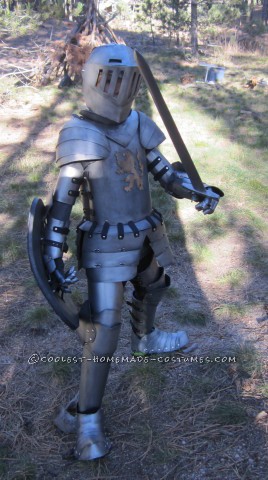
Several months after last year’s Halloween, my 9 year old son decided he wanted to be a medieval knight for Halloween this year. In my household, Halloween is a pretty big deal and we make our costumes, so this wasn’t going to be just any knight costume – we were going to go for full body armor.
Since I had never built a suit of armor before, this was going to be fun. First was learning about all the pieces of a standard armor suit and deciding what kind of suit to build. Scouring the web for images and recalling suits I’ve seen in museums, my son and I settled on an idea pretty quickly.
Next was figuring out which materials to use. Clearly steel was out of the question for cost, tools needed, and weight issues. I have used EVA foam on past costumes, which you can heat up and shape, but I was worried how it would hold up for armor pieces. However, I remembered seeing a technique for making light-weight armor by Amethyst Angel in which she uses thin polystyrene plastic sheet laminated onto EVA foam. I wanted to try it and see what we could do. After receiving my order of EVA foam and 0.020” thick polystyrene sheet, I prototyped a simple piece of laminated armor and decided it was a go. We were excited.
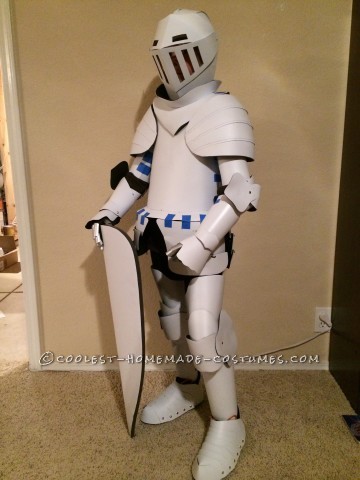
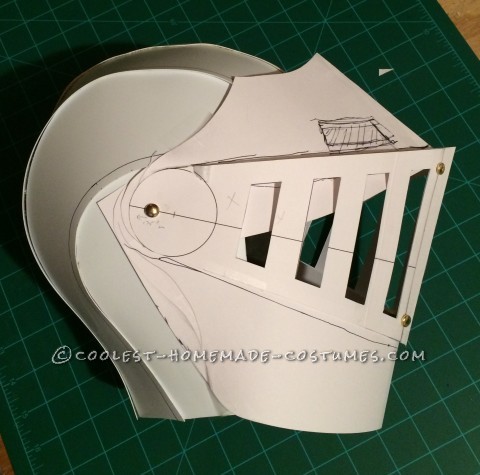
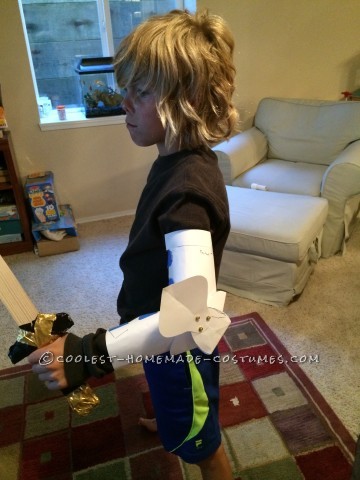
The next step was figuring out the shape and size of all the pieces. I didn’t have a pattern, so we had to make it as we went. Using card stock and metal brads for joints, we cut and fitted all the various pieces to my son’s body. This process took a while (many prototypes) to get the right size and mobility of each piece. Luckily, we only had to do templates for one side of the body, as you can just flip the templates over for the other side.
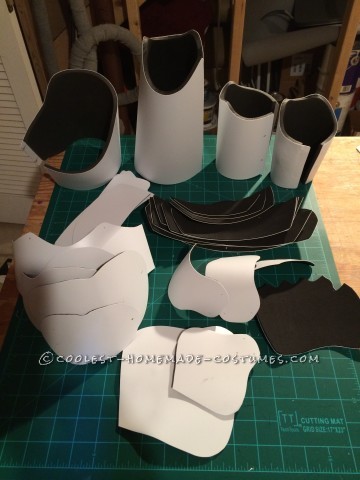
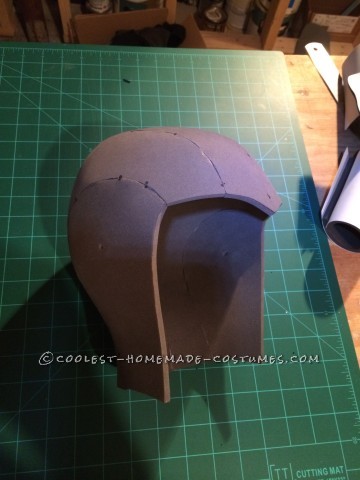
After we liked how a prototyped piece worked, the card stock template was used to cut out EVA foam. For the large body pieces I used 0.25” thick foam (breastplate, helmet, large arm and leg pieces). Smaller pieces or pieces that had to pivot together used 2mm foam (“foamies” sheets from a craft store). I used 0.5” exercise floor mat foam for the shield since it needed to be sturdier.
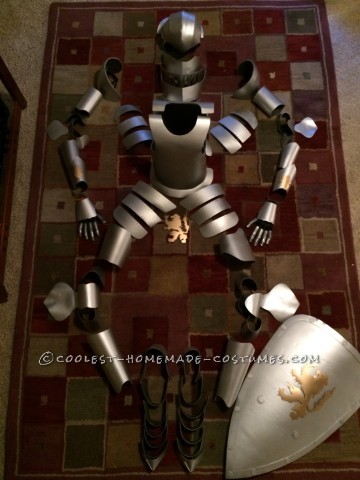
The foam cutout was then laminated to a grossly cut sheet of polystyrene using contact cement (Dap Weldwood Original), and then the polystyrene was trimmed to shape with a heavy duty scissors. For pieces that needed to be curved (most of them), I used a heat gun to heat and then shape the foam-polystyrene construction over a curved surface. Once it cooled it retained the shape. I really could only make curves in one direction (no compound curves), but that was enough for the costume. Holes were drilled at each pivot joint, and then I test fit the pieces again using the brads for the pivots, which could be easily removed prior to finishing. Later, after painting, I would use proper leathercraft rivets. There were over 100 different pieces to cut, laminate, drill, and test fit (not to mention my fair share of mistakes and redos).
Once the costume was constructed and fully test fit, it was time for dis-assembly and painting. All of the polystyrene surfaces got a layer of gray spray primer. I used gray Plasti-Dip to seal the foam side of pieces that would be showing. Everything was then painted with metallic silver spray paint. At this point the armor looked kind of plain and fake (Tin-Man like), so I created a faux patina by lathering it with a water based black acrylic paint and then buffing it back to silver until I got the right effect. I used gold metallic paint instead of silver to make the emblems on the breastplate, shield, and gauntlets stand out.
After painting, it was time for assembling. As I mentioned, I used leather craft rivets for all of the pivot joints. I used metal eyelets and leather cord to assemble the plates that hung from the breastplate and for the laces that attached the sabatons or foot armor to my son’s tennis shoes. I contact cemented the finger armor directly to a pair of work gloves for the gauntlets. Velcro, either self-adhesive or riveted on, was used for all the rest of the attachment and cinch points. I know, Velcro isn’t very medieval, but with 12 different pieces of armor to put on, leather buckles would be way too slow. A couple hundred rivets and eyelets and several feet of Velcro later it was all fully assembled.
My son’s sword was made of wood (just a lot of cutting and sanding) and finished similarly to the armor. We also spray painted a knit shirt silver to replicate chain mail, although it ended up not showing very much.
It takes a good 10 minutes to dress my son (I was the squire), but he loved the armor and had a blast wearing it at all of our Halloween events. He especially liked standing perfectly still in a crowd and then moving suddenly to startle onlookers. Maybe we will go to a Renaissance fair this summer before he grows out of the armor.




Jeff! We need to talk!
You are living the dream! I just started working with EVA FOAM. Would love to get your TRANSFORMER files. I posted this on your other page.
Hi Jeff! I was wondering if you happen to have the Pep files for sale. I think you do win the award for style and functionality. NICE JOB!
Please let me know if you are willing! My son just turned 7 and has asked for Halloween. I’m going to try to connect to every link to reach you (not going to stalk you…well maybe :)
Please let me know! From one evolved/involved dad to another!
Jarrett-
This is the most AMAZING homemade costume that I’ve EVER seen. Cheers, this is ASTOUNDING! <3
This is the most AMAZING homemade costume that I’ve EVER seen. Cheers, this is ASTOUNDING! <3
Looks fantastic. My 9 year old boy now wants this and of course he wants me to make it or buy it. I have no talent in making this. Maybe if I have detailed instructions I can do this work of art.
Hi Jeff,
Would you be interested in custom building another suit of armor? I work for a television show and we are very interested in your medieval knight costume.
Please let me know as soon as possible if you’d be interested!
Thank you!!
Hi Jeff,
Would you be interested in custom building another suit of armor? I work for a television show and we are very interested in your medieval knight costume.
Please let me know as soon as possible if you’d be interested!
Thank you!!
Hi! How many days do you need to make a knight costume? Needed for TVC. Are you interested? Please let me know asap.
Can I purchase a template for this please? This is the coolest
really looks great!
Where can i purchase the foam you used for the Knight Armor.