My daughter-in-law’s all-time favorite cartoon as a child was She-ra – The Princess of Power which was popular in the early 80’s. When Halloween rolled around this year, I decided to see whether childhood fantasies can sometimes come true.
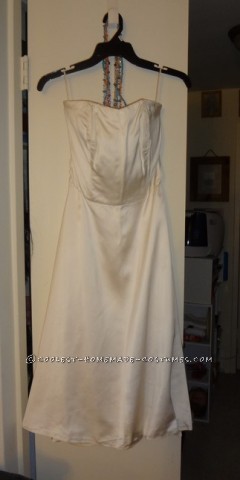
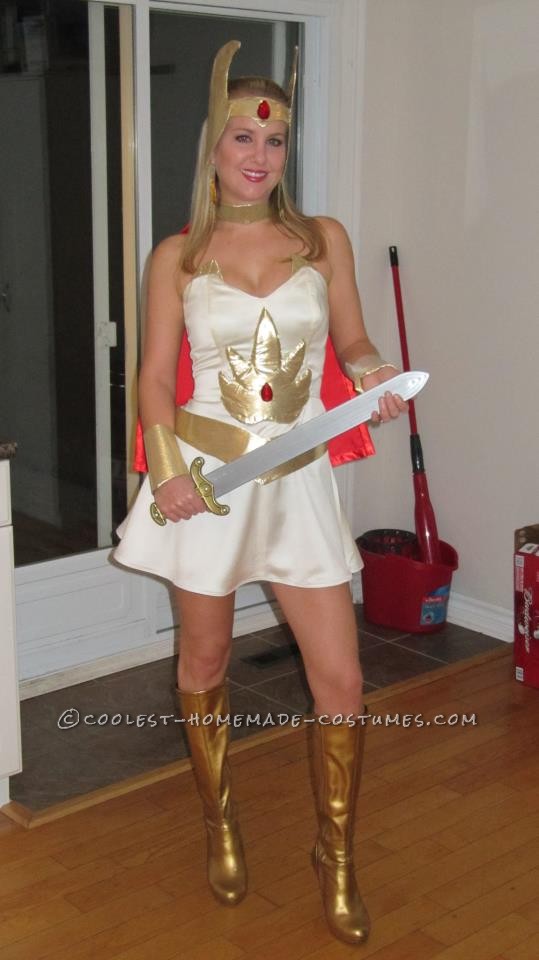
I got lucky and found the dress at the Thrift store. It needed some alterations but otherwise it was perfect. At Fabricland, I bought some gold lame for the accessories/attachments, some red satin for the cape as well as a chunk of FlexFirm to firm up the headgear wings, crest, belt and wingtips. The Dollar store provided a roll of spongy shelf liner to firm up the head band, choker, wrist bands & crest. I found a pair of red jewel earrings at the Thrift store after almost giving up on finding any jewels at all. Some matching thread, hooks and eyes, piece of elastic, self-adhering Velcro and horsehair braid for the hem rounded out the required supplies.
I took the dress in and cut the length down to size, stitching some horse-hair braid to the hem to give it a bit of bounce. I created templates of all the accessories/attachments by trial and error. I drew each one freehand and cut it out. Then I redrew it on a new sheet of paper, adjusting where needed and then cut it out again. In all cases, I created the template and used it as a pattern for cutting out the material.
Head band – filled with spongy shelf liner and elastic at the back with a hook and eye. Sewed on the red jewel with a dab of hot glue underneath to hold it in place.
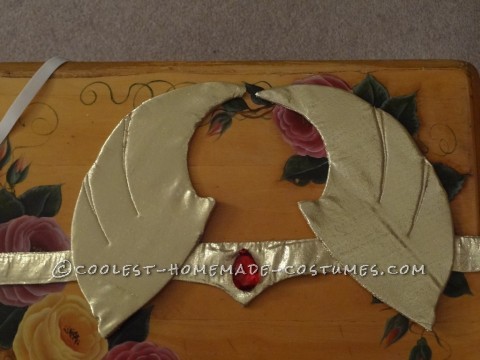
- Headgear wings – filled with FlexFirm. Sewed contouring onto them to enhance their wing-like look and sewed onto the band.
- Wingtips at the top of the dress – filled with FlexFirm, sewed contouring onto them and attached to the dress.
- Choker – filled with spongy shelf liner and elastic at the back with a hook and eye.
- Wristbands – filled with spongy shelf liner and attached with self-adhering Velcro.
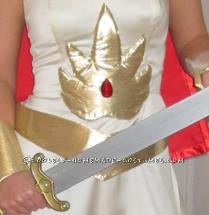
- Belt was a bit of a chore but I used the FlexFirm to fill it with elastic at the back with a sleeve of material over it. In the end I tacked it in place in four spots and left it at that.
- The crest was the hardest – filled with Flexfirm and a smaller piece of spongy shelf liner to give it a bulky look and a lot of determination and hope.
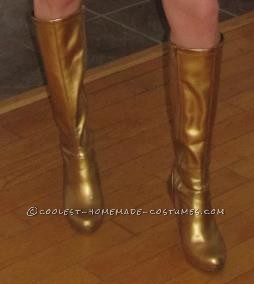
- Boots – an older pair of boots spray painted with Meltonian Nu-Life Color Spray Paint.
- The sword was bought at a local costume store.
- The red cape – hemmed and edged a piece of material (about a half yard), made a sleeve type of opening at the top and threaded with elastic. It was then attached to the choker with four hooks and eyes at the back.
The costume was a success and my daughter-in-law was tickled pink to be able to live out her fantasy and one of her favorite holidays all in one day.

Your comment has been sent successfully.