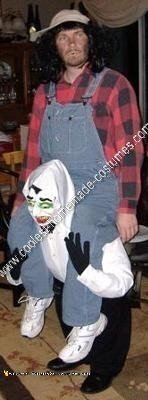
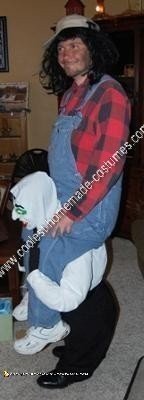
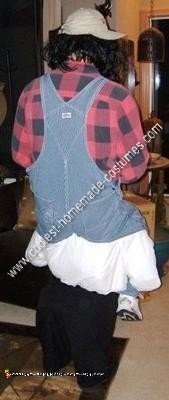
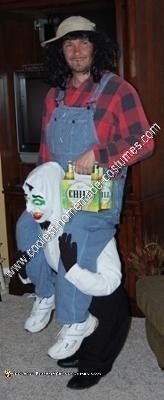
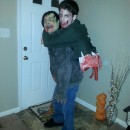
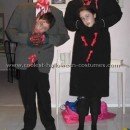
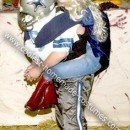
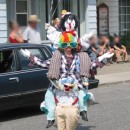
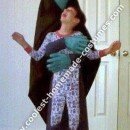
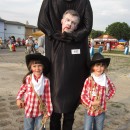
This homemade vampire carrying hillbilly illusion costume idea took awhile to plan and design. The most important part was deciding on the filler material. I ended up using lots of bubble wrap, which made the body extremely lightweight.
HEAD:
I first started with the head. I bought a styrofoam head, which was used for wigs. I attached a small PVC pipe to a sturdy hanger with electrical tape and pushed the PVC pipe up through the bottom of the styrofoam head (hole was already there). This attached the head to the shoulders (hangers curves).
I wrapped the front and back of the hanger with bubble wrap (got from work) and used electrical tape. The vampire mask is just a standard face mask picked up for cheap at Fred Meyers on clearance. The mask had a strap to attach to the styrofoam head. I made some eyes for the mask, to add realism. I used a styrofoam ball about the size of a gulf ball and cut it in half. I used color markers to paint the eyes. I attached them to the inside of the mask with duct tape. I had some extra white cloth that I sewed a hood to cover the back of the head.
SHIRT:
I bought a white long sleeve shirt from Goodwill. On the back of the shirt just below the shoulders, I made a cut from left to right across the shoulder line. This would allow my body to fit through the back of the shirt. I used some old suspenders I had and wrapped one end of the suspenders around the front of the neck, so they wrapped around toward the back. I used duct tape to add extra hold.
The other end of the suspenders fed behind the neck and under the shirt and through the hole that was cut in the back of the shirt. The suspender will later be used to go over you shoulders to hold the small body up and to keep it from pulling down. I filled the arms with bubble wrap and attached black gloves for the hands, using safety pins.
PANTS:
I had some old black slacks. I put those on to just above my knee caps and then used safety pins to mark were my ankles were. This gave me the length of the pants. I cut the pants legs at the marked area then sewed the ends to keep them from fraying. I attached the pants to the shirt with more safety pins.
For added realism, I folded a couple of sheets of bubble wrap and added it to the inside of the pants with duct tape and string tied in the center of the bubble wrap. This made the ‘Butt’ for the small person (this was the most commented on part of the body, because it made it look real). I added a belt for more effect.
OVERALLS:
Next, I found some overalls at Goodwill (extremely hard to find). I put on the overalls by themselves and sat on the edge of a chair. This would give me the sitting position. I then placed my hand between my legs and with the tips of my finders marked a spot with a piece of painters tape (easy to remove), just under the leg. I removed the overalls and found the spot with the tape. I used a piece of string to measure my leg from front to back to give me the size of the opening I would need in the overalls for my legs to fit through.
I laid out the string on the spot that I had marked with the tape, centering the tape spot to be in the middle of the string. I cut a new piece of painters tape to match the same size of the string and taped over the string, going from the waist to the knee. Do the same on the other leg. I placed a thick piece of cardboard inside the pant leg to protect the pants underneath when I made my cut. I used a utility knife to cut down the center of the painters tape. This makes the opening for your leg to go through. Do the same on the other leg. You can sew the cut ends or use tape to keep them from fraying. I removed the tape and string from the pants.
I then put on the overalls, placing my legs through the holes. I then lifted the ‘body’ and fed the suspenders through the zipper hole of the overalls. I then used safety pins to mark the spots were the cut shirt meet with the holes cut in the legs and pinned them together (might need help with this).
Once pinned, I removed the overalls and body (now attached) and used more safety pins to better keep the shirt and leg holes together (if I had more time, I would have sewn this). I used duct tape to cover the safety pins so I would be protected if one came undone.
BODY AND FEET:
Last thing to do was add some more bubble wrap to fill in the body a little more, using electrical tape attaching it to the hanger. I filled the overalls pant legs with bubble wrap to fill in the legs. For the feet, I used two small plastic water bottles and two plastic coat hangers (non-swivel). I broke the coat hangers in half, so I had a “L” looking shape. I placed the cap end of the bottle in to the bubble wrap and attached the hanging part of the coat hanger against the bottle. I wrapped lots of duct tape around the bubble wrap, bottle, and the hanger part of the coat hanger, until it was good and secure. The shape should look like really thin foot. Do the same on the other side.
I wrapped a little bubble wrap around the ends of the half hanger sticking out, to keep the end of the hanger from poking a hole through the socks. I put a sock over each foot then added the shoes. The shoes add lots of weight, so pick the lightest ones you have.
FINAL TOUCHES:
I bent the arm and attached the hands to the top of the legs, using safety pins to hold them in place. I put black socks on my real feet put on the overalls with the body now attached, carefully placing my feet through the leg holes and through the shirt. I pulled the suspenders through the zipper hole of the overalls and pulled the straps over my shoulders and reattached to the front straps of the suspenders using the clips already on the suspenders (next time I will find much longer straps to use, it was kinda tight).
I put on my plaid shirt and filled it with some bubble wrap for the fat look. I help putting my shoes on, since I couldn’t reach them. Added a wig, makeup, fake teeth and beer.
Have fun with this homemade vampire carrying hillbilly illusion costume idea!

Your comment has been sent successfully.