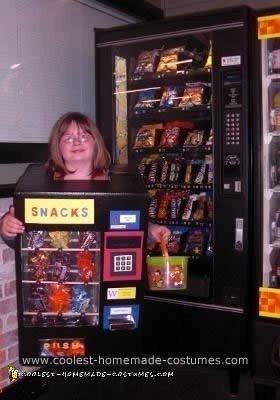
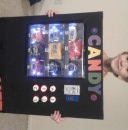
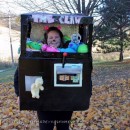
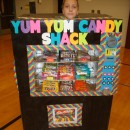
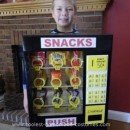
I saw this idea for a Homemade Vending Machine Costume on this website but there weren’t any detailed instructions so I had to go with what little information I had and some small pictures. My daughter loved it. Everybody said it was the best costume they had ever seen.
Items needed:
•Box big enough for child or adult to fit in comfortably
•Box for inside big enough to fit in 9 different candies on dowels.
•1 or 2 small shoe boxes
•2 to 3 cans of glossy black spray paint, the fast drying kind
•Black sharpie pen (if needed)
•Some kind of reflective or mirrored paper
•Wooden dowels, at least 3
•Packing tape, 2 rolls of duct tape( 1 black and 1 silver)
•Glue gun with glue sticks
•Scrapbooking glue
•Box knife and scissors
•2 large calculators, taken apart, you will need the numbers (1 to 9), and one of the screens
•A ruler and pencil
•Foam letter stickers and foam paper stickers
•Fiberfill or cotton balls
•9 different kinds of fun-sized candy bars
•Coils, I used wielding rods but you can use a slinky
•Thick foam pieces, one or two inches in thickness
•Plexi glass, plastic wrap, or lamented paper
Prepping the Larger Box: You need to measure and cut out the hole where the smaller box will be placed. Making sure the hole is slightly smaller than the box and on the left center side. I think I left about an inch or more on all sides. Cut out the entire bottom of the box. I then used black duct tape on the top of the box for the seam. My son then used the black sharpie to cover any writing and pictures on the outside of the box. It allowed for better coverage of the black paint later on. He then spray painted it. It only took a couple coats. Once dry you can cut out the arm and head holes. I made the hole for her head pretty big so she would feel comfortable.
Prepping the Smaller Box: I used a lid from a box of tomatoes. It ended up being the perfect size so I didn’t have to cut it down. On the inside I used craft glue to attached 2 sheets of reflective scrapbook paper. I didn’t worry about the seam in the middle because the rod you will later put in will cover it. We put black duct tape on the sides, inside box lid.
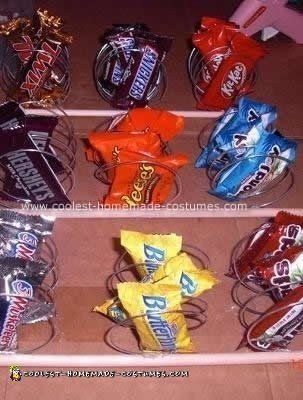
Prepping the Candy Rods, Coils, & Bars: I used wooden dowels for this. I bought a package of them at Wal-Mart. They happened to be the exact size of the smaller box I was using so I didn’t have to cut them down. You could also buy a long dowel and cut it down to size. I used wielding rods for the coils. They are easy to twist into a the shape you need. These were free from my son’s high school wielding shop. You could also buy a slinky and cut it into 9 pieces. You just need to make sure that you have room for 3 candy bars to be inserted into each section. To keep the weight down on the costume I removed some of the candy from the packages. I left 9 of the candy bars in tact then removed the candy from the other 18. Once they were empty I filled them with fiberfill then hot-glued them shut. At this time I also took apart one of the calculators keeping the numbers, 1 to 9, only. I bought the calculators from our local dollar store.
Putting Together the Rods, Coils, & Candy: I measured and marked the dowels where I wanted to put the coils. I then hot glued the coils on them. I hot glued one real candy bar in the first slot on the coil. Then I glued a fake one in the second and third slot. I did the same for all the dowels. While they were drying I measured the inside of the smaller box and marked were I would put the dowels. Then when they were dry I attached them with hot glue. I started with the one in the middle so they would all be centered. You will have to hold them in place for a couple of minutes while they dry because they slip a little on the duct tape. Once these are attached you can glue the calculators numbers on the dowels.
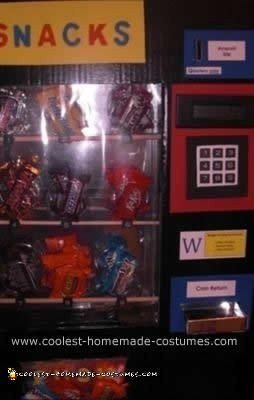
Top Of the Machine: I cut out a yellow piece of foam sticker paper for the top of the box. I then used the foam letter stickers to spell out the word “SNACKS”. I had to use red and blue because there was only one “S” on each colored sheet.
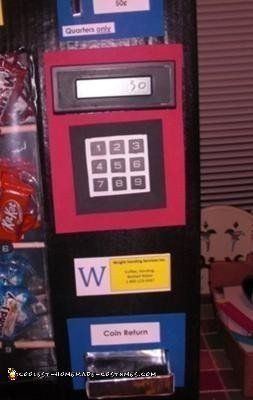
Coin Slot: I basically used the top of a shoe box, reflective paper, scrapbooking glue, silver duct tape, and reflective paper to make this. I cut and folded a small piece of shoe box in the shape of a coin slot. Then I glue and taped pieces of reflective paper on it. I then cut a piece of blue foam sticker paper out for the top, right corner. I measured, marked, and cut out a spot for the coin slot to fit in. Then I attached it to the box. I made the “Quarters only” & “Amount 50” signs on my computer. Cut them out and attached them with scrapbook glue.
Screen & Number Pad: I cut out a piece of red foam sticker paper to fit on the right side of the box. There needs to be enough room on it for the screen and the number pad. I then measured and cut out a spot for the screen. It was taped in place with duct tape. I used clear scrapbook stickers to put the number 50 in the screen. The number pad was really difficult for me to make and it’s hard to explain how I did it. I basically used part of the inside of the calculator to trace out nine squares on white printer paper. Then I cut them out and inserted the numbers through the back and taped them in place. Then I cut out a hole in black foam paper and stuck it over the number pad then attached it to the red sheet. These can then be attached to the box.
Coin Return: I made this the same way I made the coin slot. I just made it in the shape of a small tray with a high back. Then cut out a piece of blue foam paper. Cut a hole that is slightly smaller than the coin return. I made another label on my computer for the words “Coin Return” then attached it with scrapbooking glue.
Push Slot: For this I just cut a flap at the bottom of the box that you can push in. Covered it in silver duct tape. Then put the word “PUSH” on it in yellow foam letter stickers. I then hot glued 3 candy bars in the door. I thought this made it look more realistic.
Label: Once I was done with all this I realized that I had an empty spot between the number pad and coin return that I really didn’t like. I used to work for a vending company and remembered that all there machine have a sticker on them with their logo and phone number. So I made one of my own on my computer and printed it out on card stock printer paper. I used our family name as the company name and the phone number is 1-800-123-4567. I think this gives it a cool personal touch.
Glass Front: This was the most difficult part of the costume to figure out. I was originally going to use plexi-glass bought from the local costume store. Then I found out the smallest sheet was $18.99. I wanted to keep the price of making this low so plexi-glass was a no go. Then I was going to use plastic wrap. But I worried about how well that would hold up. So I used two pieces of lament taped together with clear packing tape. I ducted tape this to the inside of the box around the hole.
Finishing the Front: This is when it finally came together. I attached the smaller box on the inside with hot glue and duct tape. I first glued the long side of the smaller box to the inside of the larger box. Then I duct taped the other three sides to the inside of the box. Gluing one side made it more secure.
Foam Padding: I actually added this later. After wearing it for awhile it started to hurt my daughters shoulders. So I hot glued some thick pieces of foam in the top inside to make a kind of shoulder pad. Then I glued a larger piece on the top, back, inside for comfort.
Price Of Materials: Half the stuff I used was either free, already owned, or from the dollar store. I spent most of the money on the candy. So I probably spent around $25.00.
I started making this Homemade Vending Machine Costume in the middle of September. I worked on it a little bit every few days and got it done the week before Halloween. So it really didn’t take that much time at all. All the work paid off and it turned out amazing.

Your comment has been sent successfully.