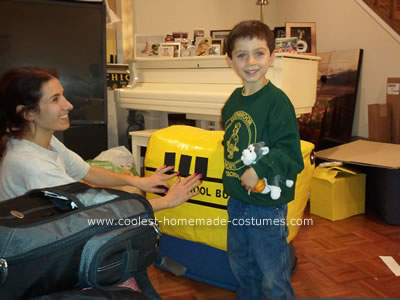
My son had so much fun wearing this homemade Yellow School Bus Halloween costume inspired by his love of the classic yellow school bus! At 4 years of age, he has amassed quite a large collection of figurines representing ALL modes of transportation, and his school bus collection is no exception! I searched his playroom and was fortunate to find all sorts of sizes of school buses from miniature, to larger-scale buses to use as my models. As this was my 1st attempt at actually ‘constructing’ a school bus costume, I let my creativity flow and was really pleased with how it came out!
The Yellow School Bus costume was equipped with lights wherever a conventional school bus would have them, along with bus sounds and a track that looped ‘The Wheels on the Bus’ which has always been a favorite of my son’s. Although it was a bit labor intensive and took a while to complete, seeing my son’s excitement build as I completed each stage of the process, and knowing how proud he was to wear the costume upon completion made it more than worthwhile! It was definitely a crowd pleaser with kids and adults alike. While out at festivals and during trick or treating, so many admired all the details on the bus, asked questions about how I built it, and commented on how seeing my creation had inspired them for the coming year.
Wearing this costume, my son won several local costume contests and even the one sponsored by Mayor Daley of Chicago who was there to see him win the contest! He also was interviewed by a local television station which was quite a thrill. This costume created a lot of joy for my family and I. This was such a great experience. Hope it inspires you too! HOMEMADE COSTUMES RULE!
Here are the materials that I used to make the School Bus Costume:
• mucho duct tape! (7 rolls of yellow, 1.5 of silver, and 1 roll of black)
• about 2 grocery bags full of brown packing paper
• about 4 ft of bubble wrap off a professional roller and a few Fed Ex packing envelopes
• a storage bin as an initial support which gets removed once the structure is stable
• sticky back black foamie letters and smaller sticky back black foamie numbers
• 2 cardboard boxes
• 14 booklight lights from the dollar store (7 encased in yellow plastic and 7 in red, same colors as a school bus)
• 2 yards of material for suspender-type straps
• 6 brats for wheel mechanism and driver’s cap
• 2 pieces of tinfoil for hub caps of wheels
• yellow sticky back foamie letters to write ‘BUS DRIVER’ on cap
• red and white sticky back foamie for small stop sign
•2 sheets of sticky back black foamies to make windows and doors of bus
• Stickers of scary passengers to stick on windows of bus
• 1 piece of black ribbon to use as strap on driver’s cap
• 2 wire hangers as part of suspender strap assembly
• MP3 player to play bus sounds and bus song
• 4 paper bowls for wheels
• 2 rolls of clear packing tape (using a tape gun will make it A LOT easier for you)
• about $15 dollars worth of black Velcro
Here is HOW I made the Yellow School Bus costume:
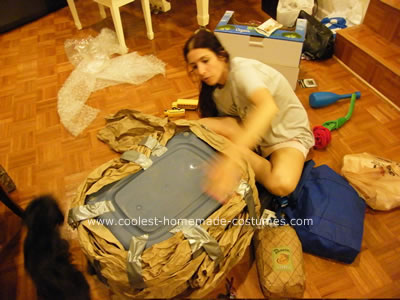
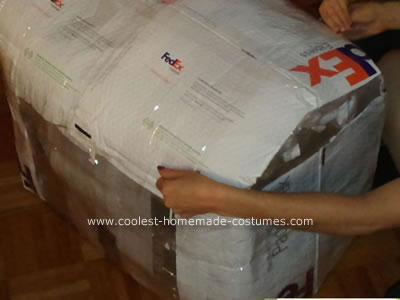
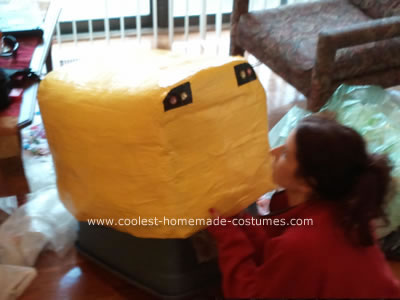
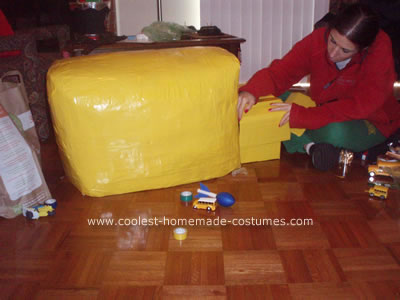
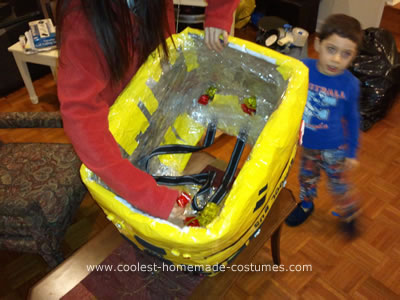
I started with a 21 gallon bin and using packing paper and clear packing tape (don’t use duct tape for this part because it will not adhere well enough) I built a rectangular foundation around the bin. Next, I added a layer of bubble wrap and Fed Ex packaging envelopes around the packing paper to smooth it out and mold it into the angles and shape of the school bus I wanted.
Throughout this entire process, I had the toy models of the school buses in front me for constant reference. I highly recommend this because it provides a great guide as you create!
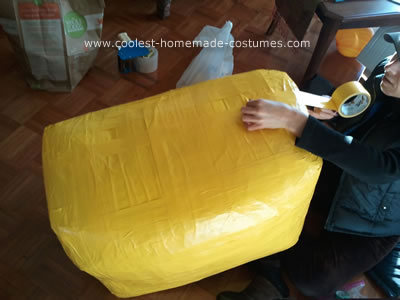
Then, I did a layer of silver duct tape over the bubble wrap to get a more polished rectangle. FYI, at this point, the costume could’ve been made into any number of modes of transportation (firetruck, construction truck, garbage truck, diesel truck, etc…). If I did this again, I would’ve used either more clear packing tape or white duct tape as opposed to the silver. The silver was too dark underneath the yellow (yellow duct tape is quite see through), which necessitated a few more layers of yellow than I had anticipated.
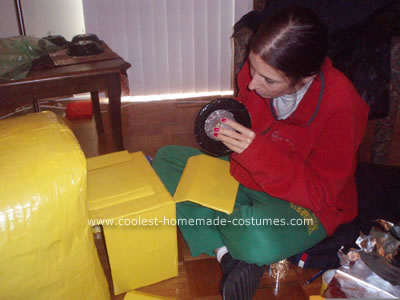
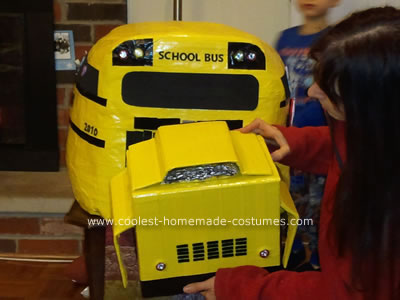
After this, I built a separate front for the bus out of cardboard covered with yellow duct tape which I adhered to the rest of the bus costume with lots of black Velcro. Again, I followed the toy model and made a grill and engine (out of tinfoil) and sides that graduated down and out for the wheel base (see pictures for visual).
After this I made the four wheels of the bus out of paper bowls covered with black duct tape, and tinfoil hub caps connected with brats so that the wheels spun. I attached the wheels to the bus frame itself with more black Velcro. Now that the bus was really starting to resemble a yellow school bus, the next step was to begin with all the small details. This is the point at which I separated the bus from the storage bin. This step is rather painless and certainly gives you a great sense of achievement, I feel.
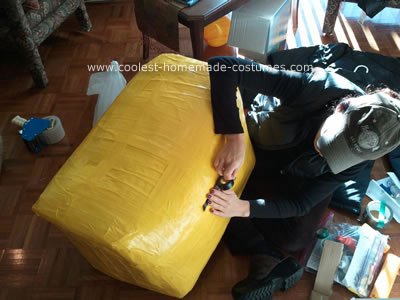
The process of the installing the lights was pretty laborious but had a tremendous result. I made the marks of where I wanted the lights (again following the toy models) and cut holes into the yellow bus frame itself. Now that the bus frame had so many layers of paper, bubble wrap, and duct tape, this was no easy feat — especially with 14 lights to be installed. I made small incisions on the outside and inside of the bus and then eased the lights in from the inside out, slowly poking them through into their place. Then I stabilized them with duct tape. Once in, I used black duct tape to frame around them where necessary, just like a real school bus.
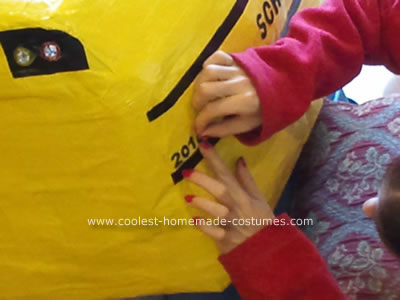
My next step was to use sticky black foamie sheets to make the windows and doors in their various shapes and sizes, all the while following the much smaller toy models. After this came the lettering and numbering of the bus. I decided to make this Bus #2010 for the year 2010. I used scary bus stickers to be the passengers such as a witch, ghost, goblin, werewolf, bat, etc… on the windows.
One of the finishing touches was the stop sign which I simply created out of red and white sticky back foamie and letters. Before making the driver’s cap, I searched images on the web because I really wanted an old-school type hat a la Ralph Kramden of ‘The Honeymooners.’ I constructed the hat out of cardboard, bubble wrap and black duct tape. I used yellow foamie letters for ‘BUS DRIVER’ and made a strap for stability using black ribbon, 2 brats, and a tiny amount o f Velcro at the base under the chin.
Once all the details and accessories were done, I cut out a square on the top of the bus for my son to slip the homemade Yellow School Bus Halloween costume on over his head. The size of your opening will depend on the size of your child obviously… I made mine about 10 x 10 inches.
The VERY last step was then to secure the straps. Up until this point, this school bus costume was ALL me, but my husband gave me a great idea for this part and I thought the approach was rather ingenious — and it worked perfectly!! We cut wire hangers into 4 inch long pieces, taped them together, and then stapled them to the ends of the straps. We then took each of the ends and heavily taped them to the inside of the bus at diagonal corners so that the straps criss-crossed. The length of the straps will again depend on the height and size of your child, along with where you want the vehicle to hit them on their body. For our son, I decided to have the top of the bus hit around his waist. I highly suggest that you add some padding at the shoulder area for added comfort. You could use foam, washcloths, thick socks, etc…
Also, if you find that your bus is tipping forward or back while strapped on your child, then you can either clip the straps to a shirt or coat, or add a small weight (1 pound) to balance and distribute the weight more evenly. And voila, the coolest homemade Yellow School Bus Halloween costume!!
(By the way, my video recording skills are quite elementary and I sincerely did not know that you cannot record VERTICALLY or you have to turn your monitor to the side for viewing — SO SORRY…PLEASE EXCUSE MY RECORDING SKILLS!):
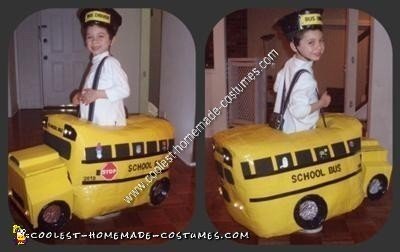
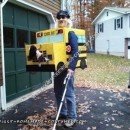
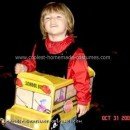
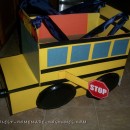
As I am the only professional bus driver in the family, I officially proclaim Maxwell as “Honorary School Bus Driver of The Year”. As such, he gets to drive (wear) the coolest bus in the world. Built buy the Mommy Bus Mfg. Co. of Danielle, Inc. to exceed all expectations of friends, relatives, neighbors and all Max’s constituents who voted for him.
No wonder he won! Great pictures, great story and great writeup.
Proud Uncle Howie
i love the costume
hi its really very good.. i want to know the size of cardboard box u used?
OMG! A mom’s love for her children is endless!! The time and effort put into a costume for Max was incredible. As we say in the south you are “good momma”!!