This is what you need to make a Homemade iPhone 4 Facetime Costume:
5 Large Flat Pieces of Cardboard
Plenty of Elmer’s Glue
A lot of Masking Tape (about 3 rolls)
12 feet of Quarter-Round Moulding (for framing)
Small Screws and Washers
2-3 Cans of Glossy Black Spray Paint
1 Can of Metallic Silver Spray Paint
1 Small LED Flashlight
A Sony Handycam
A 10inch Portable DVD Player that has AV input
And a Black Ink Sharpy for Retouch
I have always wanted to make a really cool home made costume. I moved to the United States from the Philippines when I was 15 years old. It is uncommon to dress up for Halloween in the Philippines, so the tradition here really appealed to me. This is my first attempt at making a costume and I am very excited to submit this entry to share with you the awesomeness of this project.
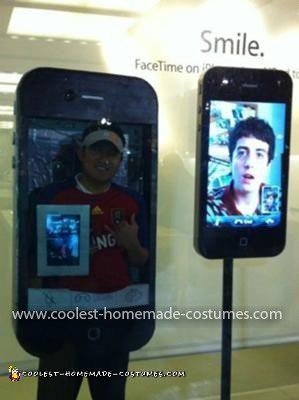
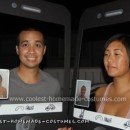
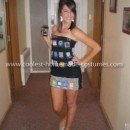
When I decided to make this costume, I decided I wanted something cool and original. I wanted something that had never been made and I wanted it to be interactive so it would be fun. The coolest new technology that came out of 2010 was the iPhone 4, with Facetime capability, which is why it was the inspiration for my costume. I searched the internet to see what kind of iPhone 4 costumes had been already been done and I was really excited that no one had done anything like what I was planning… a real interactive Facetime.
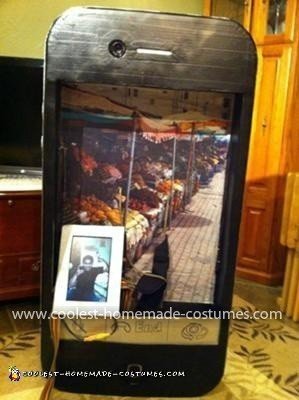
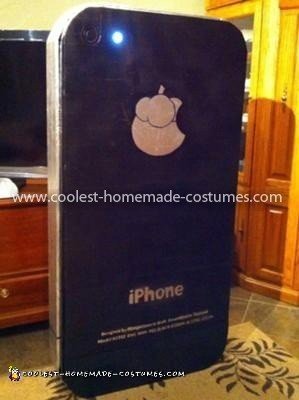
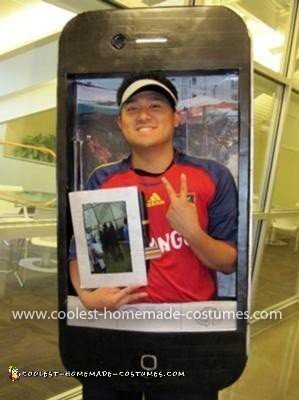
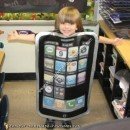
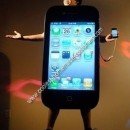
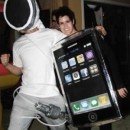
I started by measuring an iPhone and drew out the measurements to the very pinhole. I wanted it to be as realistic as possible, just on a larger scale. The key to the costume was the Facetime feature. I wanted people to look at my costume and, at the same time, be able to see themselves; like how they would on an iPhone during Facetime. I realized that I needed a camera and an LCD screen that would work as a monitor for the camera. I already had a Sony Handycam, but I needed a monitor that was battery operated. I went to Best Buy and got myself a new Portable DVD Player that had an AV input to it. $150, problem solved. The Rear Camera flash was simple. All I needed was an LED Flashlight. I could leave it turned on the whole time or I could click it on and off for the flash effect.
Once I had the key items, I knew it could be done. I then started looking for the simple, less expensive parts. I went to the mailroom at work to see if they had any big boxes that I could use. They gave me really nice big pieces of cardboards. Perfect!
Later, I was doing photo copies and saw a pile of junk by the side of the copy machine. I was excited to find a big picture of a Thailand outdoor market. I knew it would be perfect to use as my background.
My concern at this point was that cardboard would not be sturdy enough so I doubled up each side and used Elmer’s Glue to keep it together nicely. My father in-law gave me some unused quarter-round moulding, so I used that to frame the iPhone. I attached the cardboard and moulding with small wood screws and washers from Home Depot.
I got a strap from an old duffle bag and used it as a strap to hold the costume around my chest. The straps already had the adjusters so that made it easy to fit on perfectly. Once it was strapped, I put in another set of laces that went over my shoulder and tied to the strap in front of my chest to stabilize the costume and to keep it upright. To hide all the straps on my chest, I had an old soccer jersey that I cut holes in and strapped it through.
I really didn’t think through all of these details ahead of time. It pretty much all worked out as I went. I just tackled one issue at a time. One thing I learned from this project is that anything is possible. You don’t have to know everything. All you have to do is to keep moving forward and tackle each problem or situation, one at a time. Line upon line, precept upon precept.
I hope you’ll enjoy watching this as much as I enjoyed making it. Attached below is the link to the youtube video that I put together to show the step-by-step process of this costume. I also added some clips that show the recognition I received from the costume contest at work and our trip to the Apple store in Downtown Salt Lake City, Gateway Mall. My iPhone costume had a built in camera so all I needed to do was press record. Wasn’t that convenient?
Enjoy the video and the pictures!



What an amazing idea! I too grew up in the Philippines where we celebrate Christmas starting in September so Halloween and Thanksgiving were not part of our traditions growing up. Great job! Keep posting your ideas!
Thanks for sharing!!!
Thisis is such a creative costume. Very impressive.
I love this! What a great and innovative idea. It looks like it sure took you a long time….wow!
I actually had the chance to see this in person, it is really AWESOME and very well thought through!!
You are so amazing!!! Hard work = Cool costume!!!
This costume was by far the most creative, coolest, costume i have ever seen. The detail and time that was put into it is amazing. Fabulous idea! Amazing Graphics! Outstanding costume overall!!
this costume is freakin awesome! I am excited to see your creativity in the next one! Keep up the great work!
Way cool! You’re certainly putting your whole heart and mind into this project. Hope you win!
this is hard work… keep creating more for the Halloween!
Great work Junell! Congratulations!
Really funny. LOL!
Very well made, great job!
Awesome!!!
Super creative! Way to take the time to do make it so perfect. Good luck!
Nice one kuya Junell, hope you can bring it here in the Philippines when u get back, so we can see your creation personally :D Good job!
it was amazing wish we also have a costume party here in the Philippines so i can follow the instructions and make my own…..