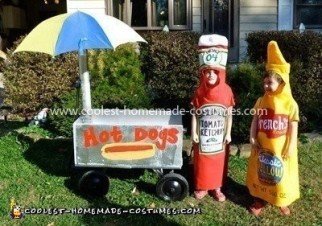
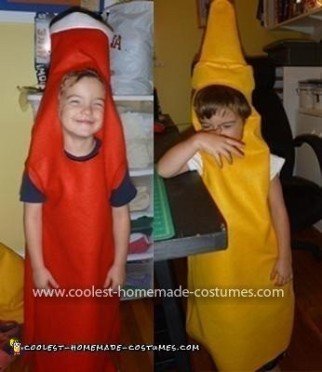
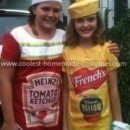
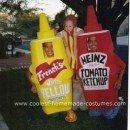
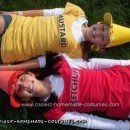
This year, my four year old twins decided they wanted to be their favorite condiments: ketchup and mustard.
1. The first thing I did for this Homemade Ketchup and Mustard Costume was google images of ketchup and mustard bottles to find the exact style I wanted to duplicate, and printed out pictures of a classic glass Heinz ketchup bottle and a bell shaped French’s mustard bottle.
2. I purchased 2 yards each of red and yellow felt, a yard of white felt, and a few sheets of different color self adhesive felt (green, black, blue). And I made sure I had plenty of glue sticks and a variety of puff paint on hand.
3. I measured my sons’ height and width to determine how big the costume would need to be, and then I sketched them out. This made it possible to figure out the right proportions for the labels.
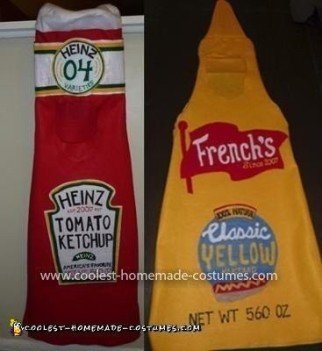
4. Very slowly and carefully, I cut out all of the pieces for the labels out of my felt, and then glued them all together. I used puff paint to write the very small/skinny writing. (I recommend having a pair of spring loaded snippers for cutting the intricate letters. I think I was able to be more precise than if I had used regular fabric scissors).
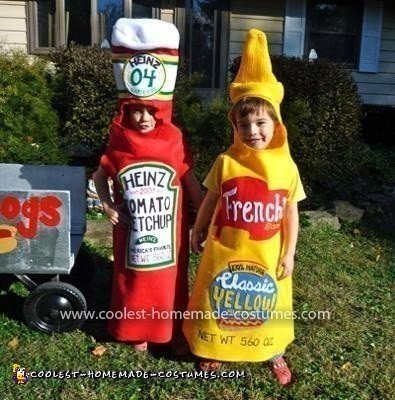
5. I replaced the original Est./Since dates with 2007 (their birth year) and the Net Wt with their weight in ounces. For the ketchup, I replaced the 57 on the neck label with 04 (since my son is 4). This is something that bothered him about the costume!
6. To make the actual bottle shapes, since I didn’t have an actual pattern, I literally laid my kids kid down on the felt and did a police outline of their bodies. Using this as a guide, I sewed the actual bottle shapes together.
7. To make the lids: For the ketchup lid, I wanted the lid to be round like a real body, so I made it a cylinder shape. As it was, it was making the neck/lid too heavy, so I sewed in some “pockets” on the side and stuck in some cut off cardboard sticks (taken from the bottom of dry cleaning hangers) to make the neck stand up. My son still complained about the neck being too big, so I took an old red ball cap and cut off the brim and hot glued it inside for a more structured hat. This solved the problem! He never complained again.
For the mustard, I was really concerned with the squirter looking authentic (and not just like a triangle), so I made sure to make a cone with a base. Then I used yellow puffy paint to make like ridges.
8. Since my boys still get tired and ask to be carried, integrating a wagon of some kind is a MUST. So we spray painted an old wagon metallic silver (and re-sprayed everything else black. Then I painted ?Hot Dogs? on the side with a picture of a hot dog. Then I used silver masking tape to tape an old poster shipping cylinder (also spray painted silver) to the front of the wagon, and stuck in a multi-colored umbrella that was in our pile of backyard stuff to pitch this fall.
My boys LOVED their costumes! This is the first year we’ve done something that isn’t at all like normal clothes, so I was worried they wouldn’t wear them, but that has not been a problem. The problem is getting them to take them off! (I think part of what they love is all of the attention they get when wearing them.)

wonderful costumes for twins!
good job!
Thanks for the cool idea!
I was wondering for the ketchup did you use 2yrds for each side for front and back or just for the whole thing..my son is gonna ba ketchup and his dog is gonna be a hot dog..
I just bought 2 yards of each color. And I ended up having lots of fabric left over. My boys were 4, so depending on your son’s size, 2 yards of red should be plenty for your ketchup bottle. Good luck! I look forward to seeing your pictures!
We are doing Angry Birds Space this year. Hmm…not sure how I’m going to pull that off!
Hi. Love the idea. But I’m not crafty person. Did you cut out the front and back pieces of felt and then glue them together. Or did you keep the felt as one piece?