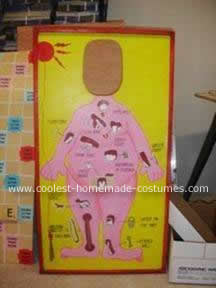
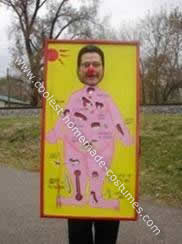
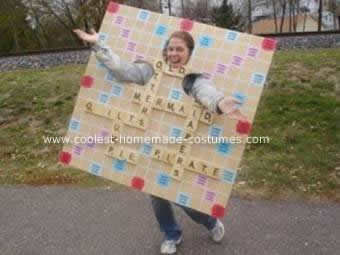
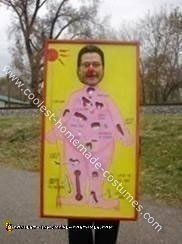
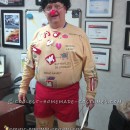
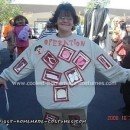
Operation is a great game. It teaches kids hand / eye coordination as well as the extreme anxiety and nerve-rattling paranoia that comes with being a real doctor. Plus it lights up and makes cool sounds. It has it all. So when Jolene told me she wanted to be a Scrabble board for Halloween this year, this would be the perfect costume to compliment hers.
Bill suggested I rig up sound and lights so that my nose actually lit up and buzzed at the appropriate moments. Once it was in his head, he took it as a challenge. So we split up. Jolene and I went to Home Depot, Bill headed to Radio Shack. Let me just add here, that if you’re using Home Depot and Radio Shack to buy Halloween costumes, it’s probably a sign you have larger issues. But I digress…
This would be a flat, 2-dimensional affair. However, instead of using corrugated plastic or cardboard, I went with lauan (pronounced loo-on), which is a lightweight plywood, similar to balsa wood. Not to be confused with Luann, the angst-ridden teen comic strip character. That will have to be a costume for another year.
First step: measure and cut out holes for our heads. We had thought about making sandwich boards out of the lauan, but that would create problems with walking and sitting, and would look like we’re merely wearing the boards, not being the boards. It’s a subtle distinction, but an important one.
Scrabble also got arm holes, so Jolene would not be trapped behind her costume all night. Operation would be narrow enough for me to reach round if I needed it
An hour later, I had started on drawing out the Operation patient (named “Cavity Sam,” according to Milton Bradley) when Bill returned from Radio Shack with light bulbs, buzzers and relay switches. He was like a kid in a candy store. He explained that all we would need was a simple circuit going from the batteries to the light bulb and buzzer, and closing at the relay. I smiled and nodded a lot and let him do his thing.
Next up: Once Cavity Sam was drawn out, I carved the cavities using a roto-zip saw. Painting went relatively quickly and was far easier than I anticipated. Which was good, since the next step proved tricky:
Each cavity needed a back, or a “room” as Jolene called it. So after a few failed ideas, we carved picture frames out of 1” foam (to give them depth), and put cardboard backing on.
Jolene painted then duct taped the “rooms” in place while I set to work on Scrabble. The trick, she discovered, was to position the rooms slightly offset of the cavities. This way, the pieces wouldn’t fall out when the board was standing vertically. Yet, they could still be removed with little difficulty. “Genius!” we cheered. This is why I love her.
It was at this point that Bill had completed the nose / buzzer array, to great success. He hot-glued a tiny light bulb inside a cheapo plastic clown nose. Basically, I could control the lights and buzzer simply by pushing a button. The rest of the apparatus would fit easily into that paragon of fashion known as the fanny pack.
The board wouldn’t actually function as the actual game, but I could just hit the buzzer whenever I felt like it and make it look like the person was playing.
Next Step: Jolene used a white paint-pen to grid-out the Scrabble board, while I set to carving the individual game pieces for Operation. Sintra® is a fantastic material. It’s a flat sheet of pvc which can be cut easily, or heated up for easy molding. I used the trusty roto-zip to quickly carve out some pieces (spare ribs, butterflies, pencil, etc)
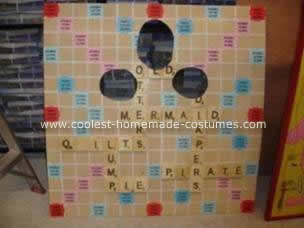
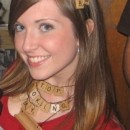
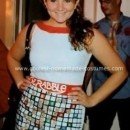
Now for the Scrabble tiles: The tiles were made of simple 1 X 4, cut 3” square. It was at this point that we noticed that in actuality, Scrabble tiles are slightly taller than they are wide. But we were too far in to change it up now. We soldiered on. After a quick sanding, Jolene set to lettering all those bad boys.
Since these costumes were going to be very heavy, hanging them off of our bodies would prove difficult. Difficult, that is, until my brother suggested using marching band bass drum harnesses. They could easily be screwed to the boards and subsequently removed for easy storage after Halloween was over. A shout out to the drumline for loaning us the harnesses.
Any bits of screw that poked through the other side met their doom by way of The Grinder! Kids: If your parents don’t create a cool display of sparks while making your costume, it means they don’t love you.
Cavity Sam was shaping up, but the board needed a plastic red frame to give it the illusion of depth. Seeing no plastic around, we went with 1X2 furring strips. Bill carved notches into each one that would easily slide across the length of the luaun board. Some hot glue and nails and they were firmly in place.
Hours later, Jolene was still lettering Scrabble tiles.
Computer time! Next we created Double Word, Triple Word, Double Letter and Triple Letter Score boxes and printed them on different colors of paper. Boy did they look at us funny at Kinko’s when we came in to buy 4 sheets of blue paper. Cutting these things out was a nightmare. Lots of tiny points on them. . . . Hands . . . cramping!
Once they were all meticulously cut, we glued them to the board using Flex-glue. I love Flex-glue even more than Sintra. It has so many uses. True to its name, it’s a strong adhesive, but is very flexible. So if your glued item bends, the glue bends with it but stays fastened. Mask makers use it all the time, and we once repaired a beach ball rather effectively with it. It goes on thick, so it doesn’t bubble up the paper, even when you slather it on. Best of all, it dries clear and leaves a glossy coating on the whole endeavor. This step was a breeze, and the shine made it look like the colored score boxes were simply a part of the board.
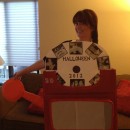
The last step was to glue on the tiles. A few had to be cut to make room for Jolene’s head and arms, and Voila! Complete!
With Scrabble out of the way, and Operation almost done, we were riding high. All Operation needed now was a tweezers, which proved difficult, trying to find a larger than normal one. Eventually we settled for vegetable tongs from IKEA, where, incidentally, they’re called glonk. We also picked up a flarg, two stunti, and a flergenlugen, but that’s a story for another time.
A quick drill job and some leftover red wire to attach the tweezers, and we were done with this one as well. 2 for 2!
As a final step, we coated each of them in flex-glue for protection and shine. Don’t worry, li’l campers, it goes on milk-white but dries totally clear.
And Voila! Done and Done
Your comment has been sent successfully.