Halloween is my absolute favorite holiday because it’s the perfect opportunity to challenge and express my creativity (which I don’t get to utilize working in an I.T. Support role in a cubicle day in and day out).
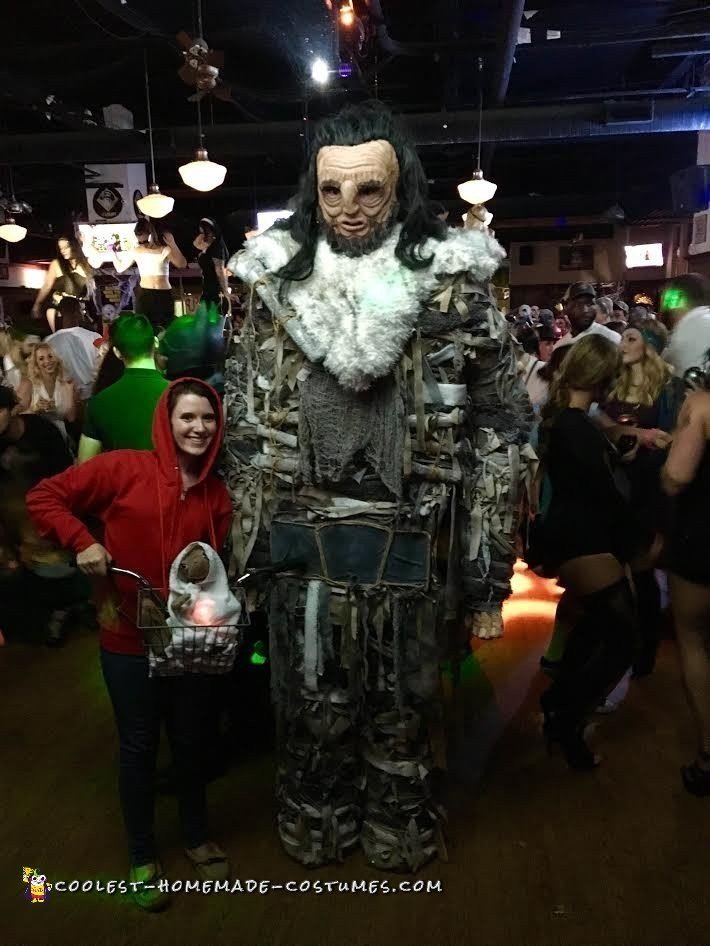
I find the process of creating a homemade costume to be enjoyable and therapeutic, which is why I didn’t mind spending 300+ hours over the course of 2 months to create this Wun Wun the Giant costume from Game of Thrones.
Each year, I try to choose a costume that will be recognizable/appreciated by everyone, but I always strive to pick a costume that nobody else will be wearing to boost the ‘wow factor’.
Over a year ago, I was watching Game of Thrones when the giant Wun Wun made his appearance on the show. I was immediately inspired by his immensity and found such a beauty in his overall menacing/barbaric appearance. I told myself that he would make a fantastic Halloween costume if I could pull it off.
Two months prior to Halloween I knew I had to make a decision soon on what I was going to be so I could get started. I knew that Wun Wun the giant was my favorite costume idea (I have a whole list of costume ideas at all times) but I was intimidated by the fact that I would have to figure out a way to make myself (5 foot 4 inches tall) into a giant.
I decided to take on the challenge despite the naysayers and the reservations in my own head that this was too crazy of an idea. Boy, am I happy that I followed my initial instincts and followed through with this costume, because it turned out AMAZINGLY!
During the last few weeks of creation, I was putting in 8-12 hour days in order to finish on time, and it wasn’t until the night of all the Halloween parties/contests that I actually completed it. My parents (who had seen the progress of the costume over the course of 2 months) were absolutely blown away to see the finished product. They believed in my talent, but their expectations were far exceeded.
I was pretty anxious about wearing the costume all night in bars because it weighed 30 pounds and it was 8 feet tall and bulky and didn’t fit through door frames without some serious contortion, but I was excited to see the reaction of my friends and strangers.
I had to borrow my dad’s car to transport the costume downtown to the pregame party and bars because it was too big to fit into the backseat or trunk of my Honda Civic (I obviously couldn’t wear it while driving). I didn’t drink any liquid past 6pm on the evening I was going out because taking the costume off and putting it back on was QUITE an ordeal, so going to the bathroom in bars just wasn’t an option.
When I arrived at my friend’s pregame party carrying the costume, everyone was fascinated by it, and when I finally got the costume on with the help of my friend, I looked around and saw about 20 phones pointing in my direction taking pictures and videos of me! They were AMAZED by it and couldn’t believe I had made it!
Unfortunately, we got to the bar too late on Friday night and missed the costume contest, but the reaction from complete strangers more than made up for that. People were in complete awe (and a few people were genuinely terrified). Everybody was asking to take pictures with me and I heard over and over that this was the best costume anyone had ever seen!
I was asked repeatedly if there were two people in the costume stacked on top of each other, and everybody was looking into the giant’s face when they were talking to me because they thought that’s where my face was (my face was actually in the center of the giant’s belly)! People were thanking me for making the costume and sharing the experience with them. It was absolutely incredible. The best part was when strangers realized I was a girl and their minds were even more blown!
Who says a girl can’t be a menacing 8 ft. tall giant!? Total girl power moment for me!
The following night, I ventured back into the city to enter a costume contest I saw advertised at the hottest new bar in Pittsburgh. After waiting in line for 50 minutes to even get into the bar, I had to beg the bouncers to let me in the doors for about 10 minutes because they were worried I would be too big and would get bumped around and fall over, but eventually I won my case (that I spent 300 hours to make an awesome costume and I wouldn’t even be allowed in the door to enter the contest!? I think not!).
Thank god they let me in the bar, because I ended up winning first prize in the contest (which covered the $150 I spent on materials!). I received the same reaction from strangers that I had the night before, everybody was completely astounded by what I had made and was asking to take a picture with me!
By the end of the weekend, I had physical knots in my shoulders from carrying the weight of the costume for several hours each night, but I would do it again in a heartbeat to display my hard work and make people’s day. Halloween 2016 was by far my best yet!
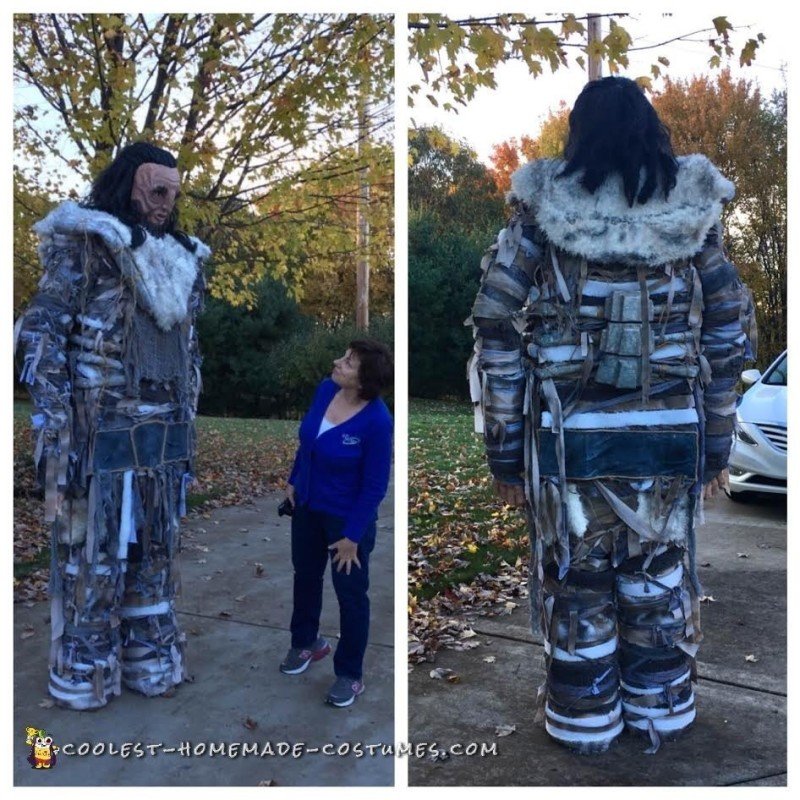
Wun Wun the Giant-8 ft tall
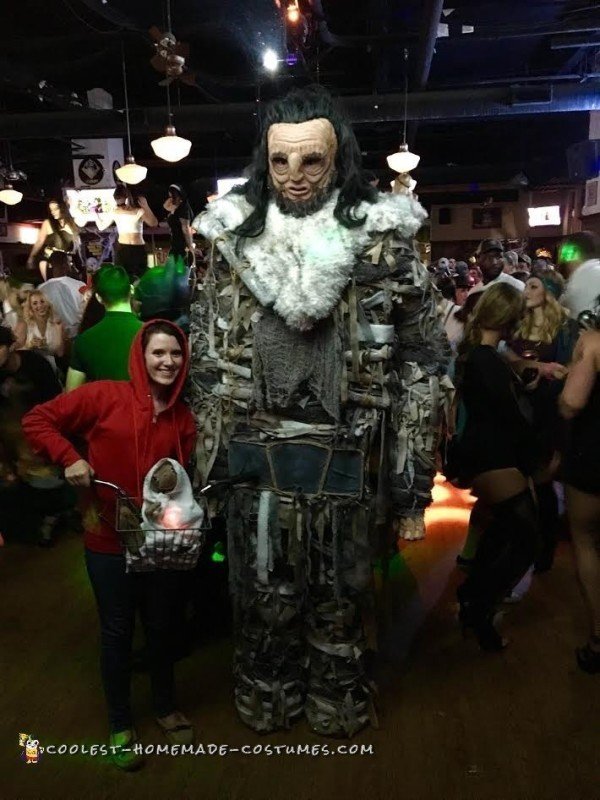
Wun Wun enjoying the bar scene
Step 1: Creating the Mask
I like to challenge myself to work with new materials each year so I can learn something new, and this year was my first time sculpting with clay. I followed the clay sculpting and paper mache instructions from Ultimatepapermache.com, specifically the “How to Make a Portrait Mask” tutorial. This tutorial was a lifesaver!
Sculpting the Face with Clay: I used Sargent Art Plastilina Non-Hardening Modeling Clay to sculpt the face of the giant directly on top of a basic mask form that I found at Michael’s (sculpting onto the mask gave a guideline for the nose/lips/cheeks which was great for a first-time sculptor). The Non-Hardening clay was perfect since it took me several days to sculpt and I was able to make changes as I went.
Applying Paper Mache over the Clay Sculpt: When the sculpt was complete, I used a paintbrush and went over the entire mask with a thin coat of Vaseline (recommended on Ultimatepapermache.com). Now it was time for paper mache. I created my paper mache paste using ¼ cup Plaster of Paris, ¼ cup Elmer’s White Glue, 1 TBSP Water, and 1 Teaspoon Apple Cider Vinegar. Instead of newspaper, which I’ve used for paper mache in the past, I used Shop Towels which are super absorbent and great to work with to pick up the detail of the clay sculpt. This step took a lot of patience to make sure none of the facial detail was lost, but it turned out great! Once the paper mache was dry (I gave it about 30 hours to dry), I was able to pull out all of the Non-Hardening Clay and I was left with an extremely lightweight paper mache mask!
Painting the Mask: The next step was to paint the mask. I painted the entire face red initially (to add depth) and then applied several layers of neutral toned paint with a makeup sponge to make it as lifelike as possible. I highlighted all of the wrinkles and folds in the face to make sure you could still see them when the face was 8 ft in the air!
Adding the Eyes: I really lucked out with the eyes. My uncle works at the Carnegie Science Center in Pittsburgh and he just so happened to have real glass eyes from a past exhibit that he let me use! These eyes were a HUGE factor in making the face look realistic. After I glued the eyes in place, I used more paper mache to create eyelids and additional wrinkles around the eyes and then re-painted so the mask wouldn’t have such a wide-eyed expression.
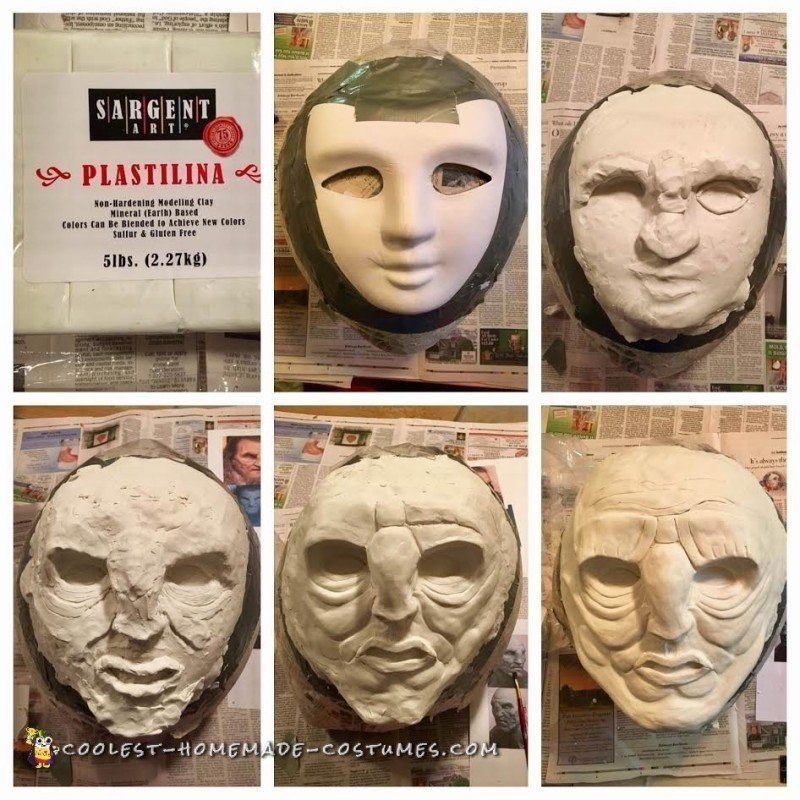
Scultping the face with Clay
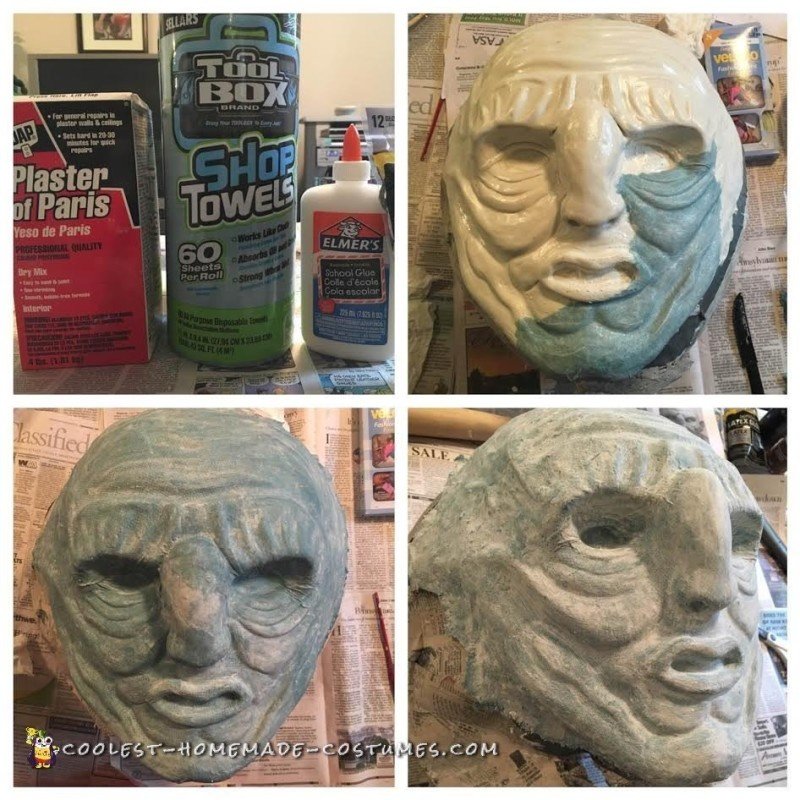
Applying Paper Mache over the Clay Sculpt
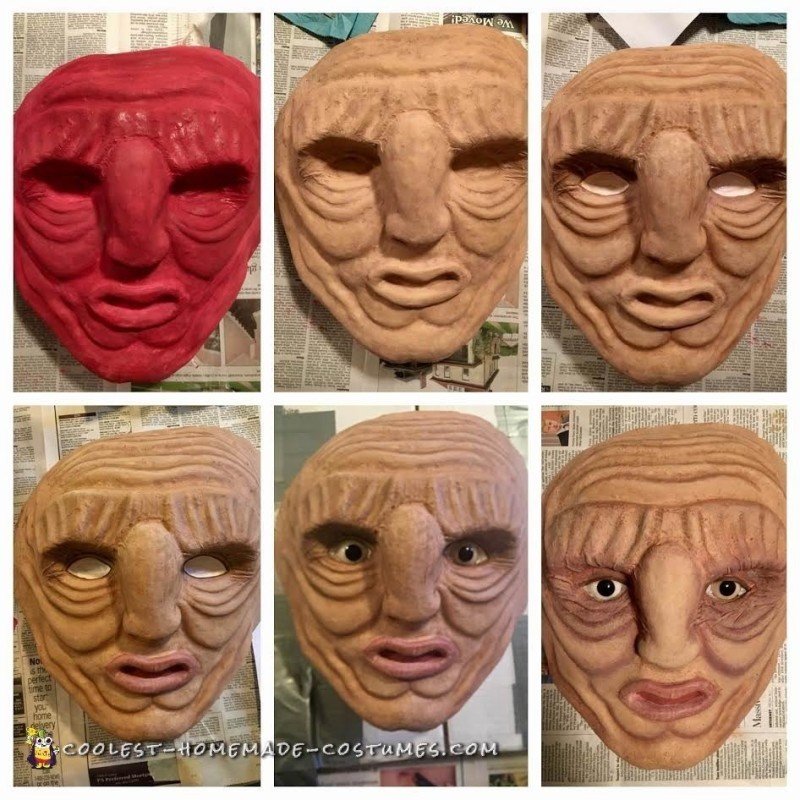
Painting the Paper Mache Mask
Step 2: Applying the Hair and Attaching the Mask to the Head
Beard and Eyebrows: Applying the hair was another serious test of patience. I bought a cheap black wig from Goodwill, cut it up, and created the beard and eyebrows by gluing the hair into place on the mask strand by strand. I trimmed it up and used my fingers to add some gray/brown paint to the hair so it wasn’t such a harsh black color. After the beard and eyebrows were complete, I hot glued the mask onto the head/neck form that I had created. The Head was made of paper mache and the neck was a Quaker Oats container. Now I was ready to create the head hair.
Head Hair: The head hair was tricky because Wun Wun has a half pony-tail hairstyle and I would have to create this myself. I cut up more strands of the black wig and hot-glued the hair strand by strand to the forehead, creating the hairline and the pulled back pony tail effect. Luckily I had bought a ridiculous looking long black beard from Walmart, because I ended gluing that to the back of the giant’s head to create additional hair volume, and I also used it as filler hair on a few patches of the head where I could see through to the ‘scalp’. Similar to the beard and eyebrows, I used my fingers to run gray paint through the giant’s hair. When the hair was complete, I was able to attach the head to the giant’s body using contact cement and hot glue.
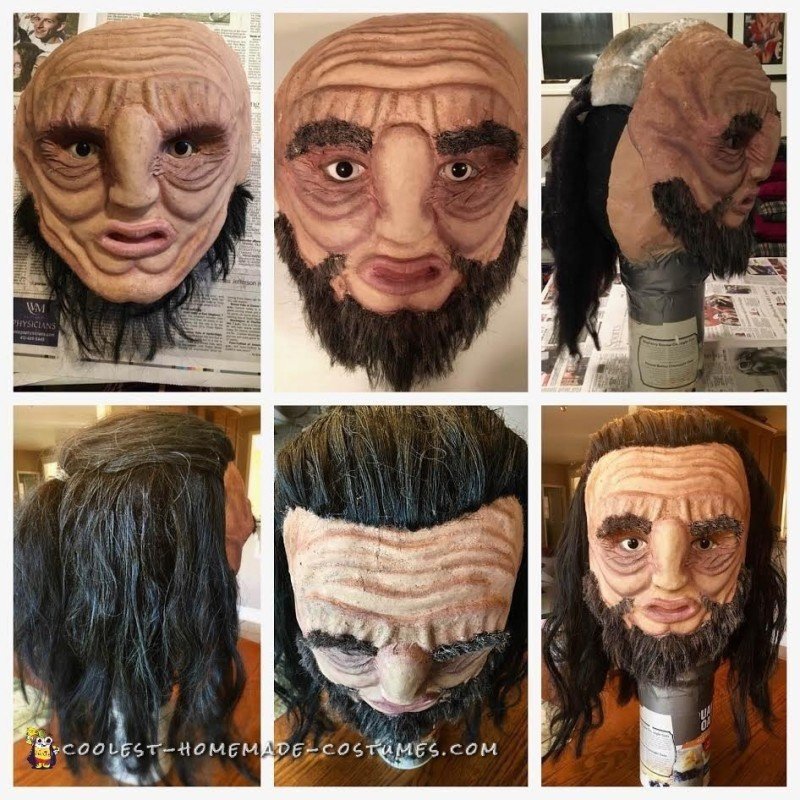
Applying the Facial and Head Hair
Step 3: Creating the Giant’s Upper Body Framework/Adding the Illusion of Height
The most challenging part of this costume was figuring out how to create the giant’s height. Initially, I thought I could use stilts, but that idea proved to be too dangerous. (I first bought drywall stilts but did NOT feel safe walking in them in my house, let alone a crowded bar. Those were quickly returned. I then spent 2 weeks building my own platform stilts using layers of interlocking cardboard strips, and they were definitely strong enough to hold my weight but I still didn’t feel comfortable enough to walk around in them all night, so I SCRATCHED the stilts idea completely and knew I needed to build the costume up several feet above my head and create a lookout to see out of the giant’s belly.
I ended up using a cardboard tri-fold poster board as the main back form of the giant and reinforced it with thin metal rods (saved from a trampoline I used to have in my backyard). I built upon the giant’s frame using cardboard, EVA foam, duct tape, and packing tape until I created the shoulders/chest frame that I was happy enough with. This took a week of frustrated engineering because I didn’t really have a plan but instead came up with ideas as I worked. I secured the giant’s frame to my body (backpack strap style) using strips of EVA Foam and two old belts. It was so important to have this frame secured to my body very tightly so I could support the weight of the upper body (23 pounds when completed) and wouldn’t feel top heavy/wobbly.
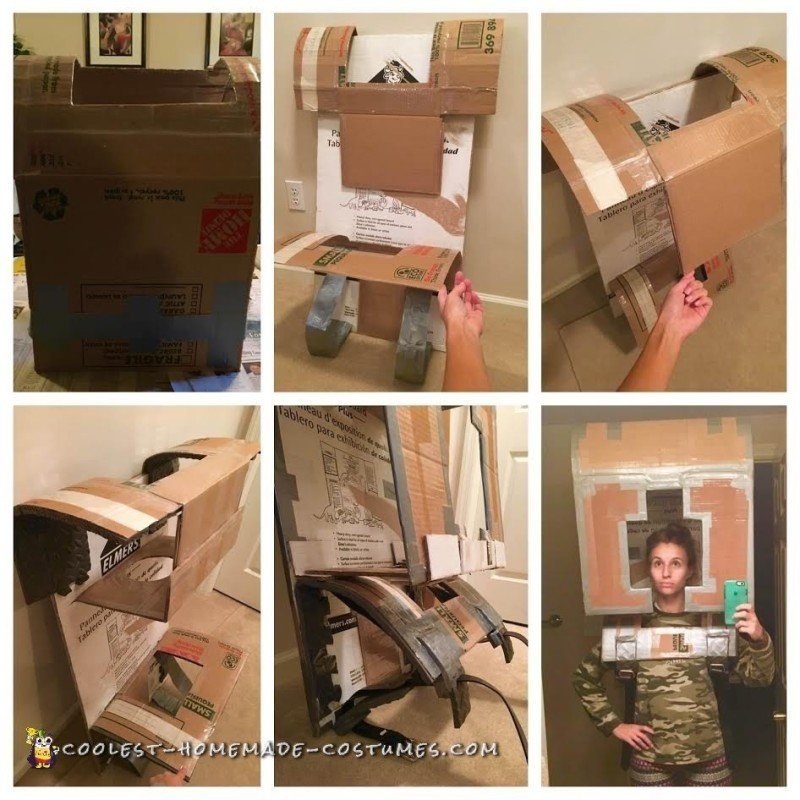
Creating the Giant’s Upper Body Framework
Step 4: Creating the Legs/Pants
The legs/pants of the giant came together surprisingly smoothly in 2 days. I was walking down an aisle at work when I saw 6 empty plastic pretzel containers stacked in someone’s cubicle with a sign marked “Trash”. JACKPOT! I immediately knew I could use them for the structure of the legs. The phrase “One man’s trash is another man’s treasure” has never been so true! I sawed off the top and bottom of the pretzel bins and lined them with cardboard. I drilled several holes into each of the plastic/cardboard cylinders which I would later loop twine through so I could tie them into place in the pants themselves (I bought a very large pair of men’s stretchy/velvety pants from Goodwill.)
Once I had the cylinders in place inside of the pants, I cut tiny holes into the pants and tied the cylinders to the pants (through the holes that I had drilled) using twine. I didn’t want the cylinder’s shifting around inside of the pant legs.
For the waist of the pants, I just made a large oval from cardboard that fit perfectly inside the waistband. I drilled holes into the cardboard waist and secured it to the pants using twine, as I did with the legs.
I used the suspenders to hold up the giant pants (7 pounds total once all fabric was added). Worked like a charm!
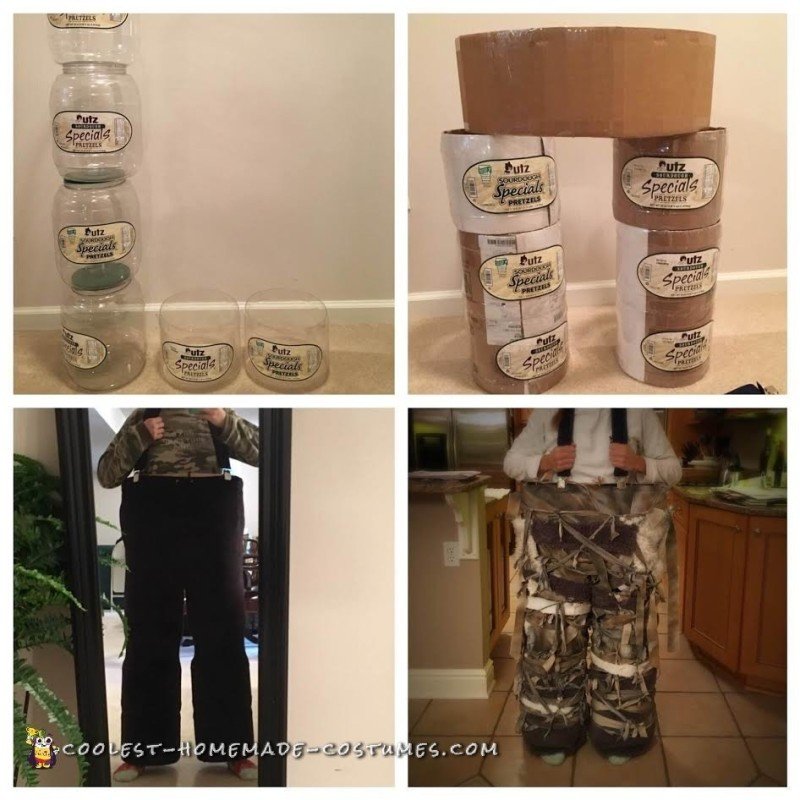
Creating the Legs/Pants
Step 5: Creating the Arms, Hands, and Details
Arms: I created the arms of the giant using cardboard. I attached the upper arm and lower arm together using small strips of EVA foam and contact cement in order to create the appearance of a bend at the elbow. I didn’t actually attach the arms to the body because they were held into place perfectly within a long sleeve shirt I bought at Goodwill that acted as the undershirt to my giant’s clothing. Since I didn’t attach the arms to the body, they were able to swing freely at my sides.
Hands: I created the hands by stuffing a pair of winter gloves with newspaper and then going over them with paper mache. When the paper mache was dry, I painted them and attached them to the giant’s arms.
Outfit Details/Accessories: Wun Wun the giant appears to have the backbone/rib cage of an animal wrapping around his torso as an accessory to his outfit. I created this backbone and rib cage effect using Styrofoam, newspaper, and paper mache, and I tied the bones into place using twine once all of the fabric clothing was completed.
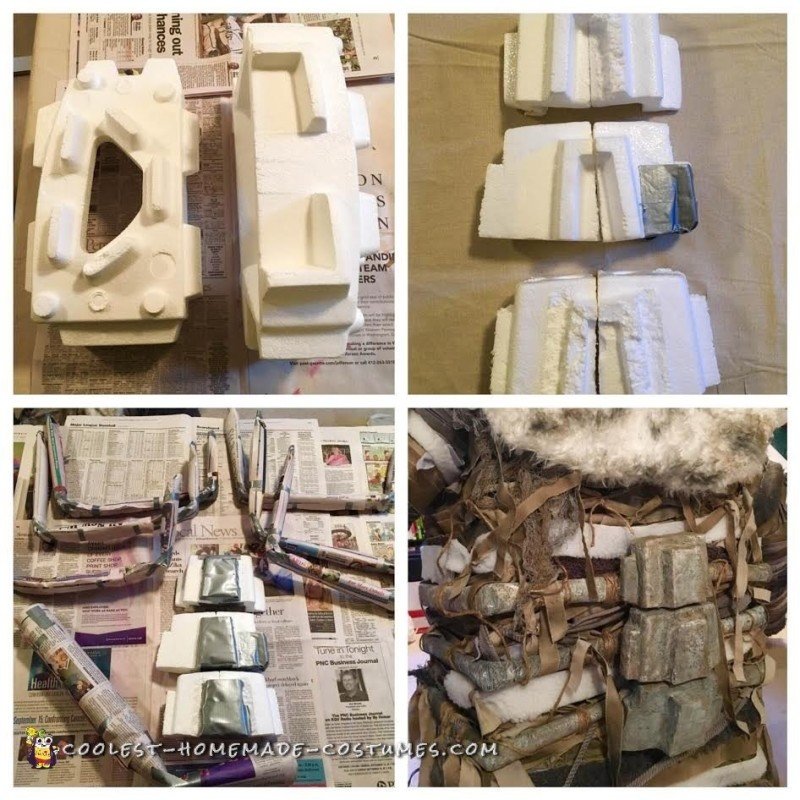
Step 6: Fabricating the Clothing
Creating the Giant’s clothing was a lot harder than I expected and could make or break this entire costume. I started by gathering a lot of fabric…an old set of bed sheets, old white t-shirts, a white fur vest from Marshalls, gray fur fabric, and burlap from Jo-Ann Fabrics, and netted ‘spooky cloth’ from Goodwill.
I tried to dye a lot of the fabric gray, but it didn’t come out quite as bold as expected, so I used black, brown, and gray spray paint to add dimension to all of the fabric. Then I shredded all of the fabric into strips. I hand sewed a basic layer of fabric strips on the shirt and pants once they were in place on the costume. This initial layer of fabric strips looked pretty terrible and that’s when the panic started to set in (it was 3 days until Halloween at this point and the clothing was looking terrible). Not only did I need to create the giant’s clothing, but I needed to use the fabric to make the giant’s frame look less boxy and more rounded like a normal human body.
I started going crazy with the fabric, using all different colored strips of fabric and fur and applying them strategically over the course of 3 days until I finally came up with my final product that I could be happy with. I created the belt to help with the illusion of a waist and to hide the disproportion of my short legs on the 8 ft giant. I draped the netted ‘spooky fabric’ over the face opening in the center of the giant’s belly. I could see through the netting perfectly, and luckily people outside of the costume couldn’t really see through the fabric into my face! I was extremely happy with how the clothing turned out, as well as the costume as a whole!
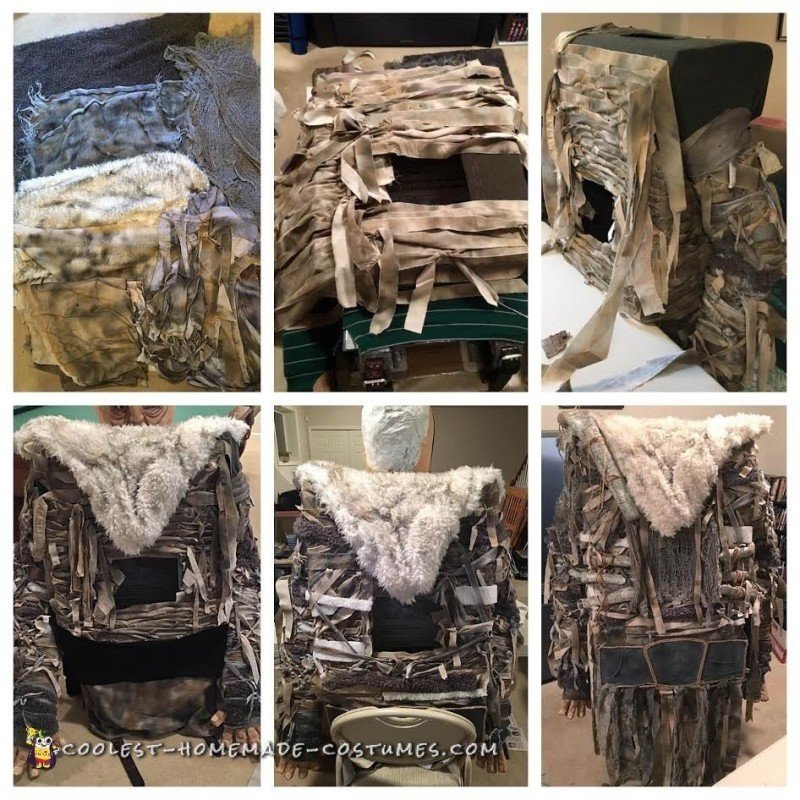
Fabricating the Clothing
