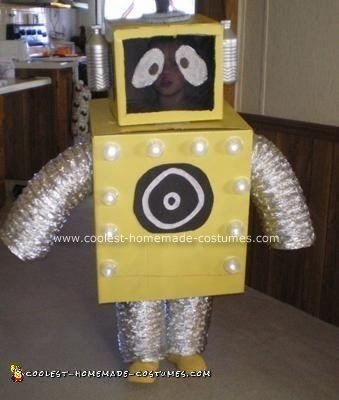
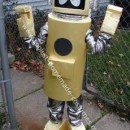
I have to start off saying my husband hates this show but our boys love it. So I found it very amusing when my 4yr old asked for me to make him a Plex robot from the Yo Gabba Gabba show on Nick jr. I hadn’t made a homemade costume in years and wasn’t sure how to even start! Here is what I did…
I used:
Dryer Venting: This cost me about 18.00 at Lowes. I bought a box with a lot more than I needed but I wanted room for errors. Unless your costume wearer is a trained weight lifter, buy the lightweight aluminum venting. It kinda looks like a roll of Reynolds wrap with wire.
2 Boxes: Make sure these are sized to your child. Ours were just a smidgen too big so steps were a little tricky
1 Mesh Laundry Bag, Asst Craft/Spray Paint, 2 Water Bottles, Small Foam Sheets, Gloves and White Socks from Dollar Stores, and Towel Holders from the Dollar Store.
Instructions:
1. I started with the boxes. I fitted my son with the larger body box first. I cut the bottom out and a hole in the top for his head (Make this somewhat snug so it rests on shoulders well) once he was inside I noted where to cut arm holes. (It helps with a smaller child to have a narrower box than mine did. He had a little trouble putting arms down the whole way, but it did give a nice robot effect)
Cut armholes maybe an inch LESS wide than the dryer vent. The wire in the vent roll will hold it in place once fitted in openings.
Next I cut an opening in the BOTTOM of the head box to match the one on the body box. Sit boxes on top of each other to match openings at this point. Make any adjustments! Now cut out the face front on the box leaving at least a 2 inch border all around. For my sons comfort I went back and taped over all rough cardboard edges before I painted.
2. I spray painted everything yellow. This took about 3 cans. (If there is writing on your box… spray paint words with color close to box first. Kinda helps tone down word color and makes less likely to bleed through yellow.)
3. At this time cut out 6 circles from the foam. Three were the same size (a little smaller than a paper plate.) These are the circles the ear bottles get glued to (2) and the 3rd gets glued to the top of the head. PAINT AND ALLOW TO DRY FIRST! These get painted silver too! The 4th foam piece was just about half the size as the first 3.
After painted silver and allowed to dry it gets glued on top of the circle already on top of head (stacking effect). For the last two circles I used thin sheets of craft foam from Walmart (1 black and 1 white) cut to look like a car speaker and glued on box body in center. To finish off the head I painted a light bulb red and inserted into a black painted paper towel cardboard roll that had been cut in half. I pushed into foam stack on head top and secured with glue.
4. Now for the lights I used a tiny strand of 20 LED lights left over from a past Christmas. I didn’t want the full 20 lights so I went thru and taped the lights by 2 giving me a shorter strand and the ability to just poke just every other light thru the box. I found these little plastic things called towel holders at the Dollar store (6pk for 1$). I’m not sure how they hold towels but they worked great for this. They come with adhesive backing and holes already in the front. I simply stuck them on box where I measured for lights. I used a small drill bit and went thru front to break thru paper backing and cardboard. I crawled into box and gently pushed every other light into the opening and out into plastic cover. This left 10 lights outside and 10 inside which I just taped to box and it gave it a cool lighted from inside look too.
5. I taped a cut out piece of mesh laundry hamper to inside face opening. This gave excellent ventilation as well as a effect of not being able to see in but my son could see out great! I then painted on eyes. The mesh had such large openings the paint colored the fabric and not the holes giving it the illusion of solid paint yet my sons vision was not impaired one inch! Puff paint around eyes would give it an added pop!
6. I attached the head to the body using heavy duty Velcro strips between the head and body boxes. The dryer vents on legs were safety pinned onto a pair of sweat pants (use a size larger pants so there is plenty of loose material to pin into. Any pulling may result in the pins popping.)
7. I spray painted a pair of inexpensive socks and gloves the same yellow as the boxes and allowed to dry. My son wore his regular shoes and I slid painted socks OVER those for covers.
8. OK I know this is a lot of instructions but it really was easy and I wanted to give you the best possible instructions I could. We received 100% compliments from EVERY single home we went to. Most kids had store bought costumes and this really stood out! We had a police officer stop to look and several parents take pictures of my son. He was recognized by many kids as being Plex off the Yo Gabba Gabba show. So I was happy I had gotten it close enough to real thing.
Happy costume making!
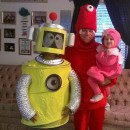
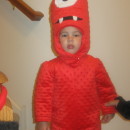
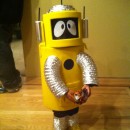
First of all, thank you for such a great idea! Your instructions were pretty easy to follow. I did leave out the lights and used screen instead of a mesh laundry bag. My son was the biggest hid in the neighborhood. Many stopped to take pictures of him and he was given extra candy for the extra cute costume. Thank you for posting this! I’ll have to check with you next year to see what ideas you have :)