This costume was a huge hit among friends and family alike (a photo of us even got a record 75+ likes on Facebook!). It was extremely simple to execute, but we started our planning about 3 weeks in advance. My boyfriend and I enjoy relieving our childhood together by watching old cartoons we used to love, so one day the Fairly Oddparents came on T.V. and as we were watching it I thought “THIS IS GOING TO BE OUR COSTUME THIS YEAR.” I ran the idea by him, and we decided that, yes, we have been dating long enough in which couples costumes are now acceptable for us. After the initial decision was made, it seemed my boyfriend left all the planning up to me. Being a poor college student who is always strapped for time between work and classes, I began my research into what my cheapest routes would be to make this costume work. In the end, I decided to home-make everything except for the method of coloring our hair, the skinny tie, and the yellow shirt (I didn’t own a plain yellow shirt, or any yellow shirt for that matter!).
We found the skinny tie (luckily!) at our local Thrift Store for a whopping $2.
We then skirted over to Michael’s and bought my plain yellow shirt for about $3.
After that, we made a visit to the local Walgreens and bought 2 white, 1 green, and 1 pink hair paint. I think they were $2/each, so I’ll just say $10 was spent on the hair paint.
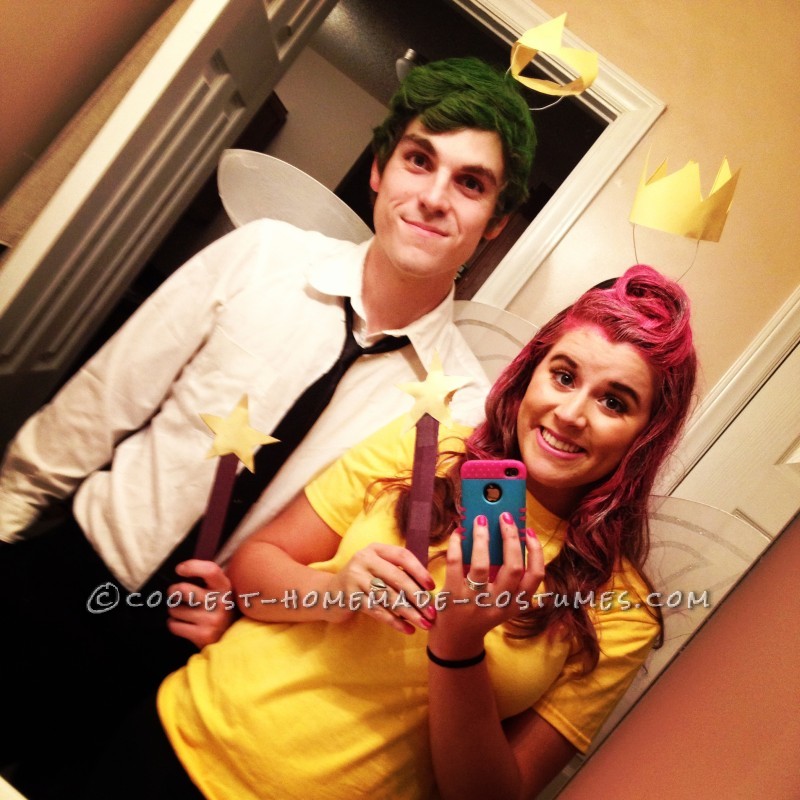
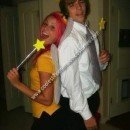
The finished product!
Wands
I started by making the wands, in which I took some extra colored paper I had laying around and cut out 4 star shapes in yellow. I took these stars shapes and taped them together, leaving a little space. In that space, I stuffed the yellow paper scraps that came about during the cutting process to give the wands more of a 3D look, then finished taping it up. Next, I took a black sheet of paper, folded it the long way until it was somewhat of an accordion; I then taped it all together. I then taped the star and stem together and Voila! Our wands.
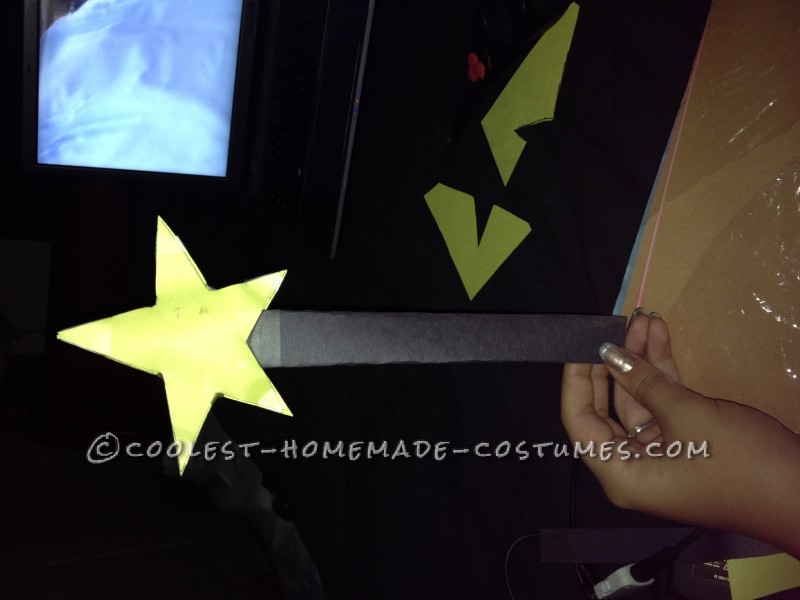
The finished wand product!
Crowns
To make the crowns, I took a sheet of yellow paper and literally drew in a motion with no rhyme or reason, since Cosmo and Wanda’s crowns always look a little lopsided and uneven. I cut out along the pattern I drew then taped it together end to end. Next, I took two plain headbands I had lying around and added a bit of wire I found at my Dad’s mechanic shop. I took this wire and looped it around the top of the headband in two places, then had it come up about 4 or 5 inches from the starting point. I took some scissors and bent the tip of this wire into a small curve at the top of the wire. After spending about 20 minutes doing this, I go to attach the crowns and realize I bent the wire the wrong way and let me tell you, that wire was not moving anymore. After my futile efforts to fix it, I gave up and decided to tape the wire to the inside of the crowns. It worked! I only found out later that I had used much too little tape and (on Halloween night) after many frustrating attempts to keep repairing mine and my boyfriend’s crowns, I took to them with heavy duty clear tape, enough to make your wallet hurt, and they didn’t fall off the wire anymore.
Wings
I was going to buy the wings, but it turns out fake wings are very expensive! Geez! I REALLY did not want to pay $15+ each for some crappy wings, so I went in search of ways to make my own. It turns out, many people make their own wings for this or that, so I came up with a lot of how-to results. After reading a few different peoples’ takes on making these wings yourself, I realize that they all have basically the same idea: clothes hangers, tights, & tape or superglue. I take my wire clothes hangers (it took three for each set of wings) and bend the first one into an oval shape; I did this with another 3 of the hangers using the first one as a guide, so they were approximately the same shape. I took the 5th and 6th hangers and un-wired them then shaped it into wing shapes, then had the ends meet. I took two ovals and taped them together. I then decided that the tape would probably not hold up and decided to break out my hot glue gun (the wires were obviously thin, so I layered the glue on top of the hangers as they were touching). After hot gluing them together, I ended up adding a layer of tape around them as well for good measure. I then took the third hanger, which I shaped into a wing shape, and tape/glued this to the center of the wings. I repeated this process to make the second pair. I then took pantyhose which I had bought at our local thrift store (I didn’t mention that above, did I? Well, I bought about 4 pairs at the thrift store out of the $1 bin, so a total of $5 for the wings). Anyways, after much fighting and confusion, I secured these panty hose onto the wires using more glue and tape along the way. Whew. I decide to add a little glitter to them, being the crafty little thing that I am.
Hair
Now. Let’s talk about this hair/hair painting process for a little bit. I, having long hair, decided that I was going to use an old crappy wig I picked up on sale last year at a drug store the day after Halloween (why I had bought this? Who knows really?) Instead of going through the hassle of trying to get all of my hair pink enough and getting my hair into Wanda’s famous swoop. This, in the end, did not turn out to be a good idea. Fast forward to Halloween day; I decide to start getting ready early after getting out of class and not having work that day (score!). So, I come home and take a shower, wash my face, and apply my makeup (for my makeup, I did my regular foundation routine, put on some fake eyelashes, pink blush, and added a little yellow eye shadow). After drying my hair from said shower, I decided it was time to put on the wig. I spent a painstaking half hour pinning my hair to my head this way and that so my long hair wouldn’t show from under my relatively short wig. Finally! That’s over. I grab the wig from my closet floor and slap it on my head in the mirror, and wow, this thing has seen better days. Its knotted up, hairs flying everywhere; I decide I can salvage it.
Nope, I can’t. This thing is unsalvageable. Dang, why didn’t I at least inspect it before deciding to use it? Okay, Whatever; new plan. I know my way around a curling iron. So, I unclip my hair and curl the ends like I normally would. When the time to do Wanda’s curl came, I was stumped. After trying an internet search with no avail (man, this is a really uncommon costume), my boyfriend suggests using hairspray then blow drying the hairspray immediately after applying. He had apparently done this to sport an “Alfalfa sprout” for one of his high school spirit days, I guess it turns out you do learn a little something in high school! Hah, ha. Anyways, I try his method and what do you know! It works. A half bottle of hairspray and lots of blow drying later, I have a decent Wanda curl. Yes!
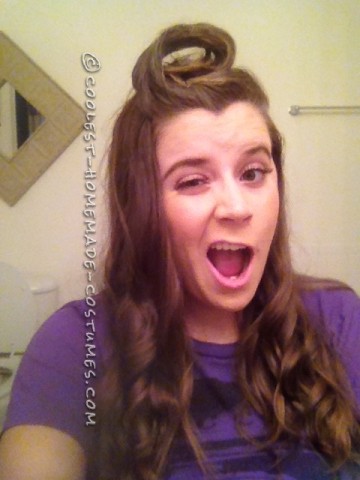
The Wanda Curl
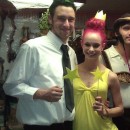
Next, it’s time for the hair paint. In case you didn’t quite understand why we had bought white, it was for somewhat of a base coat. My boyfriend and I both have dark hair and I knew that pink wasn’t going to show up in my hair and wasn’t quite sure if the green would show in my boyfriends. I volunteer my boyfriend first because it seemed pretty fun to get to spray this stuff all over his head. So, as we are standing outside of our apartment complex with cars constantly driving by, I’m spraying my boyfriends head white with this very, very cold spray that also smells very strong of (what was that smell? I have no clue honestly….), err, stuff. Anyways, It would not be described as pleasant. Once that dries, I take the green spray and put a hefty amount all over his head and even accidently get some in his ear! He was very annoyed by this, especially after the evil cackle my mouth omitted after doing it. Come my turn and I’m already afraid of the payback possibly coming to me soon. He sprays my hair white and even after using a can and a half, it still wasn’t fully white like his was. We decide to just go with it and start putting the pink in my hair. It also turns out; that one can of pink spray is not going to be enough. Darn! We decide were going to trek out into the Walgreens down the road and buy another can of pink. First, I make my boyfriend go and get fully ready and dressed like I already am before we go out. I mean, it is Halloween, might as well let some random people see our costumes! So, after getting him ready (and taking about 30 minutes and the multiple watching of a YouTube instructional video to tie his tie) we leave into the night in search of pink hairspray. First, we go to the original Walgreens we bought this stuff from. Nope, they’re out. We do end up buying some fake spider webs on sale to put up in our apartment for the party we’re having later. At the register, an older lady gushes about how cute we are (I was so excited we were recognizable!) and how she loves watching the Fairly Oddparents with her grandchildren. We let her take a picture of us and head to the Rite Aid, another Walgreens, and a CVS and every single one is out. I decide to give up looking and just leave my hair be. It honestly wasn’t too bad, you can’t tell in the pictures, but there were a few white spots all around my head and even some brown showing through. The hair was the most complicated process of this Halloween costume (I will attach a picture showing how my hair looked after a few hours in).
Conclusion
In the end, even after the headaches and annoying-ness I felt in planning this whole costume myself, it was a huge hit among our friends and as I stated at the beginning, a HUGE hit on social networking. I was also a great descent into the world of couples costumes for my boyfriend and I. I will never go back to buying costumes! We had a great night with lots of laughs and (thankfully) little scares. The costumes held up very nicely throughout the night as well. I didn’t think it through when we were retiring for the night, so we ended up sleeping on our pillows with the hair paint! Mistake! It was everywhere! (it ended up coming out, thankfully!)
Anyways, I hope you enjoyed this very long story of my costume making process. I think I may have gotten a little carried away. :O



Your comment has been sent successfully.