Each year we have a themed Halloween party with a pretty large number of people coming to our house to celebrate. So far our themes have been vampires, pirates, and cartoon characters. Even though we don’t give out a prize for best costume, they manage to get more and more elaborate each year.
However, for the first time in 2009, we didn’t select a theme. With my options limitless, I wanted to surprise my girlfriend (a crazy die-hard Disney fan with an obsession for Jack Skellington). From watches, purses and shoes to artwork, she has something with Jack’s face on it. It was easy to see what I should go as to surprise her this year.
So, in September, I started scouring the internet to find a decent-looking Homemade Jack Skellington costume, and, to my despair, could only find masks that looked like a melted blob of white plastic. Increasingly discouraged, I finally stumbled across this very website and saw a costume that had been created by Jeremy A. in Ashland, Oregon. (Mad props for the costume Jeremy! That was just the inspiration I needed).
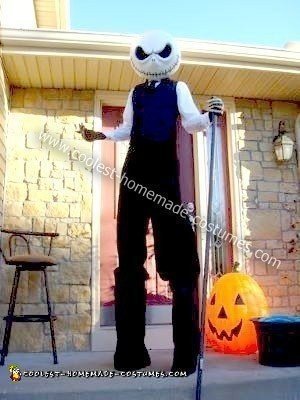
With a little over a month and a half to prepare, I began making my Halloween costume. Let me preface the following details with a disclaimer. Walking around in 2′ foot tall stilts in a heavy mask severely affects both balance and peripheral vision and is not the safest costume option. This is not for the faint of heart and I find that men make a lot of really dangerous decisions, either because we’re trying to impress a girl or trying to win a bet. Whatever the case, just make sure it’s worth risking a couple of injuries for.
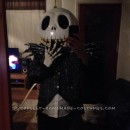
I started the mask with about a month and half to prepare. I found a large pumpkin that I thought would easily fit around my head when wearing a bicycle helmet. Then I went shopping for materials at Michaels. Once I got it home, I mixed up pre-made paper mache (looks like a big block of white dryer lint) and applied an even coat about ¼” thick to the pumpkin and let it dry completely (about 3-4 days). I applied a second layer of paper mache and let that dry again for another 3 days. Then I wrapped the pumpkin once, using gauze that was premixed with plaster. The gauze layer took less time to dry – about 1-2 days.
Now that I had a pretty good base, I printed off a picture of Jack Skellington from the internet and used a projector to shine the image on the pumpkin so I could roughly trace it. Next I grabbed a medium block of modeling clay and sculpted out the raised edges for the eyes, eyebrows, nose, and the crown of his head, to make it more circular. Then I wrapped everything again in a second layer of gauze. I didn’t worry about putting anything on the bottom of the pumpkin since I would be using that as the hole for my head. Once the gauze had dried again, I started applying lots and lots of plaster. I would mix about 2/3 cup of plaster and 1/3 cup water and apply immediately to the helmet (except the inside of the eyes). I used a water mister if the plaster began to harden too quickly so I could give it a very smooth look.
After about 5 layers of plaster, letting each layer dry for about 30 minutes to 1 hour, I was ready to cut out the eyes. I used a Dremel to cut out the eyes down to the pumpkin underneath. After the plaster had a chance to dry for a few days, I flipped the mask over onto a pillow and began carving the pumpkin out piece by piece. This was by far the longest part of the process. Carving out the pumpkin took an entire evening.
Once the pumpkin was removed, I reinforced the opening edge of the mask opening with gauze to prevent the plaster from cracking any further (the pumpkin carving is a lot of abuse). With the pumpkin removed, I had a plaster mask with empty eyes. Next, I used a very flat eggshell white paint for the head and then painted on a smile, nose, and inner-eye sockets with black. Then I mixed a grey color together to give the eyes more definition around the eyebrows.
Finally, I took a clear varnish and applied three coats so it would last outdoors. To top it off (since our Halloween parties usually have black lights around) I painted a few details on the mask with tide detergent to make it glow. Now that the mask was done, I took a bicycle helmet and used epoxy glue to attach it. I had to apply the epoxy, quickly put the helmet on, the mask on that, and then sit with it on my head for 20 minutes, letting the glue cure. To avoid fumes, I blew air into one of the eye holes with a hairdryer. I carefully took off the mask and then let the glue sit overnight.
For the lights, I bought 2 large clear red LEDs, a battery pack, RCA connectors, and a small pressure switch from radio shack ($10). I wired all of that into the helmet so, when I pressed the pressure switch in my glove, the eyes would glow.
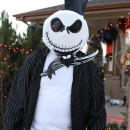
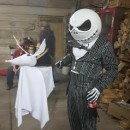
For the actual costume, I looked around at the pinstripe suit options and couldn’t find one that looked very good. Of course, my costume was more for impressing a girl than trying to make it look exact. In my opinion, the movie depicts Jack Skellington as a very snappy dresser and quite a ladies’ man.
Stay true to his character and make him look good – that is what I wanted! Instead of the costume they sell in Halloween stores, I opted to create my own ‘stylized’ version of what I think Jack would wear in reality. I found that a bow tie looked extremely small next to the large mask and a regular tie looked much better. I found a pinstripe vest at Hot Topic. I wanted something with bright white stripes that were pretty noticeable from a distance. I spent $40 on mine, but found similar ones on the internet.
The shirt is a regular tuxedo shirt with French cuffs (makes it easier to wear gloves underneath). The skeleton gloves cost $25 dollars on www.vampfangs.com. The pants I picked up were made of black denim fabric from a fabric store and followed a stilt pants pattern I found online (friends that can sew are a lot of help with this part).
Lastly, I spent about $90 on a pair of professional drywall stilts. I tried to build my own to save money but the professional ones are worth every cent. With a helmet on, you need all the help with balance you can get.
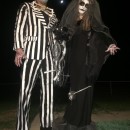
When I unveiled the entire costume to my girlfriend, she went ballistic. It made quite an impression at the party and a lot of scared looks from children trick or treating that evening. The costume wasn’t the cheapest one I’ve made but I’ll definitely wear this one again (especially since the theme for our Halloween party next year is Disney Characters). If you have questions, please feel free to comment on the youtube video and I’ll be sure to answer. Here’s to impressing a girl or winning that bet without needing a hospital visit! Good Luck!
Your costume is very nice looking and using the stilts is unique.
first of all I want to say your costume is amazing. Now I have a question for you. How heavy did your mask end up being? was it heavy enough to make your neck hurt. I read all the description of how you layered it a million times it sounds heavy. I am thinking about making one too, but using a balloon instead of a pumpkin. that sounded like way too much work, and doing the paper mache. I also thought about making a ceramic mask because I am an art minor at the college I go to and have access to a kiln if I wanted to go that route. What do you think of doing a ceramic mask?
i just love the mask, and i ask how long did it take to make? and can you make a video about it?
Sooo…are you ready to sell the mask and the costume yet? Very interested!!
Amazing! You would make a lot of money by making and selling these. You should really think about it!