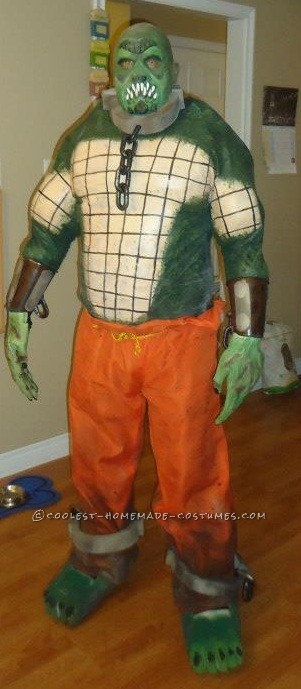
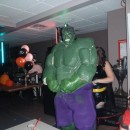
This is a Killer Croc costume I made. My son and I had a conversation back in February ’12 about what costumes we’d like to do for this Halloween. I know.. we plan ahead. He decided that Killer Croc would be the most challenging costume so that’s the one I should do. Also, you really don’t see a whole lot of Croc costumes; even around the web.
He wasn’t’ wrong about the challenges, the costume required a couple hundred hours of work and a few hundred dollars. When he saw the costume he loved it; my friends and family look forward to my costumes every year and this one was no different. It’s my new personal favorite. I had a lot of fun wearing it to the local “Mardis Gras” where a few thousand people get together all dressed up on a local street in my home town which is home to about 22 bars and pubs and the whole street becomes a party for Halloween.
I had people “high fiving” me and genuinely impressed that I did a Killer Croc costume. Even a hug or two from fellow “nerds” who were impressed with the home made aspect of the costume. You wouldn’t be able to buy a Killer Croc costume if you wanted to anyways.
I took pictures during the whole process of making the costume and I’ll be laying them out here so if anyone else is also a fan of Killer Croc and want to take a crack at making this costume; they have some small amount of guidance.
Building a muscle suit for Killer Croc
Unless you are already naturally built hugely muscular you will want to make a muscle suit for this costume. You will need the following items to build this suit:
- Two stretchy long sleeved, sweat-wicking work out shirts, one sized larger than the other
- Furniture foam; 2 inch and 3 inch thick (you can buy these in blocks)
- Utiilty knife
- Scissors
- Needle and thread
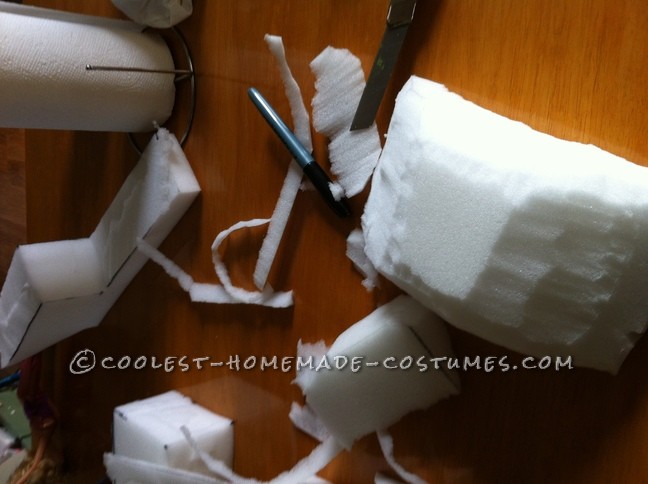
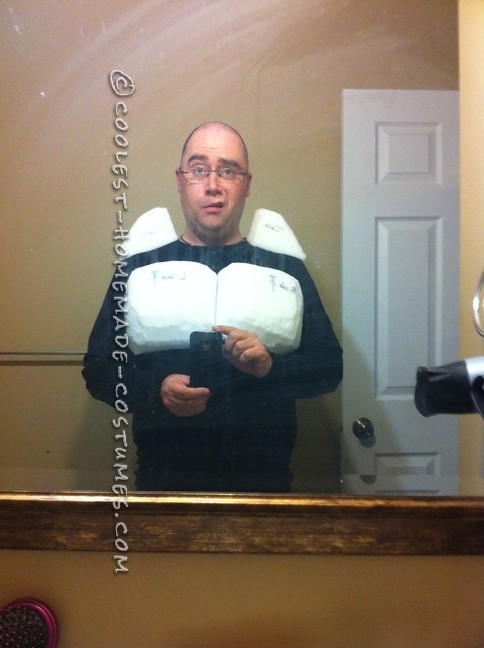
The first step is to carve muscles out of the furniture foam; I looked at anatomy pics online, other muscle suits and a pic of Killer Croc himself to best determine what muscles I needed and how big they should be. You will need to carve out a pair of pectoral, deltoids, shoulder, biceps, two parts for triceps and forearms. I carved out a single piece for the stomach and a piece for the back to make it look hunched and hulking. You do not need to worry about looking “cut” as Croc isn’t, he’s just massively muscled.
Once you have the muscle groups carved out you sew them on top of the first workout shirt; the SMALLER sized one. You’ll want to try on the shirt periodically to make sure the placement is good. Once you have the muscles sewn on, you’ll fit the larger shirt on over it and sew the two shirts together at the wrists, the bottom and at the neck. You do NOT sew entirely around the openings, just enough to connect them together so they don’t pull apart when you’re trying on/off the suit. A few stitches at each spot is plenty.
Painting the muscle suit for Killer Croc
Once you have the suit made, you need to paint it. You will need the following to perform this step:
- Green liquid latex*
- Baby powder
- Non-tack PAX paint; Yellow, Green, Black, White, Flesh tone, Brown*
- Brushes, foam paint roller, packing paper or newspaper
- Duct tape dummy**
*I can advise of websites to find these products via email request
** There are multiple videos on Youtube on how to make a duct tape dummy of yourself.
The dummy is essential for painting the suit as without it you cannot place the paint properly and know for sure that it will look correct. Also, the liquid latex is very tacky when you first paint it on and if the suit is just laying flat it is almost impossible to avoid the material folding and sticking to itself (I found this out the hard way).
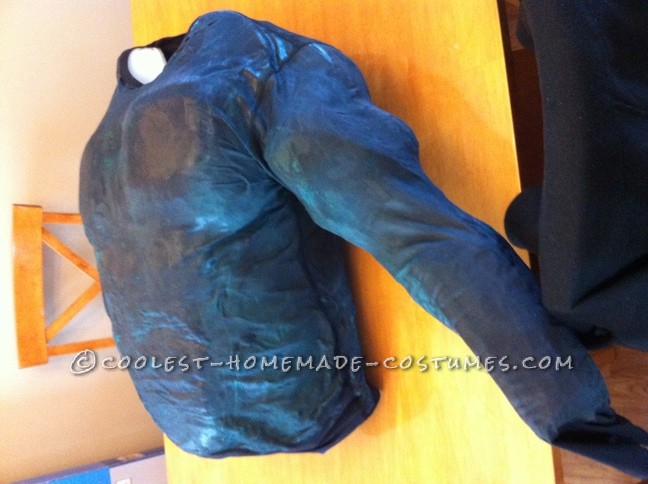
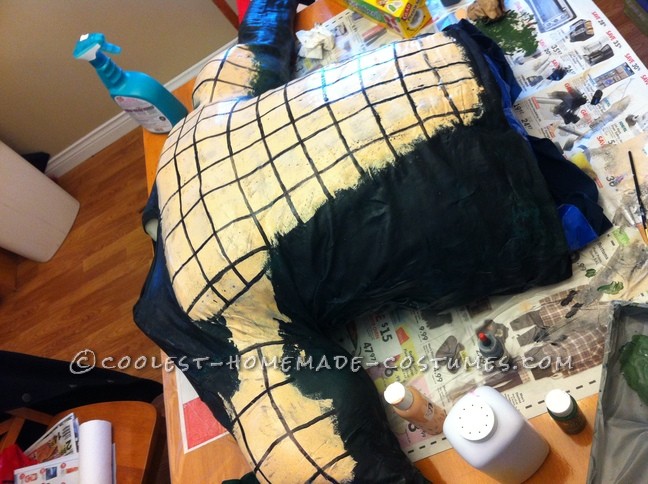
First you will paint the entire suit in liquid latex; the best tool for this job is a foam rolling brush and regular foam brush. Bristle brushes get sticky very quickly and bristles break loose and get stuck in your paint job. OK for a hairy monster.. not so much for a scaly one! You will need at least two coats of liquid latex. We use liquid latex for it’s flexibility and skin-like feel. Also, this creates a base to apply the PAX paint so it does not just absorb into the material and disappear and run. When you have the liquid latex painted on, apply generous amounts of baby powder or setting spray which is also available. This will remove the tackiness from the liquid latex. Just remove excess amounts with a make up brush or even try a hair dryer.
Next you’ll paint on the details with the PAX paint using the picture of Croc as a guide. PAX is a combination of Pros-Aide adhesive and acrylic paint. It allows you to apply paint to flexible material like cloth and foam and it will flex instead of cracking. I use the Non-tack type of PAX which is available online in every different color. You can apply this with regular paint/craft brushes. I applied the flesh tone first on the chest and belly, biceps and then the green and tried to make it look like the green faded into the flesh, much like a croc. I actually applied the base green colors with a ball of scrunched up packing paper. This gave me a broken up, scaly look.
Preparing a facial prosthetic for Killer Croc
In this step I explain how I did the look for Crocs face. You will need the following items for this step:
- “Ogre” facial prosthetic * (there is no specific prosthetic for Killer Croc)
- Non-tack PAX paint; Green, Yellow, White, Black, Brown *
- Brushes
- Grease make up; green, black, white, yellow
- Tooth black out
*I can advise of websites to find these products via email request
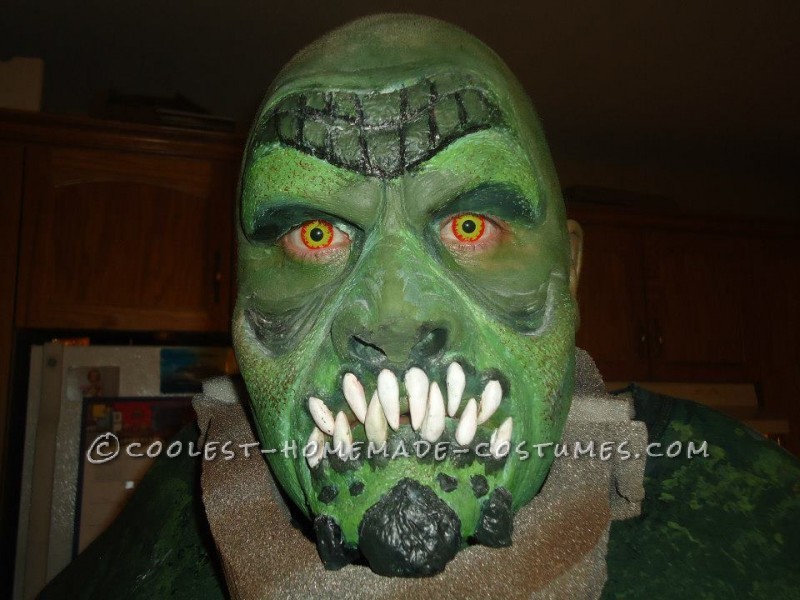
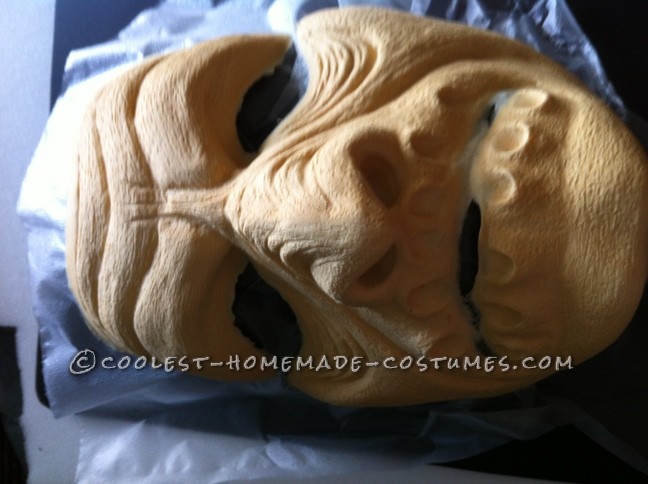
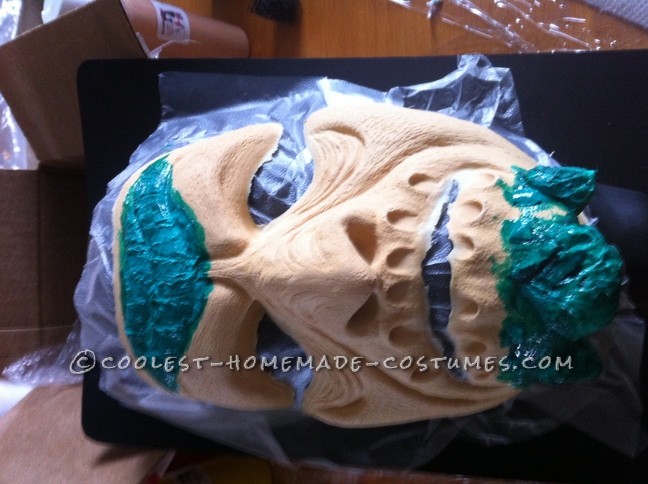
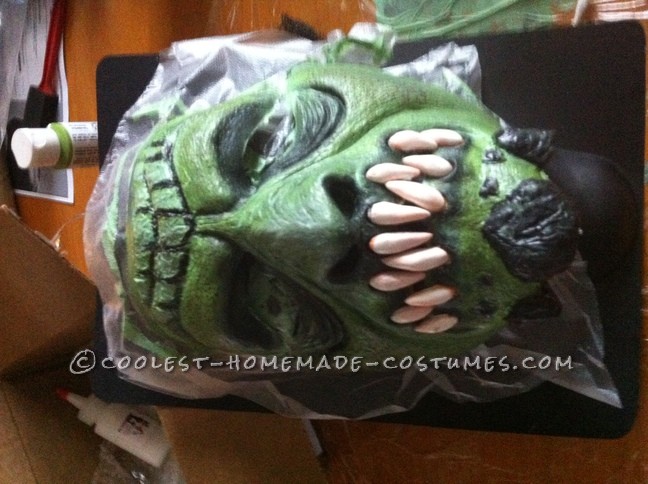
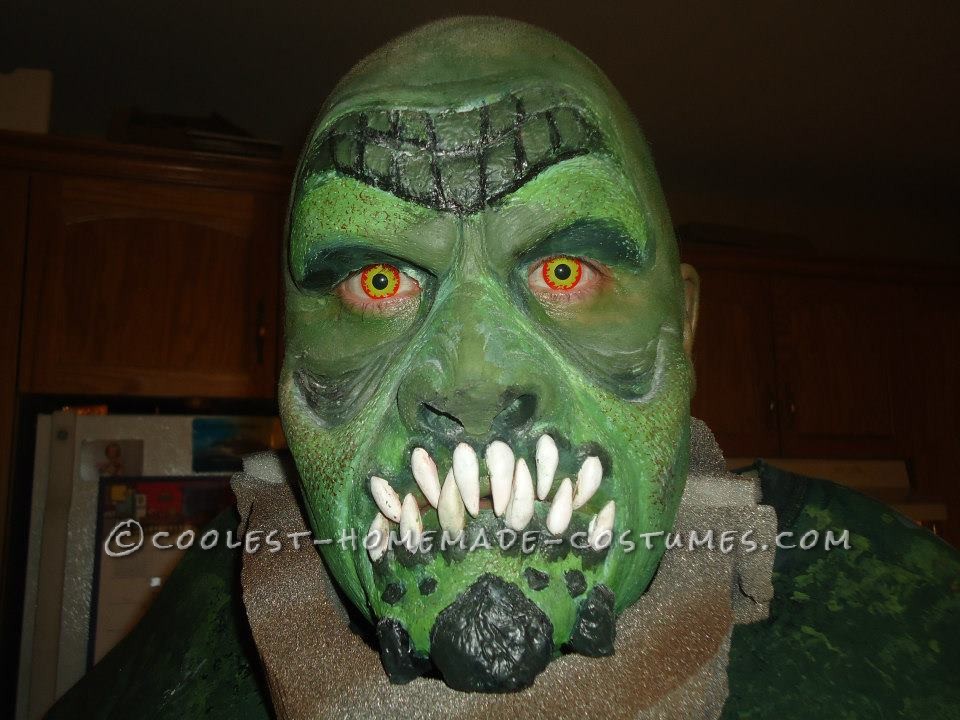
I purchased the prosthetic and then made changes to it to make it more suitable for my needs. I used old foam pieces, tissue paper and liquid latex to build up the face. I added horns to his chin, and smaller details to his lower face and forehead. I glued on the foam pieces and then applied a 2 layers of tissue paper and liquid latex over the top so the paint would have something to hold onto and not just soak in. I then painted it all with the PAX using his pic as a guide.
You will need Pros-Aide, plain liquid latex and remover to apply the prosthetic to your face. There are multiple vids online on how to apply a prosthetic. Then apply the grease make up to the rest of your head. One additional hint; black out your front teeth lower and upper with tooth black out. It ruins the look of great make ups when you can see your own teeth behind the teeth of your monster.
Making and altering the props for Killer Croc
In this final step I explain how I made the various props for the Killer Croc costume.
You will need the following items for this step:
- Plastic cups large enough to fit over your forearm
- Plastic links of chain
- Utility knife
- Scissors
- Furniture foam
- Craft foam
- Plus sized orange prison uniform costume
- Spray paint; black, silver and brown
- Acryllic paint: black green,
- Glue gun, glue sticks
- Crazy glue
- Spray glue
- Velcro
- Rope
- Green Monster Hands
Killer Croc has broken shackles on his neck, wrists and ankles. You will need to make all of these props. I used furniture foam for the neck and ankle pieces. I carved out the circular pieces using the pics as a guide, you will also want to measure to make sure they fit properly. I left one side of the circle closed and opened the other to ease the on and off. I connected that side with Velcro again so I could put them on with ease. I painted them with spray paint. First a layer of black, then silver and brown over that to give it the dirty metallic look. I then added a couple links of plastic chain. They usually have an open link with a very small gap so you can just pry the foam in there and it gives you the look of the chain link penetrating the shackle.
The wrist shackles are made from the plastic cups. Again make sure these are big enough to fit over your forearms but yet long enough to give you the proper look. Dollar stores are gold mines for props. Just saying. You will cut off one end, then paint it brown with the spray paint and then apply some black smudges to dirt it up. Then cut a plastic chain link in half so you can glue it on to the side of of the cup. Make sure that you have a few links of chain in there as well before you glue it on!
There are some steel looking details on the side of the shackles that you make with craft foam. Use the pics as a guide, cutting 4 pieces with rounded edges and 8 circles. Then paint these with black and silver. You can glue these on the side of the cups applying the spray glue to the foam pieces and pressing them onto the cup.
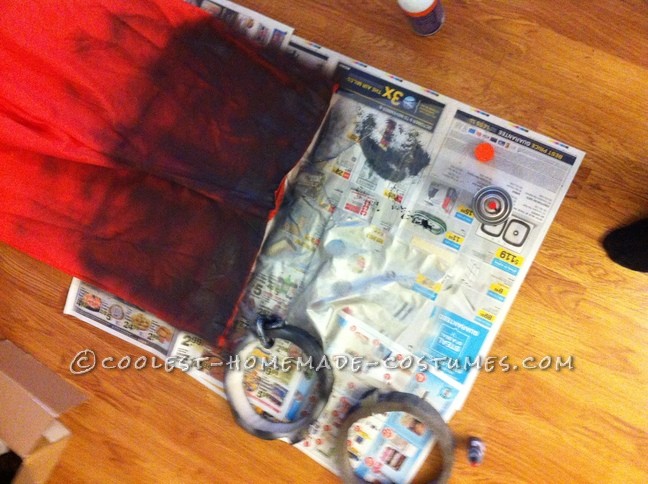
The prison pants are made from cutting an orange prison suit in half, make sure you try these on and you cut in the proper places around the waist line. Then add strips of Velcro (these usually have sticky backings) on to the top of the prison pants and to the bottom of your croc muscle suit. Leave some room at the top of the prison pants so it looks more natural. This will keep the pants up! When you put on the suit you can wrap and tie the rope around your waist so it looks more the way Croc wears his pants. Paint the bottom of the pants with spray paint and regular paint to give them the dirty in the sewer look.
For the feet, I carved feet out of furniture foam, then hollowed out the middle. I painted them with regular paint. I attached these to a pair of old sneakers using Velcro.
For the hands I just purchased monster hands online.
Video:



Your comment has been sent successfully.