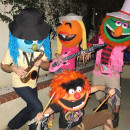
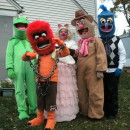
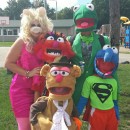
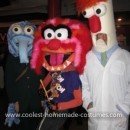
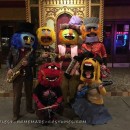
Animal, Beeker, Janice, Dr. Teeth and Abby Cadabby were our family theme for our Halloween costumes this year. First, let me just say that I do not know how to sew very well. Therefore, my method of construction is usually the fabulous glue gun.
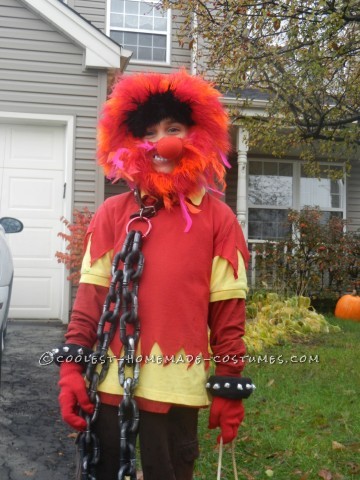
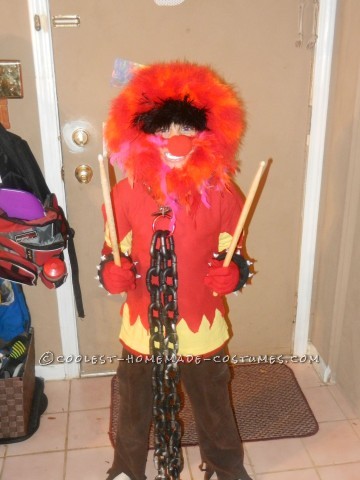
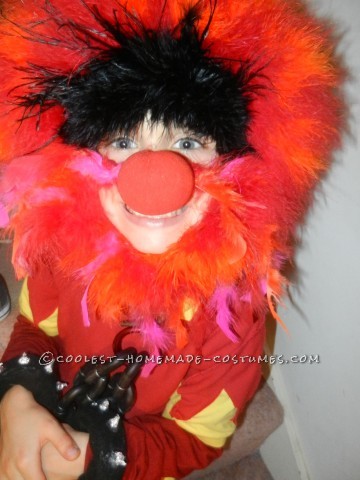
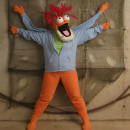
My youngest son (8 yrs old) was Animal so let’s start with him first. I used a knit cap to glue on red and orange feather boas in a spiral pattern for most of his hair. I then used ostrich and other boa clippings on the front/top of hair to have some crazy pieces popping out in red, orange and pink. For the eyebrows I used a black feather boa with ostrich and other feathers mixed and glued them to the top brow of the hat and then inserted and glued some wild pieces to the top to make the eyebrows stick out more and randomly.
For his nose and mustache, I glued 2 pieces of thin elastic band that I had colored red with a sharpie to a red clown nose and glued feathers to the elastic band and then the band to either side of the inside of the hat. For his beard I spiral wrapped a red and orange feather boa piece to one side of the inside of his hat and then the other side attached to the hat via Velcro so my son could take off the beard if he wanted. On the mustache and beard are more glued in random ostrich feathers and larger boa pieces for a chaotic look like Animal has.
His teeth are just a set of plastic vampire teeth but I cut them in half and had him put the top on his bottom teeth to look more like Animal’s crazy teeth. I used strips of foam that I had left over from the Beeker head to make the bracelets. I then glued black fabric on them for color. The little spikes on the bracelets are tiny scraps of rags that have tin foil crimped around them and then glued on to the outside ring of the bracelets to look like the kind of spikes that would be on a dog collar.
His collar around his neck is an old dog collar we had for one of our dogs many many years ago. I attached a large plastic chain to the dog collar with a carabiner ring. For Animal’s clothes I went to the Goodwill store and bought a pair of brown sweatpants and then cut the bottoms off in a zig zag pattern. His top is a set of layered shirts that were cut in the same zig zag pattern as the pants. He had a pair of drum sticks from our Guitar Hero game so he used those to complete his look. He wore a pair of grey Chuck Taylor’s for shoes and red knit gloves on his hands.
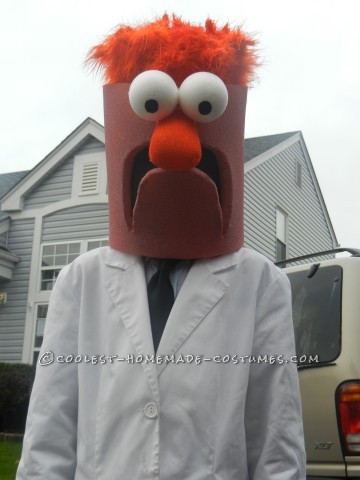
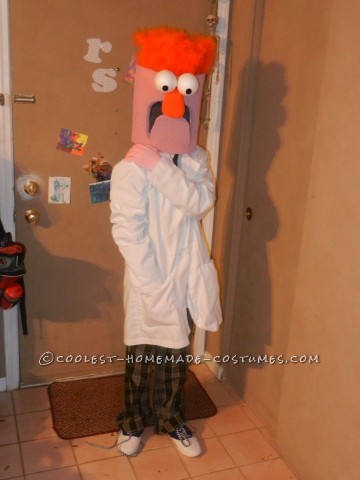
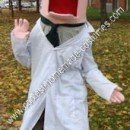
Beeker was my 11 yr old son. For his head I used 2 pieces of one inch thick foam squares that I sized and glued together. The top of the foam came to about 4 inches above his actual head. I spray painted the head pink on the outside. I cut open the mouth area and spray painted the inside of that as well. Inside his mouth I glued to the inside back of the head a few layers of sheer black material so he could see through it, but you would not be able to see him through the mouth.
His eyes came to just the very top of the mouth. I spray painted the top layer (before attaching to the head) pink so it would be less dark. On the top of the mouth I glued a piece of pink fabric in the shape of a tongue. On the pink side of the sheer fabric, I glued a piece of black fabric with a small piece of the pink fabric (made red with a Sharpie) to look like his throat and Uvula (the thing in the back of your throat that hangs down). His nose was made from extra foam from the head and then glued in that shape then spray painted orange and then glued in place under the eyes.
His eyes were made with Styrofoam balls that I glued little black fabric circles on for the pupils. Those were then glued to the nose and then that was glued on to the top of the head. To keep the mouth open, I glued the top of the mouth tho the bottom of the nose, that also helped to make sure my son always had a clear vision path. For the hair I used a piece of pink fabric and glued that to the top so I would have something to glue the hair on to. I then used a pink spray painted rag that was crumpled up into a ball so I could get height on the hair without using so much boa. I bought out all the local stores of their orange feather boa supplies!
The fabric crumple was glued into the center of the pink fabric going across the top of the head. I cut the orange boas and glued the bottoms of the pieces onto the head rim as well as all across and around the cover of the head. To make the boas stand up I put little dabs of the glue on the edges of the feathers to connect them all together ans provide support for each other. I did that in the outer layer as well so they would be able to stand up strongly. For his shoes I bought a pair of white canvas “Keds” style shoes and glues blue fabric over the sides and back to make them look like saddle shoes. On his shoes, I put checkerboard shoelaces that I bought….yes are part of the costume was actually un-altered as store bought.
His pants are ladies black and white plaid pants. His shirt is a blue checkerboard shirt and black tie, all from the Goodwill store. His lab coat was from a local doctors office, generously donated by the mother of the person as Abby Cadabby. Thank you for that! I was also not altered in anyway. Beeker’s final touch was a pair of pink knit gloves.
Janice was me. Her hair was made by gluing a few layers of yarn to a mustard yellow knit cap. Her hat and clothes were all from the Goodwill, the boots were mine. The broach on her hat were pieces of 2 heart shaped plastic rings that had the bands sawed off and then were glued onto layered feathers and then all of that was glued on to the hat. Then I glued the hat onto the hair. I wore extra long eyelashes, blue eye shadow and bright red lipstick. I wore 2 plastic rings as well.
My husband was Dr. Teeth. I used the hat I had made a few years prior for the Mad Hatter. I spiral wrapped hot pink and orange boas and then glued them to the rim of the hat. I glued 3 long feathers to Velcro and then glued the Velcro to the side of the hat. His beard and wig are orange feather boas glued to the inside of the hat. I had bought a bag of plastic rings, but they were all too small for him so I sawed off the bands, glued rubber bands to the back of the ring and then they were able to fit him. He wore 6 of the, 3 on each hand!
His clothes were all from the Goodwill. The shirt was a men’s dress shirt, the stripped vest was actually a large size woman’s shirt that I cut the sleeves and glued them underneath and had him keep it un-buttoned for a vest-like look. He has a multicolored feather boa around his neck. On his wrists are white and black ostrich feather boas I cut, spiral wrapped and glued for him to wear at the end of his shirts cuffs. The pants were a large woman’s size brown stripped pants. He wore his own brown suede shoes.
Abby Cadabby was a babysitter turned into family member. Her dress is a bridesmaids dress from the Goodwill store, notice a theme? We shortened the dress by gluing it under itself, which worked well since it was stained pretty good at the bottom on one side. The crinoline had the glued up under itself as well to hide it under the newly shortened dress. I did not glue it all the way around in one big line, I just did glue dabs every few 3-4 inches to provide a little extra fluffiness to the dress. Sheer pieces of purple and blue fabric were cut and glued long-ways from the midsection to the bottom of the dress to look like Abby Cadabby that I glued the far ends together at the bottom to form a point.
We found a fun purple ribbon made of flowers and glued that over the tops of the purple and blue fabric bands and also to the neck line and down the back of the dress. She wore a pink long sleeve shirt under the dress. Her shoes were fuzzy pink slippers, but I don’t think they were worn in the photos, sadly. Her hair was made using a hot pink knit cap with pink and purple yarn glued to it. The big pig tails were made by cutting the desired size and then gluing sections together starting with the inside of the pig tail working outward. I glued the inside higher than the outside layers so that they flop over like Abby Cadabby’s do. Those were then glued on to the hat. They were doing a lot of flipping back due to their weight, so I got around that by gluing yarn pieces from it, tightly to the hat and then we put the strips of yarn over that so it would not be seen.
I used a strip of daisy ribbon around the bottom of the pig tails. For her wand I used an existing wand, but added to it, of course. It was a star with blue and white thin ribbons and had a long clear plastic handle. I was worried it would break, so I took a cardboard tube from a coat hanger and wrapped silver duct tape around it for strength and color. I then put some glue around the clear plastic handle and put into the duct taped cardboard tube. Then I used strips of the sheer purple and blue fabric glued to the base of the star on the wand to make more ribbons on the wand. We used a pink heart ring that had the band sawed off to glue as a center piece on the wand. I also made tiny fabric tufts on the bottom of the star on the wand using the sheer fabrics. I glued and wrapped the stem of the wand in the purple fabric and I frayed it at the bottom for some fringe. She also worn matching pink knit gloves to finish off the look.
Overall I think I spent around 35 hours making this year’s costumes over a 2 week period. Lots and lots of glue sticks were used.

Your comment has been sent successfully.