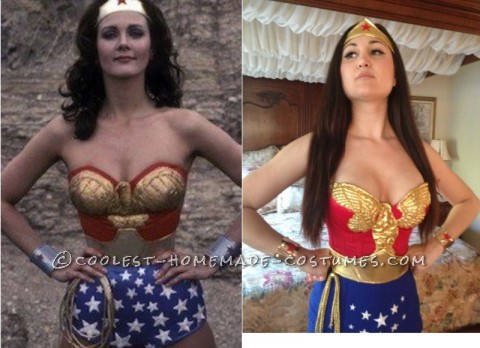
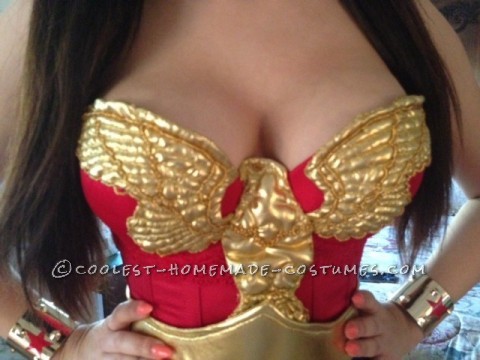
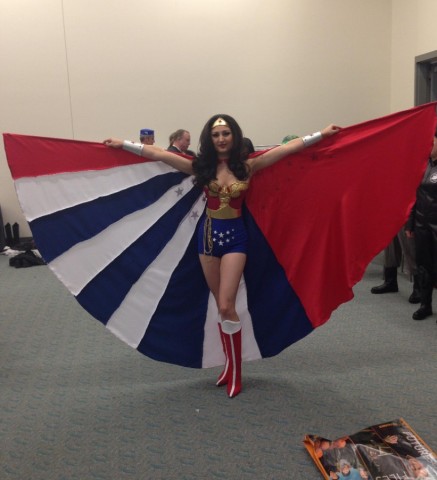
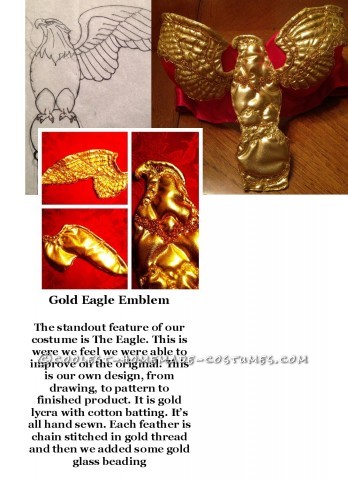
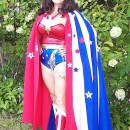
My daughter Victoria is modelling my interpretation of The Wonder Woman Costume. It was inspired by the original Linda Carter costume with the first eagle. I studied many photos of eagles to come up with my drawing I then separated it into three parts to make the pattern. I used gold lame added some cotton for dimension and used gold thread to chain stitch details of feathers, and added some beading to make it stand out. I used compressed Styrofoam for belt and headband. I made boot covers.
Ended up winning at the comic-con costume contest!


You should make them to sell them too! i would buy it :) I cant sew at all :/
You should make them to sell them too! i would buy it :) I cant sew at all :/
Just what i’m looking for i’ll pay you to make me one or tell me how you made this! Let me know if you can help breannaramos17@gmail.com
Just what i’m looking for i’ll pay you to make me one or tell me how you made this! Let me know if you can help breannaramos17@gmail.com
I would love to buy this as well! let me know if you will be making them! cpezzullo26@gmail.com
I would love to buy this as well! let me know if you will be making them! cpezzullo26@gmail.com
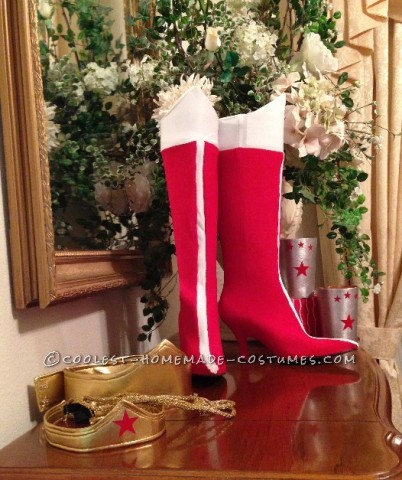
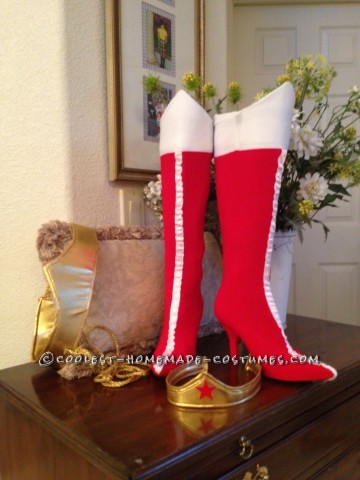
Ladies, it was a lot of work and it was expensive, so no I won’t be makin them to sell. but I can tell how I made each one of the pieces.I’ll start with boots: Take any boots you have lay them onto a large piece of tracing paper and trace around the boot to make your pattern. it’s very easy. It’s best to use streach fabric. easier to cover mistakes it also gives you a very snug fit. cut a 1 1/2 inch wide of white stretch material (my photo has white ribbon, didn’t like the way it wrinkled up) by what ever lenght you need for however high your boots are. it’s better to double the white material because it tends to be see through. Sew the white onto the red material on what will be the front part of boot. make sure you sew it around the toe of boot, the heel will fit snug you sew down to the sole but not all the way so you leave a hole in sole for traction so you don’t slip. Another thing you can do si to buy some rubber pads trace them to fit bottom and use E600 glue to attache to material and sole of boot.After you have material sewn on both side (front and back) you will see that it is a boot cover. You will need to buy some study compressed styrofoam to make the tops of boots, you staple this on to boots from inside out so that you don’t scratch yourself. on the inside of the pointy center you staple a piece of hard plastic, you can use the lid of plastic dip containers for this. When you cut the styrofoam board use it to cut the white material to cover it sew the top so that if trapes onto your form. then sew sone side of white to red now your boot cover are done. When you put your boots on you can zip them up and down, and you just pull the cover up, fit it over the styrofoam and tuck the rest of material inside boot. I hope this helps you you can so this to any shoe you want covered, it’s really very easy. have fun sewing, I hope this helps you.
Ladies, it was a lot of work and it was expensive, so no I won’t be makin them to sell. but I can tell how I made each one of the pieces.I’ll start with boots: Take any boots you have lay them onto a large piece of tracing paper and trace around the boot to make your pattern. it’s very easy. It’s best to use streach fabric. easier to cover mistakes it also gives you a very snug fit. cut a 1 1/2 inch wide of white stretch material (my photo has white ribbon, didn’t like the way it wrinkled up) by what ever lenght you need for however high your boots are. it’s better to double the white material because it tends to be see through. Sew the white onto the red material on what will be the front part of boot. make sure you sew it around the toe of boot, the heel will fit snug you sew down to the sole but not all the way so you leave a hole in sole for traction so you don’t slip. Another thing you can do si to buy some rubber pads trace them to fit bottom and use E600 glue to attache to material and sole of boot.After you have material sewn on both side (front and back) you will see that it is a boot cover. You will need to buy some study compressed styrofoam to make the tops of boots, you staple this on to boots from inside out so that you don’t scratch yourself. on the inside of the pointy center you staple a piece of hard plastic, you can use the lid of plastic dip containers for this. When you cut the styrofoam board use it to cut the white material to cover it sew the top so that if trapes onto your form. then sew sone side of white to red now your boot cover are done. When you put your boots on you can zip them up and down, and you just pull the cover up, fit it over the styrofoam and tuck the rest of material inside boot. I hope this helps you you can so this to any shoe you want covered, it’s really very easy. have fun sewing, I hope this helps you.
Amazing costume.Can I buy just the egale? Please email me victoria_lace@ymail.com
Amazing costume.Can I buy just the egale? Please email me victoria_lace@ymail.com
This is amazing! I would consider selling these… people pay $50-100 for flimsy costumes imagine what they would pay for this amazingness.
This is amazing! I would consider selling these… people pay $50-100 for flimsy costumes imagine what they would pay for this amazingness.
is there a way you could send me step by step instructions to make this beautiful costume? is this a one or two piece? and is the top a corset? did you make the entire thing from scratch? how long did it take?
Hi Van,
as you can see in one of my ealier posts. I would be willing to give instruction. However the most difficult part of this costume is the one thing that Makes this costume and that’s the Eagle. I drew the eagle and made a sort of pattern, but that would only give you the outline. The hard part is stitching in all the feathers you can not mark the gold material because it smears. and if you used sharpie it would look very bad. The Eagle is really just in my head it took a lot of work to where my fingers hurt and at times were bleeding. The top is a victorian corset that cost close to $200 It comes with black lacing, I purchased cutom made red laces the eagle was attached to corset. There is also beading on eagle. I’m not happy with the way the shorts turned out so I’m still going to work on them. The Cape I made from scratch I made my own pattern. The cuffs are aluminm tubblers that I cut the bottoms off. and sanded to remove color. So the only thing I didn’t make was the corset, but I did make a few modifications to it. I made and attached a panel in back so that no skin would show. Every costume I make for Victoria is a one of kind, it’s like my artwork, once I’m done I don’t want to repeat, I go on to the next one. I am currently working on a two piece embroidered gown for one of her performances.I’ll post it when it’s done.
Very well done!
Very well done!
How much is the cost size L ?
How much is the cost size L ?
could u make me one
could u make me one
Hey I wanted to know what the blue bottoms for this costume are called and where I could find some. Ty :)
Hey I wanted to know what the blue bottoms for this costume are called and where I could find some. Ty :) clavaladez00@gmail.com