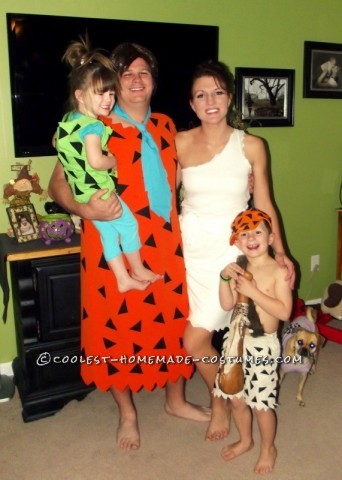
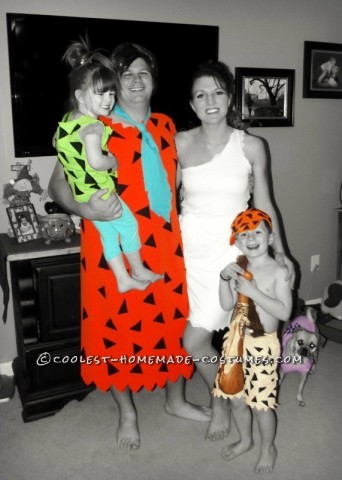
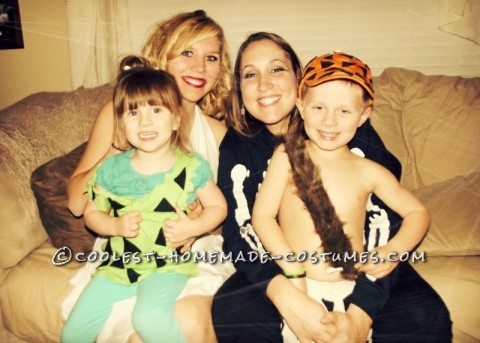
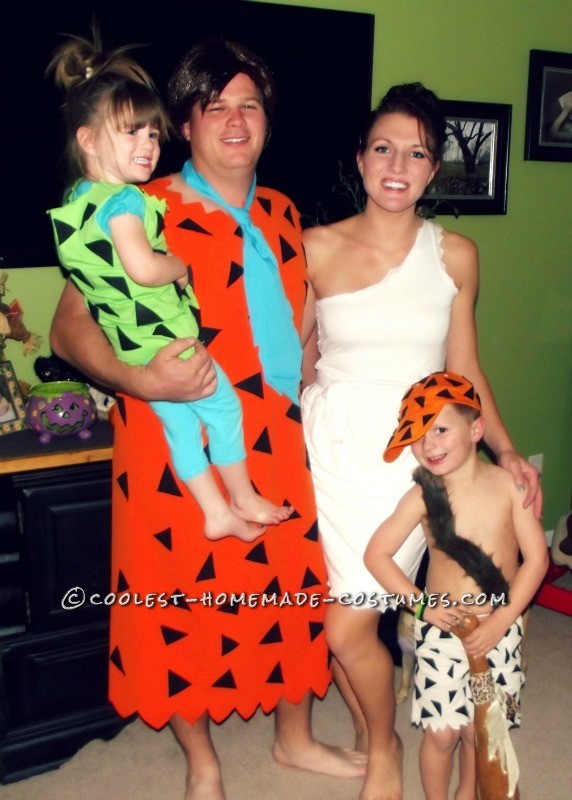
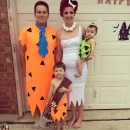
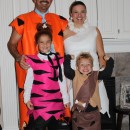
This year, we had a Halloween party at our house and I wanted to make costumes that involved our whole family. I’ve been thinking about the Flintstones for a while now and decided to give it a go. I sure am glad I did! Everyone loved our Flintstone Family Costumes! We posted pictures on Facebook afterwards and received tons of compliments. My only regret is that we didn’t get to go anywhere and show off our costumes some more. Here’s how we did it…
My son and I started looking online at pictures of all the Flintstone characters to get an idea of exactly what we would need to complete all of our looks. I went to Joanne’s Fabric to get all the supplies we didn’t already have on hand, but here’s a list of everything I used…
- E-6000 glue! Yes, I used this on all of the costumes I made and they held up fantastic! (Stronger that most costumes you’d purchase from a Halloween store) I wouldn’t however recommend using this on every day clothes. It just suited my purpose for the costumes I was making since my sewing machine does not want to cooperate. I would have hand sewn, but didn’t really see the purpose since we’d only be wearing the costumes once.
- 1 + yard of stretchy orange fabric (Think of what would be comfortable to wear, t-shirt type material).
- 1 yard of black felt (Really, you could totally get by with much less. We’re talking less than ¼ yard).
- 1 long piece of turquoise blue fabric (for Fred’s tie) I had some at home that I just glued two pieces together to create one long piece.
- 1 short brown hair wig for Fred
- Pillow cases! White pillow cases are what I had on hand for Wilma’s costume. And since my husband’s work throws these out, we have a stock pile that I use for different crafts.
- News paper (you’ll see in a minute what this is for)
- Duct tape
- One pair old shorts (We used khaki shorts for Bam Bam, but would have used orange if we had them).
- Strip of faux fur. I lucked out and found this at Joanne’s next to the boas. It was $1.99, but I got it on sale for 50% off, so it was only $1 and it was the perfect size!
- Orange baseball hat. Of course we couldn’t find a plain orange one, so I bought a solid white one and dyed it orange with Rit Dye.
- Bones (For Bam Bam’s “suspenders?” and Pebble’s hair) Couldn’t find these anywhere at the craft store, but found a small bag of bones at a Halloween store “in the Neanderthal section” where I was directed ;) You could also use small dog bones, but I really didn’t want Dino attacking our kids all night, so I chose plastic ones.
- And of course a club. You can definitely make your own, but we just bought one at the Halloween store as one of our last minute purchases. We splurged on that one for a whopping $9! Probably wouldn’t do that again… But it was very authentic and SOFT, so nobody was hurt if Bam Bam got into character.
- Lime Green t-shirt
- Turquoise leggings (any kind of solid turquoise bottoms would work though).
- Purple fabric (something that stretches and is comfortable).
Fred:
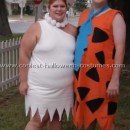
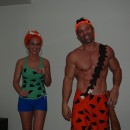
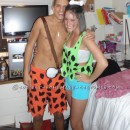
I got a really good deal on fabric. I chose an orange stretchy fabric that was on sale. It was thick enough that my husband wouldn’t need to wear clothes underneath. And a huge bonus was that it was a remnant, so I got an additional 50% off the already reduced price of the fabric. It was a little over one yard, and it was the absolute perfect size! I ended up paying right around $2 for the orange fabric.
I laid out the fabric and folded it in half lengthwise. I cut along the fold. Then I laid a t-shirt on top and traced the arm and neck holes. I made triangle like cuts around the edges. Since the fabric wasn’t much bigger than my husband’s shirt (width), I didn’t have to do anymore cutting on the sides. I placed the fabric so the right sides were together and I glued the “seams” with E-6000 glue (along the sides and on top of the shoulders). Let it dry for about 15-20 minutes and then turn the shirt right side out.
Now, start cutting triangles out of your black felt… I just did it free handed and made different sized triangles. Place a piece of cardboard in between Fred’s shirt and begin laying out all the triangles and glue them on with E-6000 glue. Once one side is dried, flip and repeat.
For Fred’s tie, all I did was use a piece of turquoise cotton material that I had at home. It wasn’t long enough for a tie, so I just glued two long strips together. Then I cut out jagged edges around the tie shape just like Fred Flintstone’s and we were finished with his costume. We just slapped a wig on him for the party and he was good to go.
Wilma:
Honestly, there was really no rhyme or reason to my costume… I just kind of threw it together after getting very aggravated by it, but here are the steps I took to achieve my look.
My costume was in two pieces, a top and then a skirt… I thought it would have been a great idea so later on I could take off the skirt and just wear leggings, but it probably wasn’t the best idea.
I laid out one of the pillow cases flat on the ground. Since it was stretchy, I wanted to leave on the bottom hem (this made for a long shirt that I could wear with leggings, but I never did, so if I had a redo, I would just cut it off since it was driving me crazy all night riding up on my rear end underneath my skirt). Anyway, I laid down a tank top that fit me well on top of the pillow case and began tracing out the shape. I had to cut away from the sides as well as one of the arms. I made jagged cuts as well. Once I was finished, I flipped the shirt inside out and glued the seams. I repeated the process for another pillow case since these were slightly sheer.
For the skirt, I used 4 pillow cases. For the first one, I kept the seam on and used it as the top hem. I cut a tiny hole in the “hem” and slid a spare piece of material through it with a safety pin and used it like a draw string. I then cut off the bottom of the skirt using jagged cuts at the length I wanted. I then cut and glued three other layers to the skirt until you couldn’t see through my skirt.
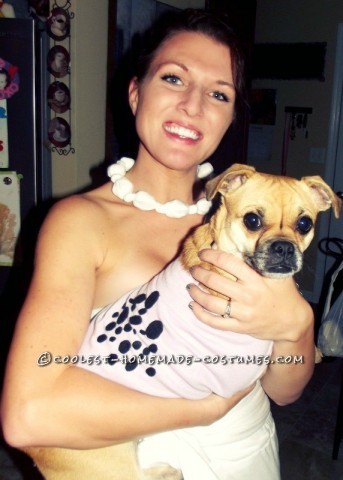
For the necklace, I rolled up tight balls of newspaper and taped them with duct tape to hold their shape… That’s okay if they’re a little bumpy, Wilma’s weren’t perfect either J I mad about 9 balls all together. I took a scrap piece of material from one of the cut up pillow cases and rolled it around each ball. I tied a tight knot to secure each ball in place. Be sure the fabric strip is long enough to have a little extra material to tie the necklace on.
That HAIR!!! Aaaaahhhh! Okay, so I bought orange spray paint for my hair (and to use on Pebbles too) because I thought it would work out better than a wig?! Noooooooo!!! I fixed my hair and had it all ready to go and had my husband help me spray it, since I wasn’t getting anywhere. It was a disaster! It barely colored my hair at all, but did a wonderful job coloring my scalp and all I was left with was beads of orange hair spray dripping off my hair and EVERY fly away showed up wonderfully. So back to the shower I went. Scrubbed my hair and scalp and threw my hair up in a sloppy bun just in time to finish getting ready and for guests to come. Needless to say, I didn’t use the hair spray on Pebbles.
Bam Bam:
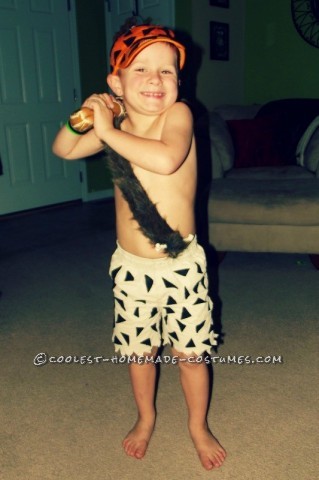
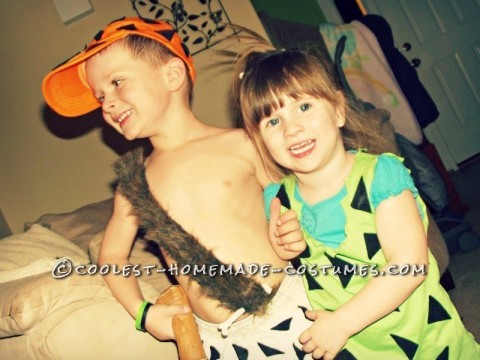
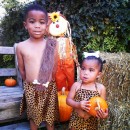
I know Bam Bam technically belongs to the Rubbles, but we decided to borrow him for the evening. Okay, so his was pretty easy and common sense. We took an old pair of khaki shorts and made jagged cuts at the bottom. Glued felt triangles to the front and back. I just pinned on the faux fur strip and attached a bone close to the bottom on the front.
For the hat, I just dyed it following the directions on the Rit Dye package… I think I actually let it sit longer since I wanted a darker orange. Once it was dyed and dried, I glued felt triangles all over the hat as well… I also glued a white pom pom to the top of the hat like Bam Bam has. That’s it!
Pebbles:
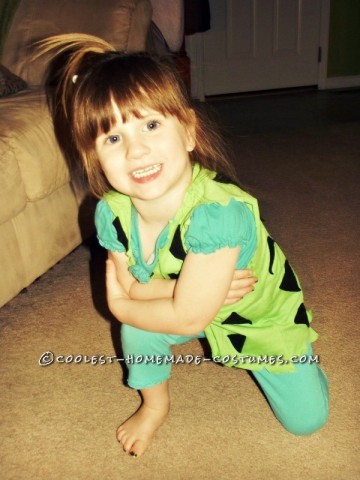
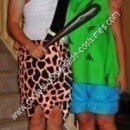
Another very simple costume. If you already have a solid lime green tank top/t-shirt, just use that. I however didn’t, so I just picked one up at Joanne’s for around $2.50. Cut the sleeves out and the neck using jagged cuts (the bottom hem as well). I had to take the shirt in just a bit since it was huge on her. Then glue black triangles to the front and back. Have her wear a pair of turquoise bottoms, throw her hair in a bun and put a bone in it and you’re good to go.
Dino:
This costume was very last minute and a little trial and error, but of course I had to include little baby Daisy as well. I pretty much just measured and cut, measured and cut, and glued and measured and cut… You get the picture. I finally came up with a little t-shirt that “Dino” could wear and glued small felt circles and ovals to the back and we were finished.
So that’s it. There’s how I made all the costumes. Please excuse the length, but I wanted to give details, and it was an entire family of costumes, so it was bound to be long. Hope this helps everyone!
Your comment has been sent successfully.