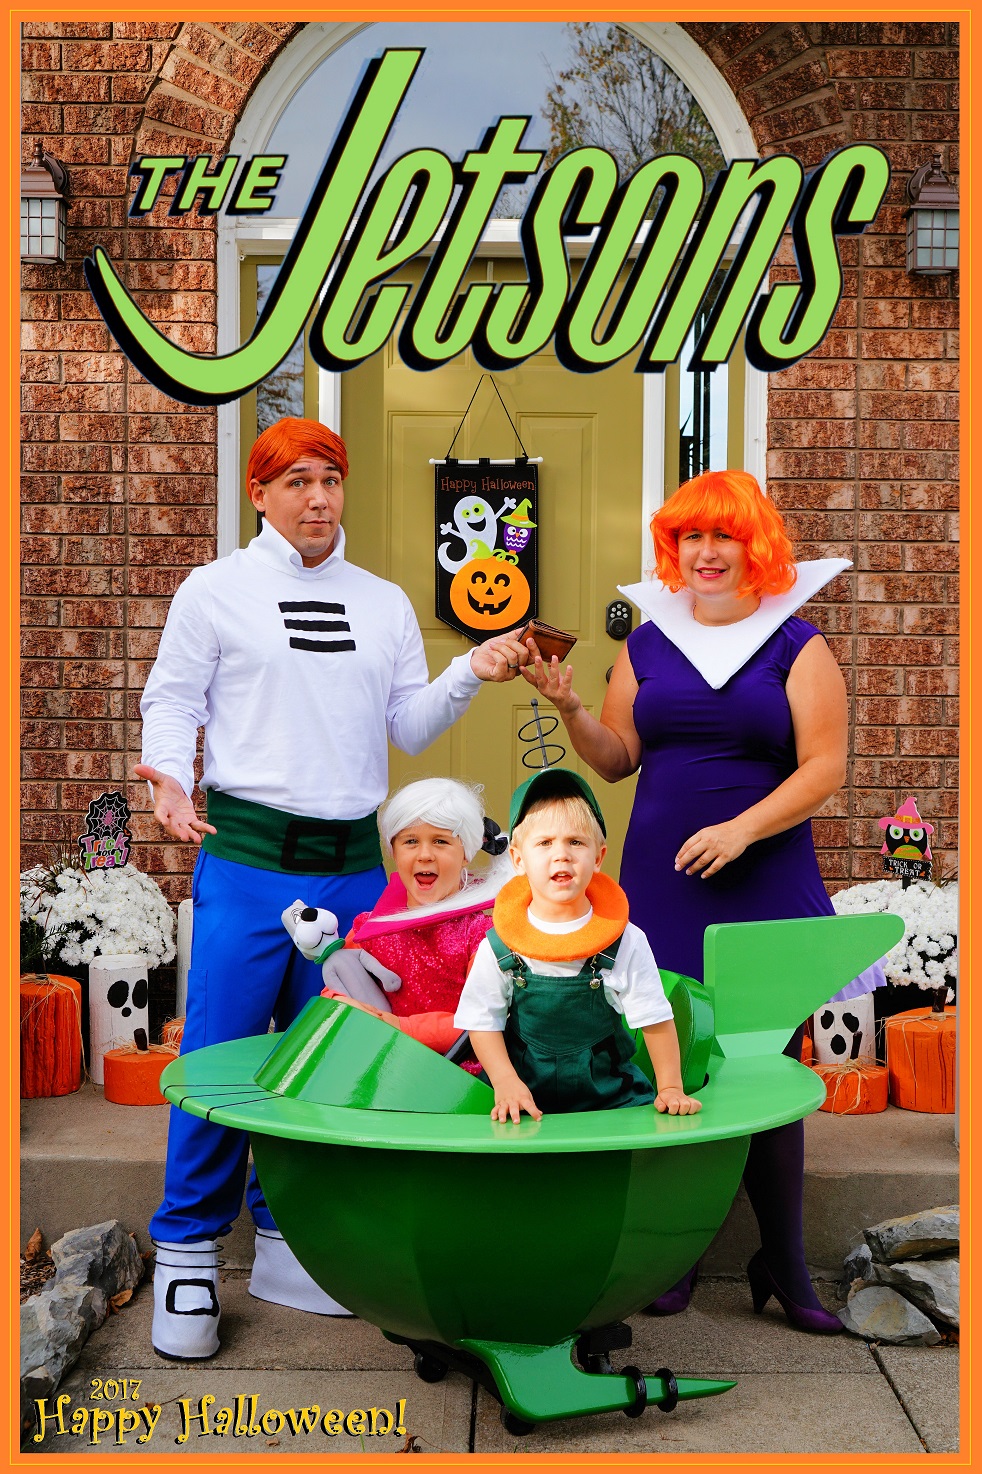
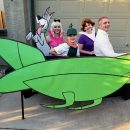
Creating the Jetsons costume for our family was a great adventure! I said our Flintstones family costume last year would be it as we are running out of room (other previous costumes include our ‘Chips & Buds Spud Wagon’ as well as a ‘Pest Control mouse trap’), but I couldn’t resist taking a crack at the natural follow up with The Jetsons!
My wife and I were of course George and Jane, while the kids were Elroy and Judy Jetson. As with my previous costumes, I knew I had to build the family spacecar to top it off. I had considered this off and on since last year, but I simply did not have confidence in being able to create a rounded space car out of wood. I didn’t have a detailed plan going into this one like I usually do – I just rolled with it as I went along…
The Jetsons costume project included a mix of store bought items that were modified and/or made from scratch:
George – a felt collar and black stripes were added to a long sleeve t-shirt. The belt is made from felt and the pants are basic hospital scrubs. The wig was a womens pixie cut style that we had to cut and hairspray into position as best we could. To finish it off, I made white felt covers for my boots complete with wire wrapped around the ankles for the space rings.
Jane – I started with a cheap $5 ebay dress and sewed in a hulahoop and a light purple frill on the bottom edge. The neck triangle is cut from thick cardboard with white felt sewn over top. To finish it off, we added an orange wig, then finally some purple tights and high heels.
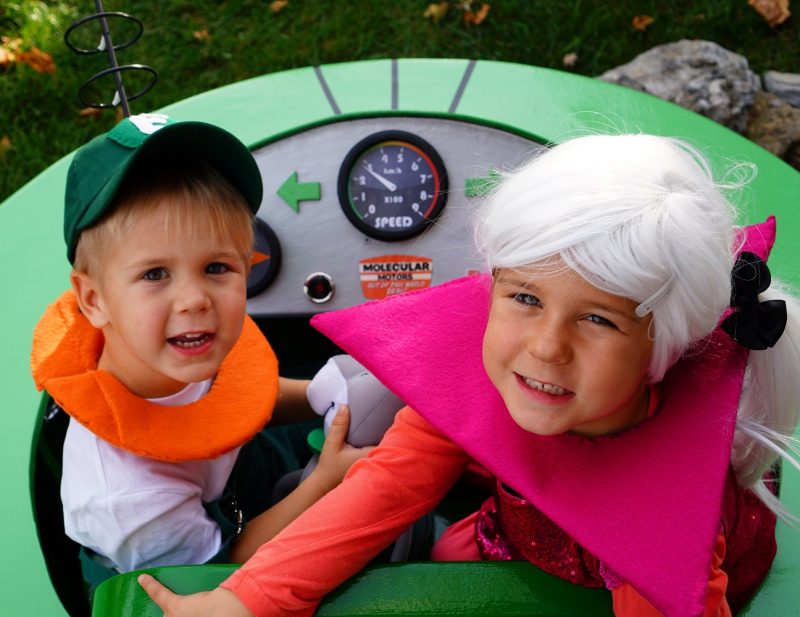
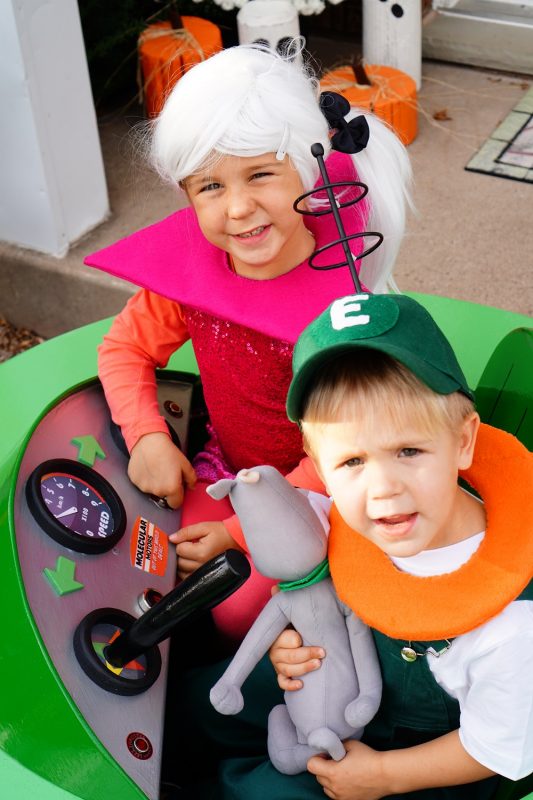
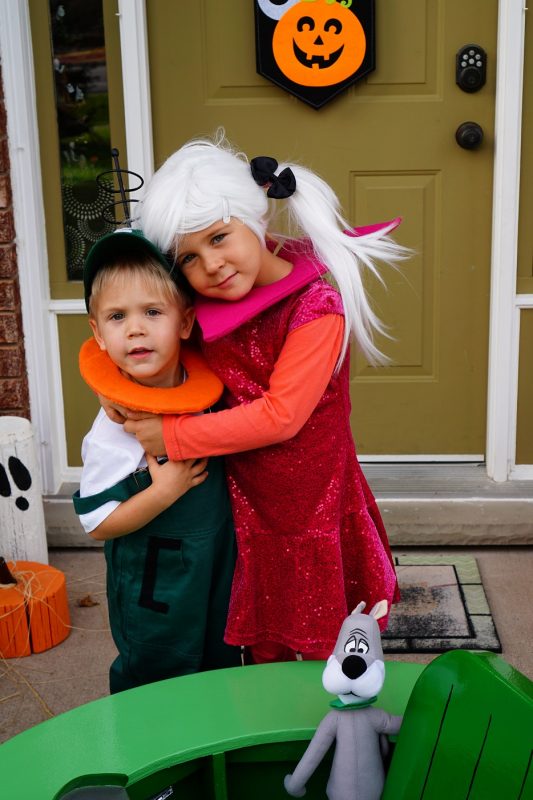
Elroy – I bought some cheap green ovealls off of ebay and just had to remove a tractor patch on the front. I sewed on some black lines to look like Elroys pockets and added an orange collar made of thick cardboard with felt sewn around it. The hat also had a patch on it that I covered with green felt and my wife suggested adding an ‘E’ to it – although it’s not correct, I thought it was a nice touch. The antenna is a wood knitting needle that I drilled tiny holes in to mount the wire that makes up the space rings which are just bent into a circle and pushed into the knitting needle. The knitting needle is siliconed to a chunk of dense foam inside of the hat and it surprisingly stands up very well – I was pretty happy with how that turned out as I figured it would want to flop around.
Judy – this outfit started with a sparkly pink thrift store dress that seemed to fit nicely with the theme. Underneath is a coral coloured shirt and tights. The neck triangle was created the same as Jane’s and white wig finished it off.
Astro –can’t forget the family pet – got this stuffie on ebay for a good price to add to the theme!
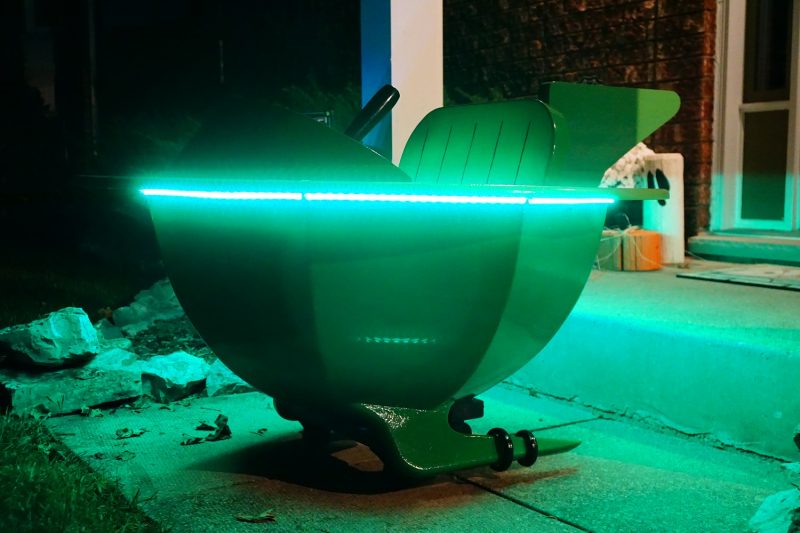
Now, I actually started the Jetsons costume with the tricky part that I was really unsure of being able to build – the family space car! From what I have seen online, nobody has built one before so I was on my own for ideas on how to get this done. It’s hard to design something round on paper, so after thinking of a basic concept for the lower dome shape, I decided to just start building it and see what happened…
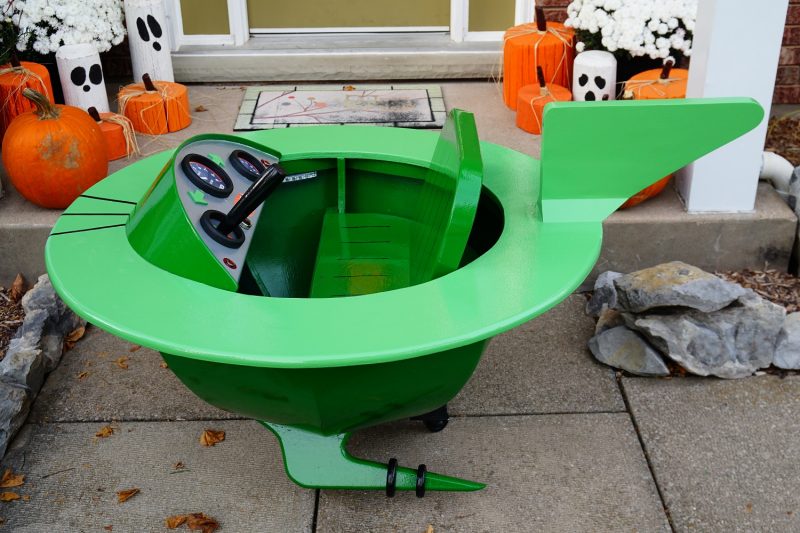
The lower frame and main upper ring are built from ¾” plywood. The ring is 46” outside diameter and 36” inside diameter. Two C-shaped sections of the frame are interlocked and the others four quarter-circle pieces just butt up to them with a 45 degree cut. A hub was screwed to each section from underneath and I later glued in small supports where they all meet at the hub to help lock it all together better.
The inner framework for the seat, wheels and battery tray is built from 2”x2” wood. The wheels consist of two fixed casters mounted to supports under the front bottom of the seat with a single swivel caster mounted to supports under the rear bottom of the seat frame.
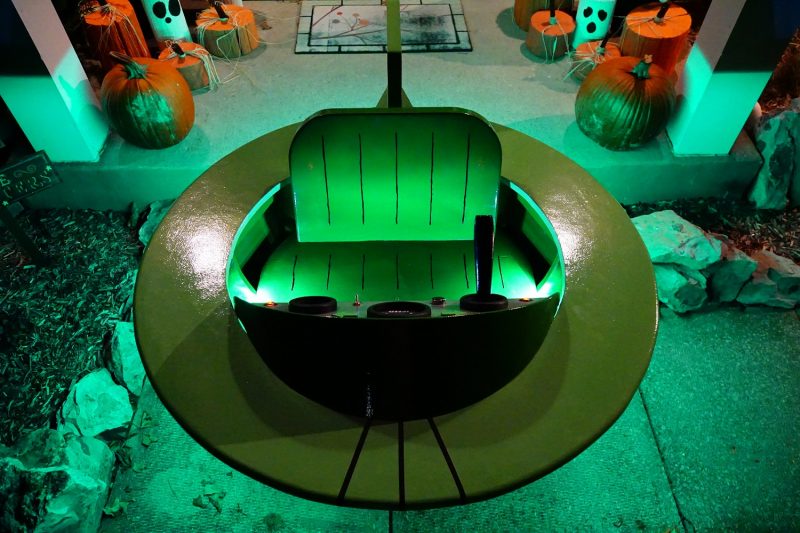
The seat bottom is ½” plywood and the seat back is built with a 2”x2” frame covered in ¼” plywood on each side.
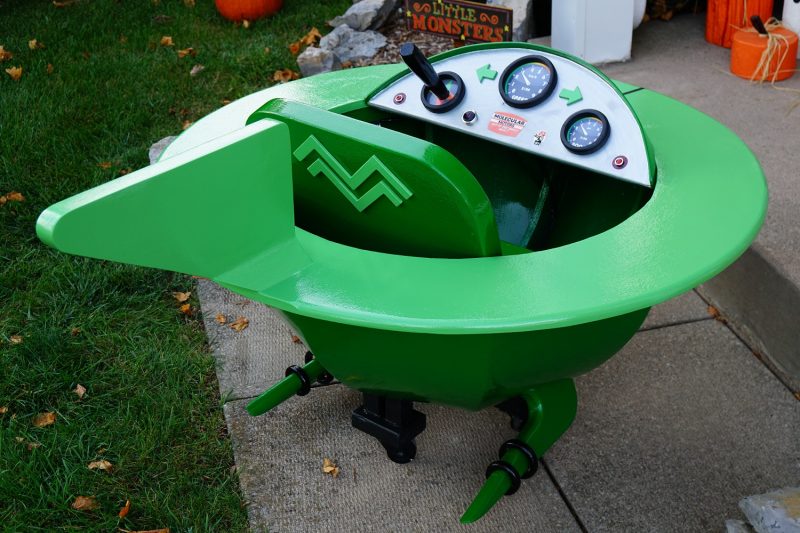
The spoiler is two pieces of ¾” plywood glued together and cut to shape with gussets glued to the side and mounted with four 4” screws from the bottom of the main ring through the gussets then into the spoiler itself. Note that the spoiler also acts as a handle to push the space car around.
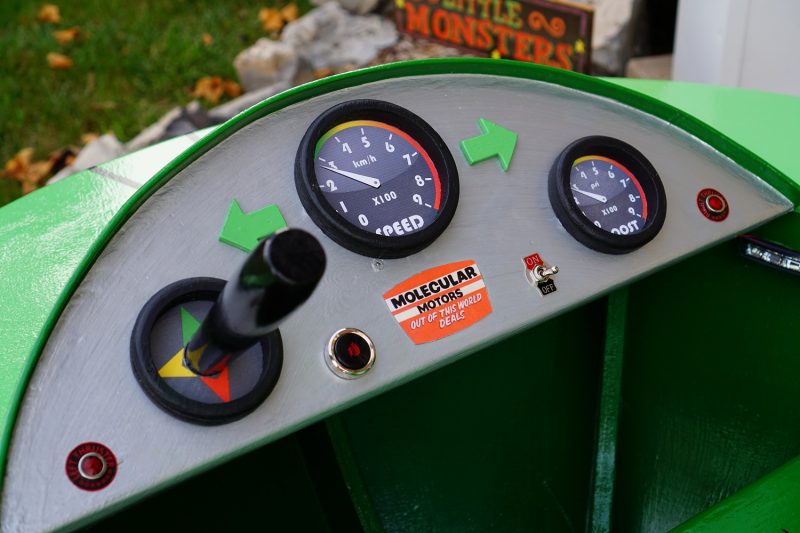
The dash has a ¾” plywood face with ¼” plywood bent around it. It was shaped through trial and error to fit perfectly onto the top ring with a single 2”x2” support underneath. The ¼” plywood was not as flexible as I assumed it would be – more on this below. A movable joystick, gauges (900km/h max speed!) and dealer badge (taken from a sign on the actual show) were added as well as some buttons, a main switch for the lighting and finally two thruster indicator lights.
Once the main frame was built, it came down to building the body panels to close it all in. I made a template out of cardboard but the ¼” plywood couldn’t make the bends without snapping, so I ended up soaking the panels in our kiddie pool for an hour or so, which gave them just enough flexibility to bend into shape. I strapped them into position immediately after taking them out of the water and let dry and them take shape for 24hrs before deciding how to finalize the mounting.
I cut mounting strips out of 2”x2” for the top side of each section and mounted the panels on the top side with three screws each. The bottom sides were temporarily held in with horizontal screws into the bottom hub, but I later added a screw in between each panel to the main frame supports.
Lastly, I nailed each panel into place with several small trim nails, being careful to space them nicely as I assumed they’d be visible in the final product. The seams were filled with silicone initially, then some wood filler and drywall compound. I would have preferred to use bondo body filler, but didn’t have time due to a late start on this project.
The side thrusters are two pieces of ¾” plywood glued together, shaped and routered to give more of a rounded look to them. Space rings were cut with a large hole saw and also routered.
The paint is classic John Deere green which was a great match for the darker shade, then I mixed half a can with white paint to create the lighter minty green shade used on the ring and spoiler.
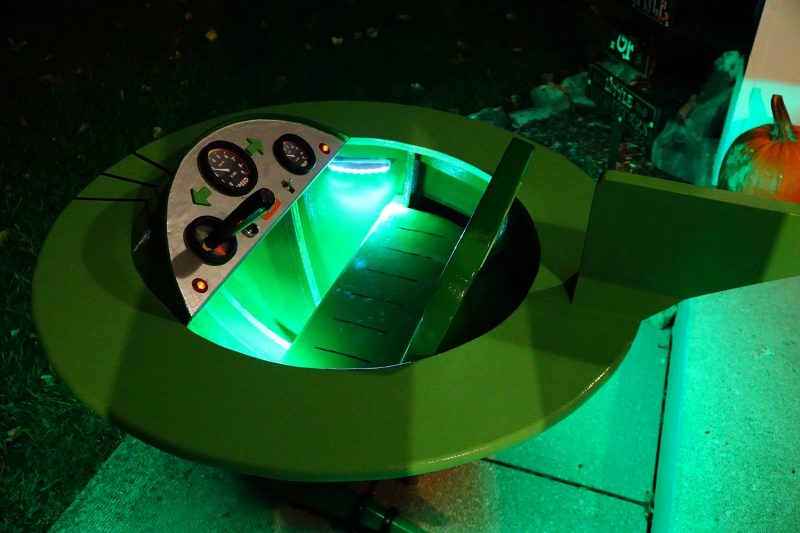
I bought a 3 meter long green 12V LED light strip from ebay which I wrapped around the lower portion of the top ring and mounted with cable clamps. I later added interior lights (LED running lights intended for a car) and two thruster indicator lights on the dash. All lighting is controlled by the kids by an ON/OFF switch on the dash. The battery is a 12V battery borrowed from their power wheels ride on toy.
A couple other details including adding pinstripes to the seats to look more like a cushion and the double-M logo on the back of the seat, which is a made-up company badge for ‘Molecular Motors’ – the dealership on one episode of the original Jetsons cartoon series.
Lastly, I downloaded the Jetsons theme song, which will be playing on an mp3 player and portable speaker located behind the seat.
The biggest cost for this Jetsons costume project comes from the purchase of the ¾” & ¼” plywood ($90); however there is probably another $100 or so in the purchased clothing/felt/lighting. The car took about five weeks to build with limited time and some hassles with the paint (had to sand and start over at one point!) while the costumes only took a few days once my dear wife collected all the materials. One of the main reasons I was hesitant to build the space car is that I couldn’t think of a way to make a clear dome top, but I decided to go ahead anyways and now that it’s done I don’t think it would have been practical anyways. All in all, the Jetsons costume was a fun project and I am once again quite happy with how it all turned out, especially with the space car seemingly being the first of its kind!
Your comment has been sent successfully.