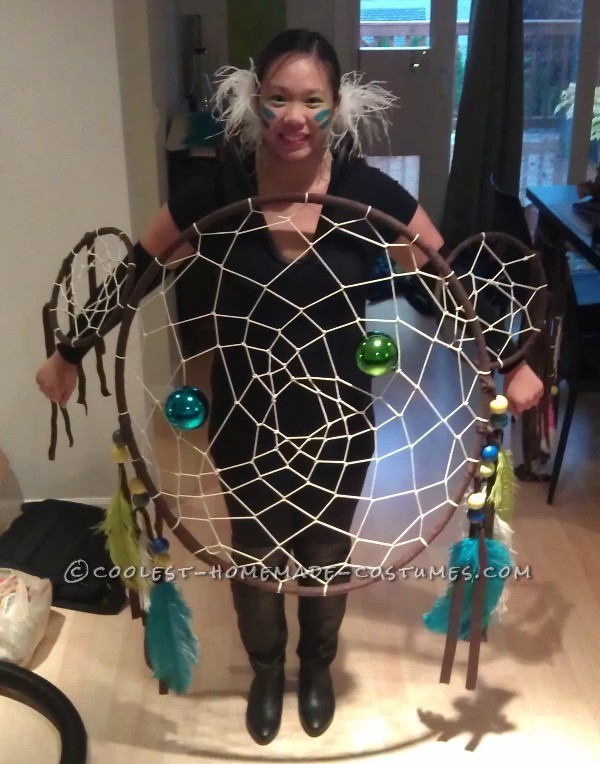
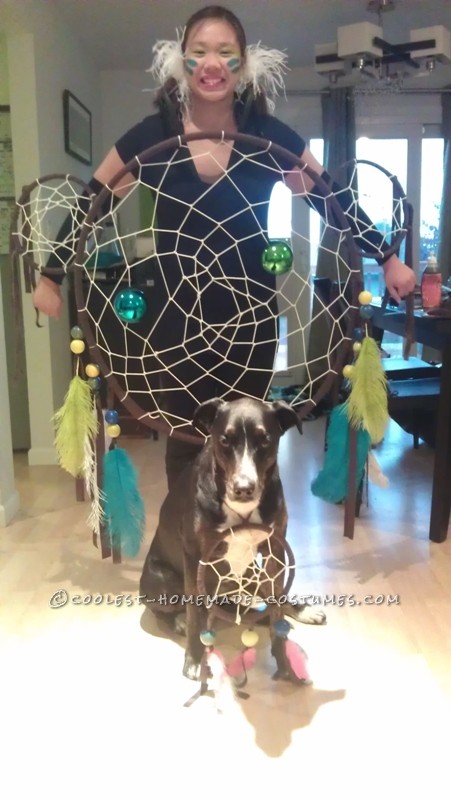
I was tired of store bought trashy girl costumes. I wanted something that was unique, magical, and slightly obnoxious in a crowd. This site inspired me to create everything from scratch in the true homemade spirit. This is how I made my own original and creative homemade Halloween costume: Dreamcatcher
Materials:
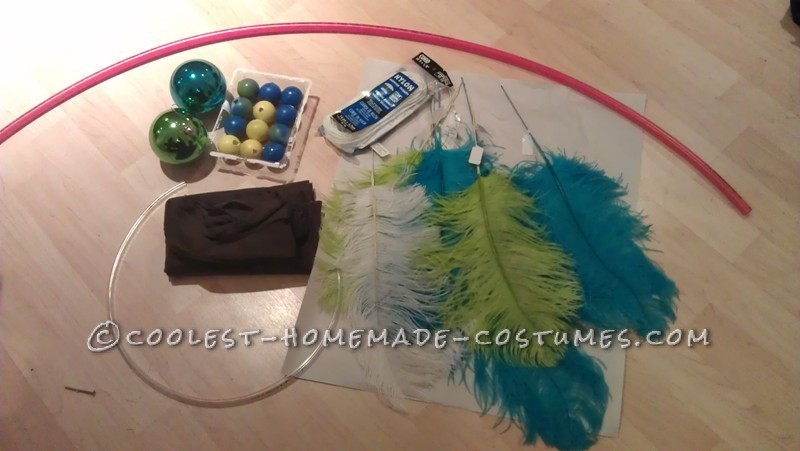
Small diameter irrigation tubing so that I could make a custom perfect diameter on the main circle on my body. You can use a hula hoop if it is to scale for you.
Plastic rods for the arm dream catchers
Nylon cording (3×50\’)
Faux Suede fabric cut into long strips
Plastic Christmas ornaments
Ping pong balls
Krylon Fusion plastic spray paint
Eye shadow to get bright face markings
Obnoxiously bright nail polish
Bike hanger which is used as a shoulder mount for the main hoop
Feathers
Black socks with the foot cut off to mount the small dream catchers on your arms
Safety pins
Black outfit
Making Hoops:
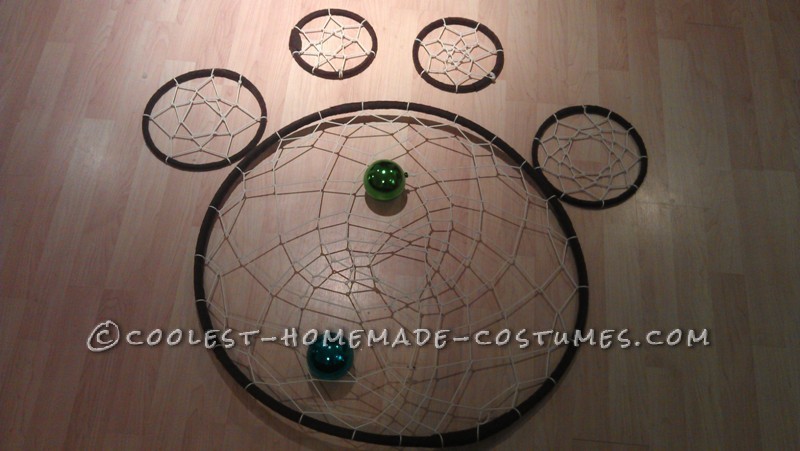
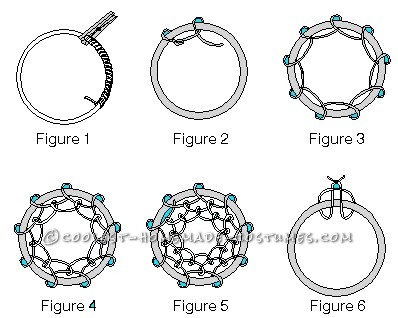
To create the hoops I took the primary plastic tubing, warmed it in the sun, and then attached the two ends using a slightly larger diameter 4″ piece of tubing. A few drops of gorilla glue were placed on each end prior to insertion to lock it in place. I then cut strips of the faux suede fabric 1″ wide. Quick set fabric glue was used to tack it in place and then it was wrapped tightly around the entire diameter of the tubing as shown in the photo. This was allowed to dry a full day to ensure it wouldn’t shift during weaving.
FUSING ROPE: This is important. When you make your initial knot, use a lighter to carefully melt it slightly so that it cannot come undone. If your initial knot comes unraveled you’re screwed. You’ll also need to do this when you run out of rope midway through weaving. The main hoop took about 75 – 100′ of rope I believe. It is better to fuse multiple shorter rolls than try to pass 100′ of rope though the weaving. If you fuse in the open field of the weaving, you can add a small bead to cover the melted knot.
The weaving is a single wrap technique shown in the photo which is simply repeated. Do not pull too much tension on the net or you will deform the hoop. It works well to leave the nylon cord wrapped in a hotdog sized mass so that you can pass it through the net easily. I recommend you do not make the net too dense to begin with, because it will get smaller as you work inside and can eventually make it impossible to pass the rope through each hole.
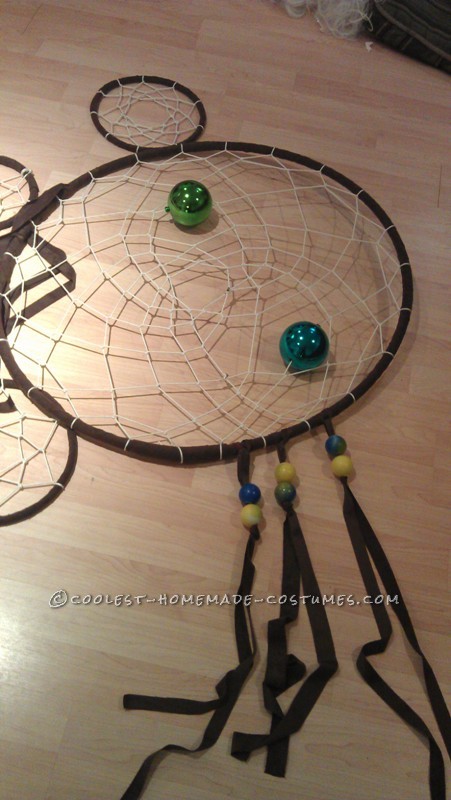
Think ahead about beading placement. I used jumbo plastic Christmas ornaments. A hole was drilled through it and wire was used to pull the nylon chord though. Keep in mind it will block the uniformity of the weave so you may have to adapt and accept irregularity. Having an extra set of hands can help pin each not in as you get toward the center.
When you get to the end and are content with the inner diameter of the hole in the middle, take the rope and bring it tightly back to the outside rim, tie it off, and again melt it slightly to lock it in place.
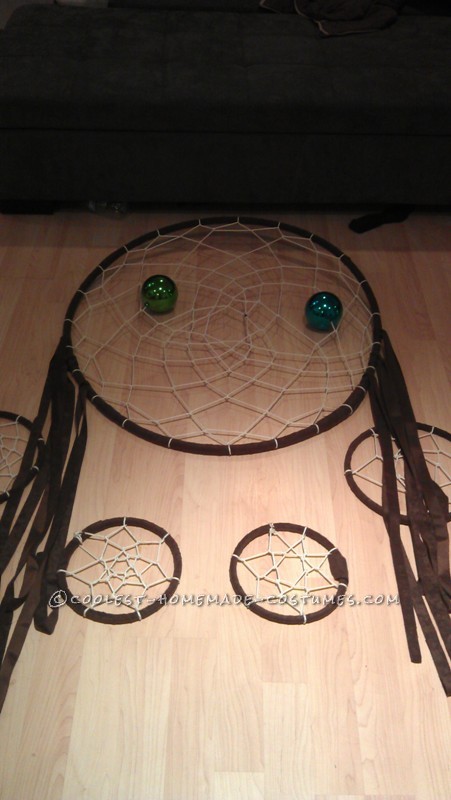
Repeat the same process for the smaller hoops. I mounted small hoops on my arms and it makes it a LOT better looking with one in the center or hanging.
Fringe and feathers:
Once I had the main structure done, it was on to decorations. Have fun with this. I recommend the traditional components of feathers, beads, and leather wrapping.
START BY ATTACHING THE FABRIC TO THE HOOP BY PASSING IT THROUGH ITSELF. Make a U shape, lay the rim of the hoop on top, then pass the two free ends between the U and the hoop and pull tight. Then you’ll have dangling fringe when you’re done.
To make small beads I took ping pong balls and painted them with Krylon plastic paint. I drilled holes through them, threaded them down a coat hanger, hung them from the ceiling and sprayed them to get all sides.
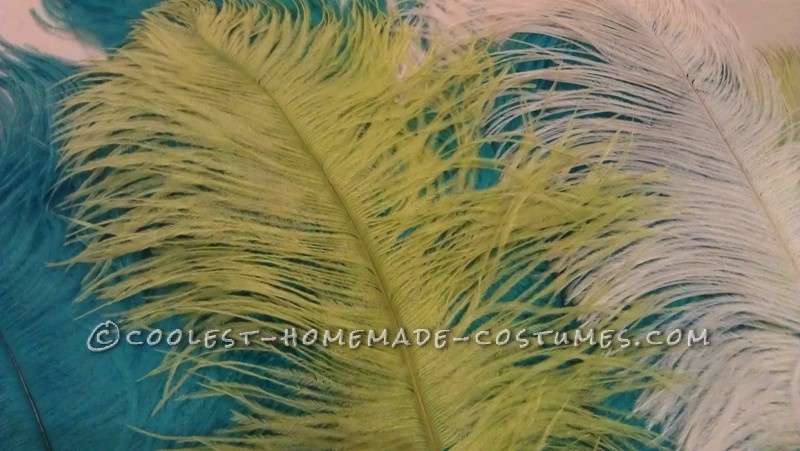
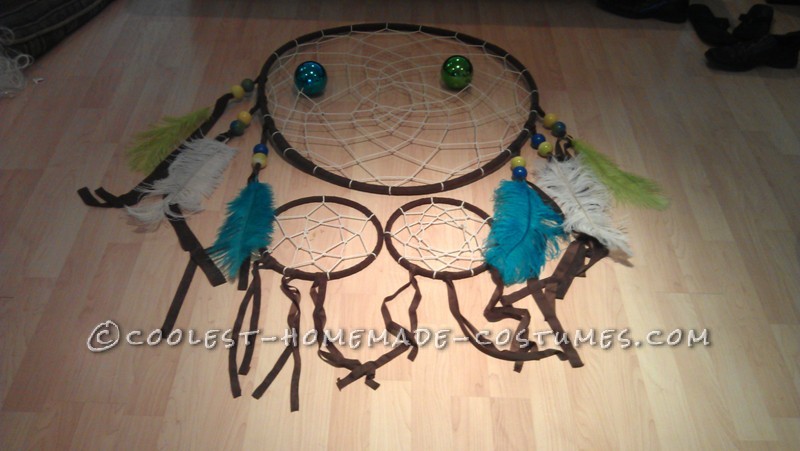
The feathers were from a craft store and I found ones that were large enough to be the appropriate scale. Having a long wire in them made mounting easier. I threaded the completed ping pong balls down the feather shaft, tacked in place with hot glue, wrapped with fake suede fabric, and tied it to the rim of the main hoop.
You can take extra faux suede and make fringe.
Mounting and Accessories:
I took a wall hanger for a bike ($3), bent it slightly, painted it black and then put it upside down over my shoulders. The portion that would typically mount to the wall was then screwed into the hoop perimeter.
ACCESSORIZE!!! You can find feather wrist bands, put feathers in your hair, wear a feather mask. I used eye shadow to make face paint markings. I recommend wearing a black outfit under the hoop to make the white weaving POP. I also made a tiny hoop so that I could match my adorable dog.
Conclusion:
I won most creative costume in a contest, but you still have time to copy me and take home some glory yourself. HAPPY HALLOWEEN!


Your comment has been sent successfully.