Last year, I had noticed my boy was saying something about wanting to be an alien with one hundred eyeballs for Halloween, but I’d already found him a $2 Cookie Monster costume at a garage sale and I didn’t really think about it. As I’m putting him to bed the night before his preschool Halloween party, he’s crying and telling me he wanted to be an alien with one hundred eyeballs, not Cookie Monster. I ponder about it and at 10:00, I get out fabric, a pajama pattern, and iron-on vinyl and make him a costume for the next four hours. It turned out to be green pajamas with iron-on eye balls all over the front (not 100, I was tired).
This year, I want to make sure I know what he wants. For this year’s Halloween costume, my four-year-old boy had chosen Red Death, the boss dragon from How to Train Your Dragon. As I looked at pictures of the dragon, I decided it was complicated and maybe my boy would change his mind if he saw other dragons. We went to the theater to watch How to Train Your Dragon 2, and yes, he did pick a new dragon.
He picked the Bewilderbeast boss dragon from that movie; even more complicated than the first. Alas, this is why I’ve set aside three weeks to make it. I love that my boy is so passionate about what he likes. Good thing I really wanted to make him a better costume this year.
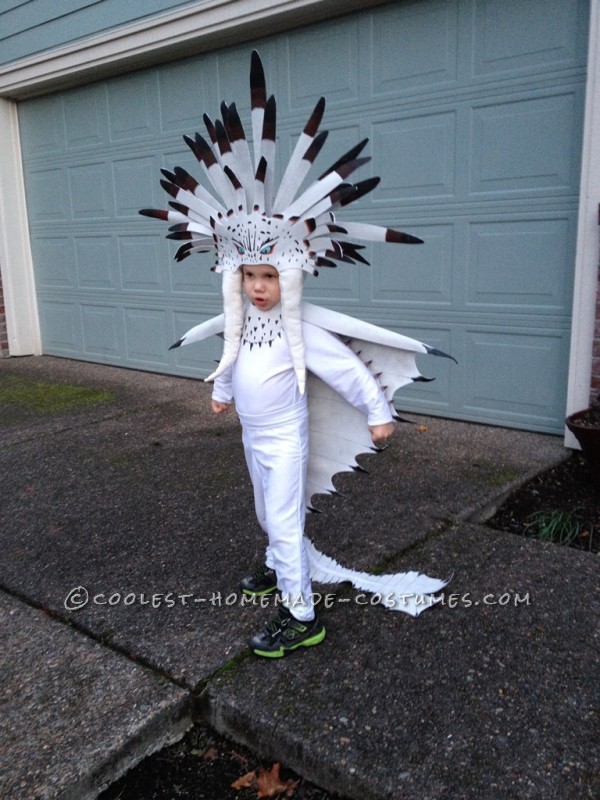
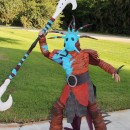
Posing before we Trick or Treat
Planning
I put a lot of thought into how to make the pieces come together. A lot. Even as I was creating some parts, I was trying to plan out how to make the next part work.
I found pictures of multiple angles of the dragon. I decided how detailed to make the costume: spikes along his arms or no spikes? I drew out diagrams of the different pieces I would need to make.
The bodysuit would be made of white fabric. The shirt and pants would be sewn together and there would be a zipper in back.
I knew that I didn’t want to make the spikes out of fabric. I recalled that my mom used foam once in a costume. I searched online for foam for costumes and found out that general craft foam is a great solution. It’s paintable, sewable, bendable, can be heated to hold it’s shape, and it’s lightweight. I found a 60” x 36” roll of craft foam in white.
The headpiece, head spikes, wings/tail, and arm spikes would all be made of foam. The tusks would be made of fabric and batting.
Wings and Tail
I drew out the wings on butcher paper before cutting it out of foam. I cut one piece for the left and one for the right. I added extra length at the top of the wing so I could heat it and curve it over the shoulder. To add spines, I used three dimensional fabric paint in black and painted straight lines to every spine of the wings and tail. When I was finished, the black on white was too high of a contrast, so I decided to paint over the wings with a mix of white and gray acrylic paint. I think the white and gray paint added a lot of art to the costume, so I’m glad the spines required me to paint over them. I detailed the tips of the spines with black paint.
I cut a long, thin triangle out of fabric to use as the tail that connected the wings. I sewed the foam wings onto the fabric, then handstiched the underside together and filled it with batting. On the shoulders of the wings, I added strips of fabric with Velcro and another belt at the waist with Velcro to make it easy to get it on.
Painting the wings took about four days. I had to wait overnight for the fabric paint to dry. I also had to wait for the front of the wing to dry before I could paint the back of the wing. So I did the same process four times over. I thought I was all done when I realized I still had one unpainted side. Oh bother.
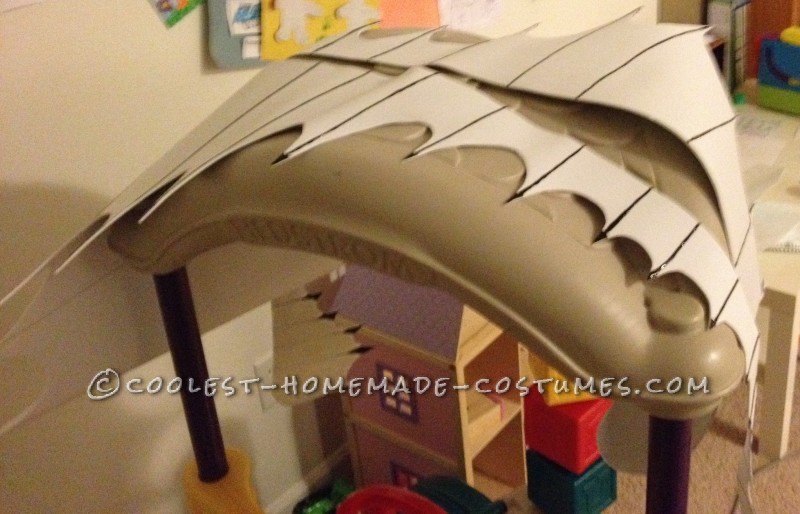
Waiting for the fabric paint to dry
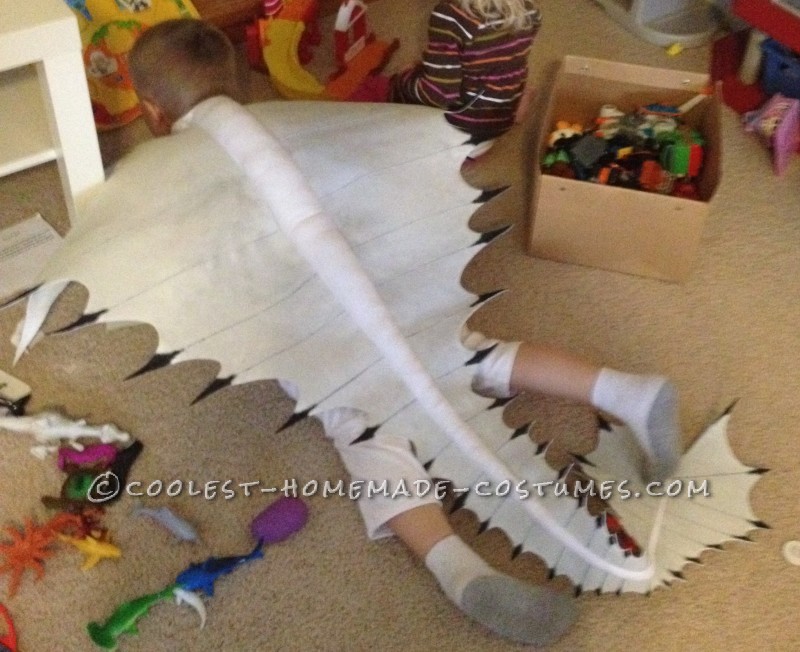
Distracted by toys after crawling on all fours like a dragon
Headpiece
I made the tusks out of off-white fabric. I wanted them to curve forward so I used my brain powers to figure out how to do that without a seam in the front.
I looked carefully at a picture of the dragon as I drew out the shape of the head frill onto butcher paper. It took me a long time to size it just right for my kid’s head. I also had a hard time deciding how I wanted to attach the tusks and therefore how wide the frill needed to be. I drew out three layers of head spikes to go behind the frill. I cut those out of foam. One layer of spikes was cut out of one piece in the shape of a headband. These tallest spikes were too limp when I wanted them to stand upright. At first, I reinforced them by gluing fabric behind them (an idea I saw online). That didn’t help in the least. Then I got bamboo skewers and hot glued them behind each spike. This meant the costume was no longer pretty from the backside. To keep the spikes from caving inward into each other, I glued popsicle sticks across them like a headband. I attached an elastic chin strap to the headband. This worked great if I wanted to wear it. When I was completely finished with the costume and had my boy try it on, I realized that as soon as he looked down, the spikes on the headband would fall forward and try to fall off. To help it not fall forward, I made a hood, connected it with elastic loops to the Popsicle sticks of the headband, then sewed the bottom of the hood to the top of the fabric center of the wings. There was a lot of cramming of foam and fabric and wood under my sewing machine during these steps. At one point, I had sewed the hood directly to the foam of the headband, but had to give up when I reached three layers of foam and also accidentally sewed through a Popsicle stick, breaking a needle. I had no idea I actually went through a popsicle stick once cleanly before the needle broke on the second hole.
I made a chin out of foam. I had to figure out the placement of the frill on my kid’s forehead so I knew how long to make the sides that connect the chin to the frill.
I started painting the brown and black tips of the spikes before I’d painted the wings, so later, I had to go back and add the white and grey paint as the new background color of all the foam. Also, I painted the spikes of different days, so some of them ended up as a darker color of brown than others. Some days, it was burnt sienna with a little black mixed in, and other days it was burnt sienna with a lot of black mixed in. I used acrylic paints and free-handed the face. I paint better than I draw, so I didn’t sketch it out first. I just kept looking at a picture of the dragon as a reference. I painted black spikes all over his face and chin.
I glued the tusks to the back of the frill, then glued some spikes to the frill. I glued more spikes onto the front of the headband of spikes to make it more full. I glued the chin piece to the back of the frill and sewed elastic onto the chin piece so that it would go around the back of my boy’s head. This meant that in order to get the costume on, first he puts the frill over his head to hang around his neck (so the frill and spikes are obstructing his vision). Then I pull the hood over his head which is connected to the headband and wings, get the chinstrap under his chin, shimmy the frill’s elastic from his neck to the back of his head (whilst this elastic is under his hood and crisscrossed under the elastic of the chinstrap), and voila! He can see again.
Many times I had to take apart something I’d glued because I didn’t like the placement of the spikes. Hot glue + foam are very happily married and neither wants to live without the other. Hot glue is especially willing to kill foam rather than separate from it. I had already painted the face onto the frill when I had to divorce the hot glue and foam attached behind it, and was many times in danger of ruining the face. Yay for the glue being effective though.
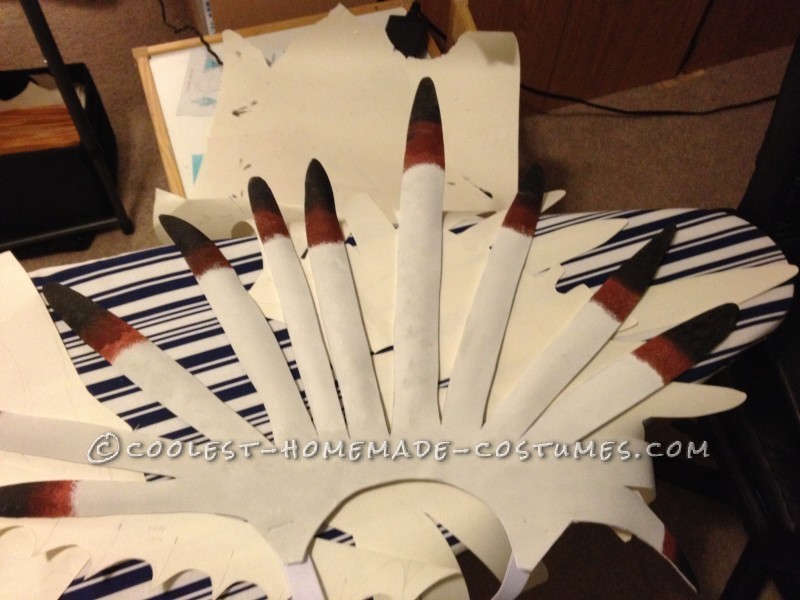
The headband piece in progress
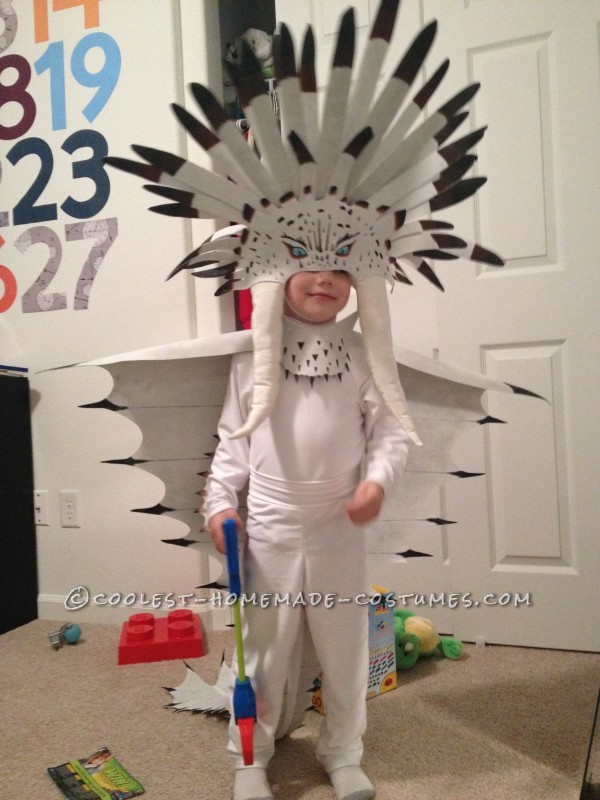
Headpiece falling off after he looked down. I guess I’m not done with the costume after all.
Bodysuit
I used a pajama pattern to make the body suit. I cut out two legs, a shirt front, and two shirt backs, a turtleneck neckline, and sewed them all together and added a zipper in the back. I wanted the sleeves to have spikes coming out of the back. Sleeves usually have a seam on the underside. I wanted my seam on the backside so I could sew the foam spikes into the seam. This took some tricky maneuvering. I cut a couple inches off of the front side of the sleeve pattern and tried taping it to the backside. It worked out fine but it “seamed” like something was wrong the whole time – like I wasn’t thinking it through enough.
The spikes were cut from one piece of foam per arm, I added fabric paint, waited and waited, painted it gray and white, painted the tips black with some brown detailing (like the picture of the dragon). This time it was plain burnt sienna with no added black. I had to wipe off most of the paint so the brush was practically dry and bounce the brush as I painted to make a light dusting of brown instead of a thick line. My favorite paint brush for this is a run-down, hard bristled, abused paint brush. I feel like it has the perfect rough style for my dry-brushing and texturing needs.
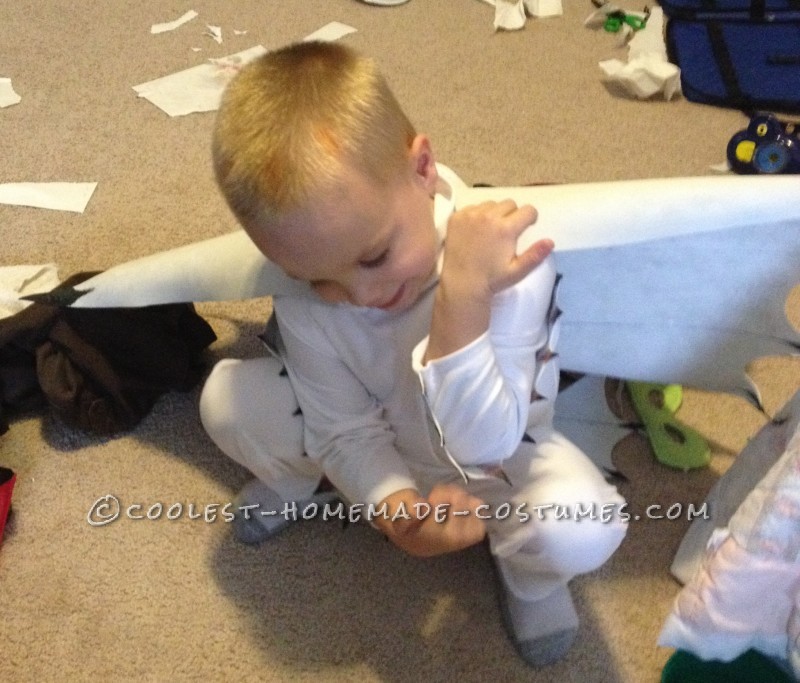
Admiring his arm spikes
My Boy’s Reactions
As I’m having my boy try on his costume for multiple fittings as I make adjustments, mostly to the headpieces, he says “when can I take it off?” repeatedly. After working for two weeks in every moment of spare time, I don’t appreciate this question. Also, when I show his cousin a picture of Red Death, the dragon that he originally wanted to be, my boy throws himself on the floor and starts crying that he wants to be that dragon. I immediately put myself on a timeout – no way am I able to handle talking nicely in that situation, so I won’t even try.
My boy gets to wear his costume to preschool the day before Halloween. The moms and teacher were asking question after question about how I made it and were all compliments. My boy didn’t have much to say about it except “I’m a wilderbeast, raaaaaawr.”
We went to a Halloween party that night. I got some compliments on his costume, but most people who talked to me were distracted by my Lucille Ball costume and didn’t notice the kid three feet below me when my hair was so orange, it almost glowed.
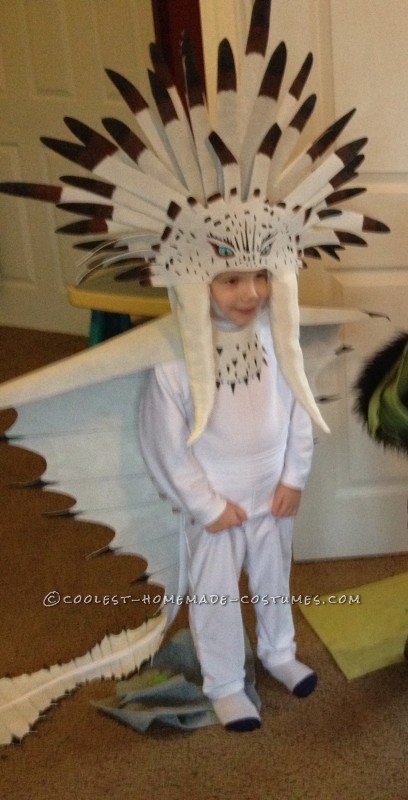
Slightly shy during the praise and attention at preschool
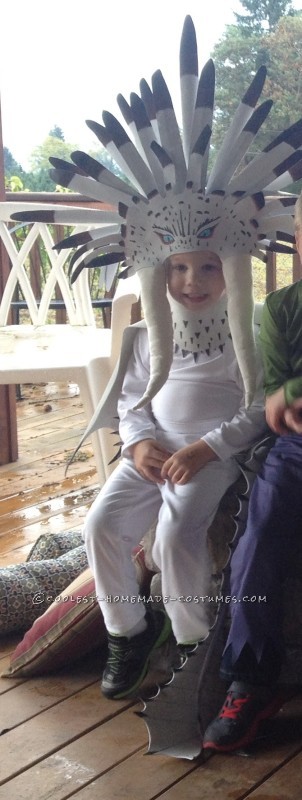
Posing for pictures at preschool
Trick-or-Treating
This was definitely the best part. I let my boy take off the uncomfortable headpiece of his costume after the first four houses. He was still wearing the face frill with some spikes, and the rest of the spikes were hanging on the hood on his back. So most everyone who saw him didn’t get the full effect of the costume. But man, oh man, did he get compliments. It seemed like every house we went to for the next 90 minutes paid his costume special attention. He said to me, “Everybody thinks my costume is amazing! Thanks mom!” It made it all worthwhile, hearing his four-year-old voice say that. Parents in the streets complemented me on the costume. “I heard a lot of you made that!” And though those things are great to hear and I don’t get tired of it, I don’t want to get a big head or have the praise be the reason for doing it. The joy my boy had as he realized how cool his costume was is all I ever wanted. It was one of our favorite experiences so far. That night, he slept in his bodysuit, not wanting to take it off.
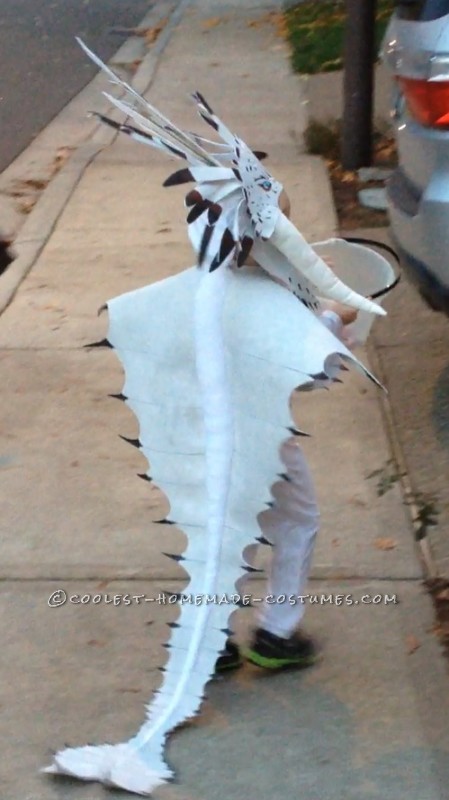
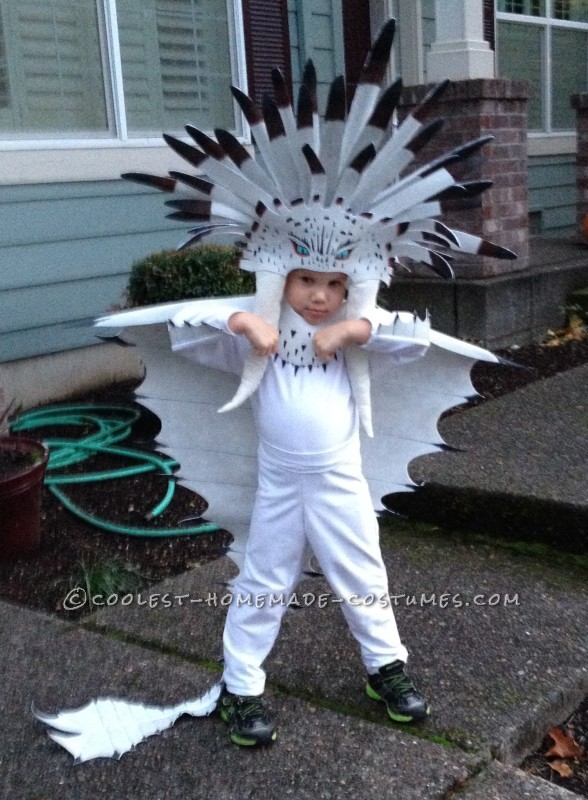
About to Trick or Treat

So cool!!! Incredible work!
So cool, Sarah!!! I love it and he’s so cute in his costume :) I love it
So cool, Sarah!!! I love it and he’s so cute in his costume :) I love it