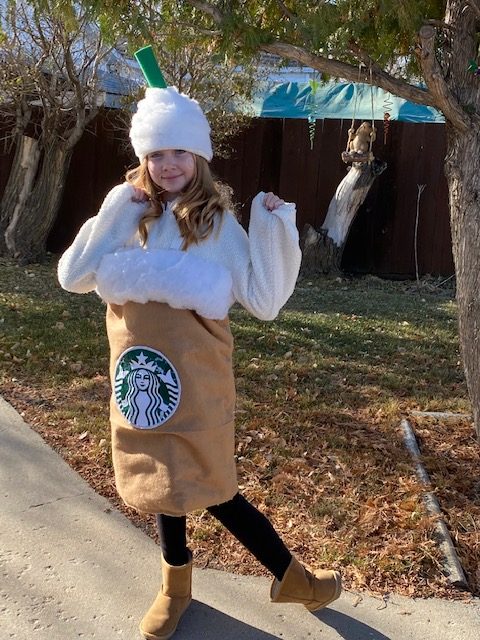
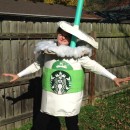
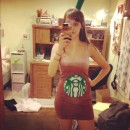
My daughter decided she wanted a Frappuccino Starbucks costume for Halloween, but had one stipulation – she wanted her arms to be free and nothing around her neck. Immediately I had a picture in my head of what I wanted it to look like, but no idea how to get there. I found several tutorials on how to make them using poster board – but I wanted something comfortable that she could move in easily, and that would be durable enough to wear more than once. So this is what I came up with:
For the “Cup” I ordered 6 yards of tan craft felt online, and purchased some quilting cotton from the craft store. I measured out the quilting cotton to the approx size I wanted it to be around her torso, and then laid it flat and hot-glued the felt on top (i just clued along to tops, as if I were sewing a seam). I then took an old white sheet that I didn’t need any more, but it to fit, and glued it to the inside (just to cover the cotton batting so it wasn’t exposed, as I thought it would be itchy.) I used a sheet because i didn’t have enough felt – if i had enough felt I just would have used that!
Next, I glued the two ends to make a tube shape that would fit over her head.
The straps of the Frappuccino Starbucks costume gave me a lot of problems. I originally tried to make them with white ribbon but they wouldn’t stay up properly and my daughter said they were uncomfortable. Finally I ordered a pair of cheap white kids suspenders from Amazon, and attached them to the top to make straps that would hold on her shoulders. Problem solved!
For the “Whipped Cream”, I cut strips of the left over cotton batting and glued them to the top of the “cup”, layering them until it was the amount I wanted.
For the Starbucks logo, I found the logo on Google Images and printed it as big as I could. I cut it out and hot-glued it to a piece of green felt. I then painted on 2 layers of mod-podge (allowing to dry in between coatings) to make the paper more stable, which made a plasticy effect. I then glued the logo on to the front of the “cup”.
For the headpiece, I took a piece of green craft felt and rolled it up into a straw shape. Then I glued it to the top of a touque/hat that we already owned. I then cut thin pieces of cotton batting and glued them to the base of the straw in swirly shape. We are in Canada so warmth is important. This could also be done on a headband in a warmer climate.
This Frappuccino Starbucks costume was one of the more challenging costumes I have attempted but in the end it came out perfectly! My daughter was happy, everyone loved it, and she won best DIY Costume at school!
Your comment has been sent successfully.